Download
1 / 21
210 likes | 344 Vues
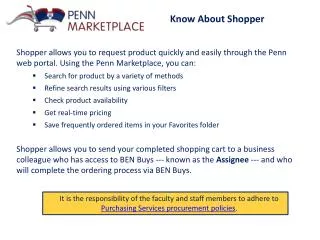
This guide outlines the steps to create and manage assignees, as well as to create, assign, and unassign shopping carts in the Penn Marketplace. You'll learn how to set a default assignee for your cart, search for items to add, and assign carts to specific individuals for completion of the order process. Follow the detailed steps to ensure an efficient shopping experience and maintain organized cart management.

E N D
Shopper Guides • Create and Manage Assignees • Create a Cart • Assign a Cart • Unassign a Cart
Task Definition: Select and save a default person who will be getting your cart and completing the order process – known as the Assignee. Create and Manage Assignees • Steps: • Click on your name along the top and click “View My Profile” “User Information and Settings” and finally “Cart Assignees”. • Search for Assignees by name, email address or username. • Save selected Assignees to your profile. • From the list of results click the button in the column marked ‘Set as Preferred’ • In this task – Add assignees and set the default assignee by: • Assignee first/last name • Email address • PennKey Simulate the action by clicking the gold oval when you see the ‘arrow and oval’ The Assignee must have access to BEN Buys as either a Requisitioner or Purchase Order Manager and previously visited the Penn Marketplace.
Step 1: Click on your name along the top. Create and Manage Assignees
Step 2: View User Information and Settings. Create and Manage Assignees
Step 3: Click Cart Assignees under Default User Settings. Create and Manage Assignees
Step 4: Click Add Assignee.. to search for assignees. Create and Manage Assignees
Step 5: Enter Assignee search criteria and click “Search”. Create and Manage Assignees
Step 6: Click Add Assignee to add more assignees to your profile. Create and Manage Assignees Step 7: Pick a default Assignee for your future carts.
Task Definition: Search for and select items from the Penn Marketplace and add it a cart you will later assign. Create a Shopper Cart • In this task – Find items and add them in your shopping cart, such as: • Office supplies • Lab supplies • Computer supplies • Steps: • 1) Search for item(s) by: • Description • Part # • Supplier • Supplier punch out ordering site • 2) Use filters to narrow your search, for example: • Supplier • Category • Unit of measure (UOM) • 3) Add the item(s) to your cart1 Simulate the action by clicking the gold oval when you see the ‘arrow and oval’ You may repeat the steps in this task as necessary.
Create a Shopper Cart Step1: Search by a variety of methods, for example: product description, part number, supplier name or Penn specific ordering sites.
Create a Shopper Cart Step 2:Filters help narrow your search results. You may use several filters in combination if necessary.
Create a Shopper Cart Enter the quantity for each item selected. Click [Add to Cart] to add the product into your shopping cart.
Task Definition: Name and assign your cart to the person who will complete the order process. Assigning a Cart In this task – Describe the need of the requirement and if applicable how the purchase will be funded and send your cart to an Assignee. • Steps – Select your cart from ‘Carts’ tab • Name the cart • The cart name should help the Assignee know who the cart is from and what it is for • Enter Cart comments • For example: • Why the product(s) is need and for whom • How the purchase will be funded • Unit of measure (UOM) • Select the Assignee • Confirm the cart assignment Simulate the action by clicking the gold oval when you see the ‘arrow and oval’ You may assign your cart to your default Assignee or select a different Assignee as needed. To see this in Shopper...click here
Step 1: Click View My Cart to review cart details. Assigning a Cart NOTE: Clicking Checkout skips Step 2.
Step 2: Click Proceed to Checkout. Assigning a Cart NOTE: Name the cart and click Update makes tracking the cart easier.
Step 3: Review the cart, add additional comments and click Assign Cart. Assigning a Cart
Step 4: Add comments for the Assignee to review and click Assign. Assigning a Cart
Step 5: Review the confirmation screen. Assigning a Cart
Task Definition: Withdraw a cart(s) that has not been picked up yet by an Assignee. Unassign Carts • In this task – Unassign a cart so you can edit the cart contents and/or the cart comments. • The unassigned cart becomes your active cart • Steps: • Navigate to the Shopping Cart icon. • Click on My Carts. • Click on View Draft Carts. • Below the “Carts Assigned to Others” section - Click [Unassign] to remove the cart from the Assignee and make it your active cart. Simulate the action by clicking the gold oval when you see the ‘arrow and oval’ You can reassign the cart back to the original Assignee or select a different Assignee when reassigning the cart after editing. To see this in Shopper...click here
Step 1: Point to the Shopping Cart icon, then My Carts and View Draft Carts. Unassign Carts
Step 2: Below the “Carts Assigned to Others” section - Click [Unassign] to remove the cart from the Assignee. Unassign Carts