Download
1 / 101
1.02k likes | 1.12k Vues
Learn about gastrointestinal transit, contrast media, room preparation, exposure times, and radiation protection in GI radiography. Understand the importance of positioning for esophagus and stomach examinations.

E N D
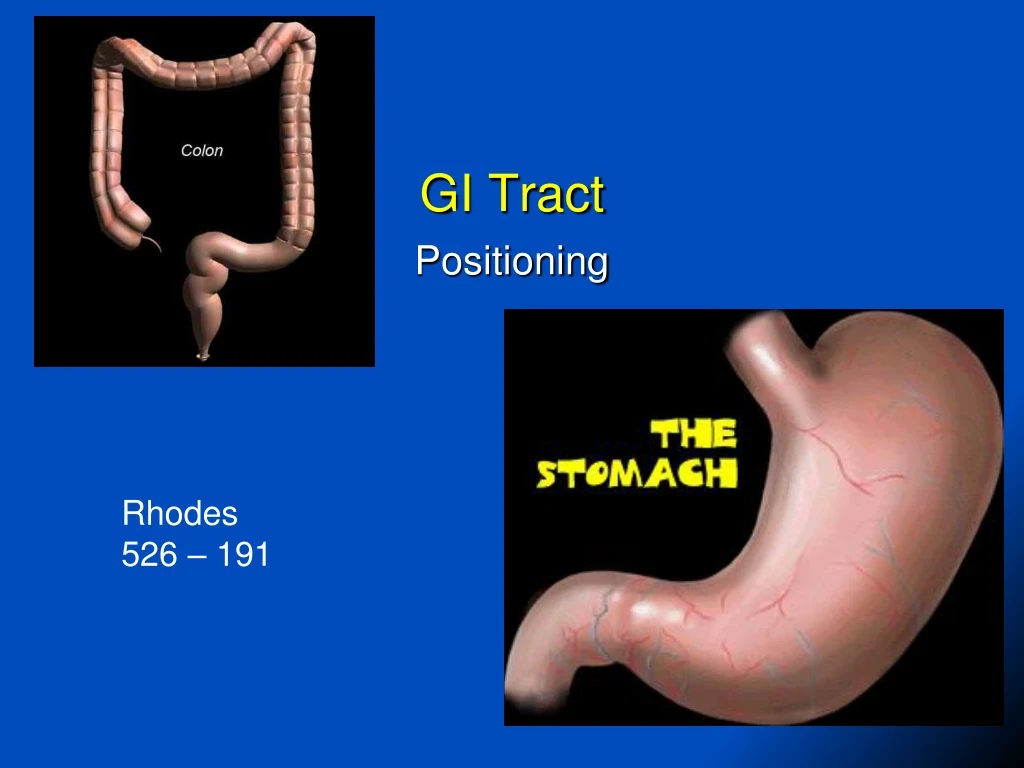
GI Tract Positioning Rhodes 526 – 191
Technical Considerations • Gastrointestinal transit • Examination procedure • Contrast media • Preparation of examination room • Exposure time • Radiation protection
Gastrointestinal Transit • Peristalsis = contraction waves by which the digestive tube propels contents toward the rectum • Three to four waves per minute occur in the filled stomach • Average emptying time for stomach is 2 to 3 hours • Average transit time to ileocecal valve is 2 to 3 hours
Contrast Media • Radiographic demonstration of the alimentary canal requires use of contrast media • Barium sulfate is most common contrast for the alimentary canal • Water-soluble iodinated contrast media may also be used
Contrast Media • Iodinated solutions move through the GI tract quicker than barium sulfate • Clears the stomach in 1 to 2 hours • Iodinated solutions do not adhere as well to esophageal mucosa as barium sulfate • Iodinated solutions provide satisfactory examinations of the stomach, duodenum, and large intestine • Water-soluble media easily removed by aspiration before or during surgery • Also readily absorbed by the body and excreted by kidneys in cases of perforation
Preparation of Examination Room • Room should be completely prepared before patient enters • Adjust equipment controls to correct settings • Have footboard, handles and shoulder supports ready • Check filming devices and number of IRs available • Prepare type and amount of contrast
Preparation of Examination Room • Before beginning examination, the radiographer should • Describe the contrast media and administration (i.e., taste, enema tip insertion) • Inform the patient that the room will be darkened during the procedure • Introduce the patient and fluoroscopist to each other
Exposure Time • Challenge of GI radiography is to eliminate motion • Based upon each region • Peristalsis greatest in stomach and duodenum • Slows in distal part of GI tract • Peristalsis affected by body habitus, pathology, use of narcotic pain medicine, body position, and respiration
Exposure Time: Esophagus • Upright position = 0.1 second or less • Exposure time may be slightly longer for recumbent position • Barium passes slowly if swallowed at end of full inspiration • Barium is delayed in the lower portion if swallowed at the end of full expiration • Deglutition inhibits respiration for several seconds
Exposure Time: Stomach • Normal peristaltic activity – exposure time no longer than 0.2 second • Never longer than 0.5 second • Hypermotility requires 0.1 second or less • Exposures made at the end of expiration in routine procedures
Radiation Protection • Shield pediatric patients and patients of reproductive age • Refer to guidelines on p. 135, Volume 2 • Do not compromise clinical objectives of examination • Other radiation protection measures • Close collimation • Optimum technique factors
Radiographic Procedures Slide 12
Essential Projections: Esophagus • AP or PA • AP or PA oblique (RAO/LPO) • Lateral
AP or PA Esophagus • Preliminary patient preparation is not required • May use single- or double-contrast • Single: barium or water-soluble, iodinated • Double: barium and carbon dioxide crystals • First part of examination is fluoroscopy of swallowing • The following slides are about overhead projections
AP or PA Esophagus • Patient position • Supine or prone without rotation • Head turned to side to facilitate drinking • IR is placed so that top is level with the mouth • CR perpendicular to midpoint of IR • Usually at level of T5-T6
AP or PA Esophagus • Esophagus from lower part of neck to its entrance into the stomach* • Esophagus filled with barium* • Penetration of barium* • Esophagus visible through superimposed thoracic vertebrae • No rotation *Note: These criteria are the same for all projections of this anatomy.
AP/PA Oblique Esophagus • Patient position • Recumbent 35- to 40-degree RAO or LPO position • Align IR and elevated side of patient about 2 (5 cm) lateral to MSP • CR enters perpendicular to midpoint of IR • Enters patient at 2 (5 cm) lateral to MSP at level of T5 or T6 RAO
AP or PA Oblique Esophagus • Barium-filled, well-penetrated esophagus demonstrated between the vertebrae and the heart
Lateral Esophagus • Patient position • Recumbent right or left lateral position • Patient should face radiographer • Arms forward • MCP centered • CR enters perpendicular to midpont of IR • Enters patient on MCP at level of T5-T6
Lateral Esophagus • Entire barium-filled, well-penetrated esophagus demonstrated • Patient’s arm not seen in anatomy of interest • No rotation • Ribs posterior to vertebrae superimposed
Stomach: GI Series • Examination often referred to as a gastrointestinal series (GI series) or upper gastrointestinal series (UGI series) • May include • Scout KUB • Fluoroscopic and serial radiographic studies of the esophagus, stomach, and duodenum using ingested contrast (usually barium) • When requested, the barium may be imaged as it traverses the small intestines
Stomach: GI Series • Patient preparation • Requires stomach to be empty • Desirable to have colon free of gas and fecal material • Food and water withheld 8 to 9 hours before examination • If small intestine examined, food is withheld following evening meal • Nicotine and gum are thought to stimulate gastric secretions, so these are often restricted for same time frame
Stomach: GI Series • Single- and double-contrast studies • Double-contrast includes barium and gas-producing substance (powder, crystals, pills, or carbonated beverage) • Biphasic examination = combination single- and double-contrast during the same procedure • Usually begin with patient in upright position, if possible - Radiologist may examine heart and lungs with fluoroscopyand determine if stomach is empty
GI Series Procedure • Radiologist instructs patient to drink cup of barium - Esophagus is examined with first two to three swallows • Spot films made as needed • Manual manipulation used to coat gastric mucosa - Spot films may be made • Patient drinks more barium to fill stomach • Examination determines size, shape, and position of stomach, peristalsis, filling and emptying of duodenal bulb, and abnormalities in function or contour of anatomy
Essential Projections: Stomach and Duodenum • PA/AP • PA oblique ( RAO ) May do steep & shallow • AP oblique (LPO ) • Lateral ( Right lateral)
PA Stomach and Duodenum • Patient position • Recumbent or upright • Part position • Align midline of grid to sagittal plane passing halfway between vertebral column and left lateral border of abdomen • Center IR 1 to 2 (2.5 to 5 cm) above lower rib margin (level of L1-L2) • Upright requires IR centered 3 to 6 (7.6 to 15 cm) lower
PA Stomach and Duodenum • CR • Perpendicular to center of IR • Exposure made at end of suspended expiration Double Contrast Single Contrast
PA Stomach and Duodenum • Entire stomach and duodenal loop • Stomach centered at level of pylorus • No rotation • Exposure technique demonstrates anatomy
AP Stomach and Duodenum • Patient position • Supine • Trendelenburg’s for demonstration of hiatal hernia
AP Stomach and Duodenum • Part position • Align midline of grid to MSP on 35- × 43-cm IR • On 30- × 35-cm IR, align midline of grid to sagittal plane passing midway between MSP and left lateral margin of abdomen • Center 30- × 35-cm IR to level midway between xiphoid and lower rib margin • Center 35- × 43-cm IR may be adjusted to demonstrate more diaphragm or small bowel
AP Stomach and Duodenum • CR • Perpendicular to center of IR • Exposure made on suspended expiration
AP Stomach and Duodenum • Entire stomach and duodenal loop • Double-contrast visualization of gastric body, pylorus, and duodenal bulb • Retrogastric portion of duodenum and jejunum • Lower lung fields on 35- × 43-cm images for demonstration of hiatal hernias • Stomach centered at level of pylorus on 30- × 35-cm radiographs • No rotation • Exposure technique demonstrates anatomy
PA Oblique Stomach and Duodenum - RAO • Patient position • Recumbent RAO position • Part position • Midline of IR aligned with sagittal plane passing midway between vertebral column and lateral border of elevated side • IR centered to lower rib margin (level of L1-L2) • Adjust rotation to 40 to 70 degrees to demonstrate pyloric canal and duodenum
PA Oblique Stomach and Duodenum - RAO • CR • Perpendicular to IR center • Exposure made on suspended expiration
PA Oblique Stomach and Duodenum - RAO • Entire stomach and duodenal loop • No superimposition of pylorus and duodenal bulb • Duodenal bulb and loop in profile • Stomach centered at level of pylorus • Exposure technique demonstrates anatomy Arrow shows esophagus entering stomach
AP Oblique Stomach and Duodenum - LPO • Patient position • Recumbent LPO position • Part position • Align midline of IR with a sagittal plane passing midway between the vertebrae and the left lateral border of the abdomen • Center IR to a point midway between xiphoid process and lower rib margin • Adjust rotation to 30 to 60 degrees (average is 45)
AP Oblique Stomach and Duodenum • CR • Perpendicular to midpoint of IR • Exposure made on suspended expiration
AP Oblique Stomach and Duodenum -LPO • Entire stomach and duodenal loop • Fundic portion of stomach • No superimposition of pylorus and duodenal bulb • Body of stomach centered • Exposure technique demonstrates anatomy • Body and pylorus with double-contrast visualization
Right Lateral Stomach and Duodenum • Patient position • Recumbent right lateral demonstrates right retrogastric space, duodenal loop, and duodenojejunal junction • Upright left lateral position demonstrates left retrogastric space
Lateral Stomach and Duodenum • Part position • Align plane passing midway between midcoronal plane and anterior surface of abdomen to midline of grid • Center IR at level of L1-L2 for recumbent position; L3 for upright position • True lateral position
Lateral Stomach and Duodenum • CR • Perpendicular to center of IR • Exposure made upon suspended expiration
Lateral Stomach and Duodenum • Entire stomach and duodenal loop • No rotation as evidenced by vertebrae • Stomach centered at level of pylorus • Exposure technique demonstrates anatomy
Anatomy: Small Intestine • Extends from pyloric sphincter to ileocecal valve • Average adult length = 22 feet • Three portions • Duodenum • Jejunum • Ileum
Function : Digestion and absorption of food Peristalsis = contraction waves by which the digestive tube propels contents toward the rectum Average transit time to ileocecal valve in 2 to 3 hours Anatomy: Small Intestine
Small Bowel Technical Considerations • Gastrointestinal transit • Examination procedure • Contrast media • Preparation of examination room • Exposure time • Radiation protection
Contrast Media • Radiographic demonstration of the alimentary canal requires use of contrast media • Barium sulfate is the most common contrast for the alimentary canal • Water-soluble iodinated contrast media may also be used • Iodinated solutions become diluted in the small intestine, so clear anatomic detail cannot be seen • Does permit a rapid survey of the entire small intestine
Examination Preparation • Prepare Room before patient enters • Set control panel , Have footboard, handles and shoulder supports ready • Check imaging devices and number of IRs available • Prepare type and amount of contrast • Before beginning examination, the radiographer should • Describe the contrast media and administration (i.e., taste, enema tip insertion) • Inform the patient that the room will be darkened during the procedure • Introduce the patient and fluoroscopist to each other
Exposure Time • Challenge of GI radiography is to eliminate motion • Based upon each region • Peristalsis greatest in stomach and duodenum • Slows in distal part of GI tract • Peristalsis affected by body habitus, pathology, use of narcotic pain medicine, body position, and respiration
ExposureTime • Normal peristaltic activity – exposure time no longer than 0.2 second • Never longer than 0.5 second • Hypermotility requires 0.1 second or less • Exposures made at the end of expiration in routine procedures • Shield pediatric patients and patients of reproductive age • Other radiation protection measures • Close collimation • Optimum technique factors
Small Intestine Procedures • Barium or other opaque contrast administered one of three ways • Orally • Reflux filling via large-volume barium enema • Direct injection via a tube placed into the small bowel, termed enteroclysis • Oral method most common