Download
1 / 12
120 likes | 137 Vues
Shopify is an attractive option for any business enterprise with full features of an advanced ecommerce portal. As per Statista, the readymade eCommerce platform of Shopify holds a staggering share of 10.98%.<br><br>If you are trying to develop your Shopify store!<br><br>This blog discusses the step-by-step guide for creating a Shopify store.<br><br>Analyze the different Shopify versions you can go for before creating one. Let's check out!

E N D
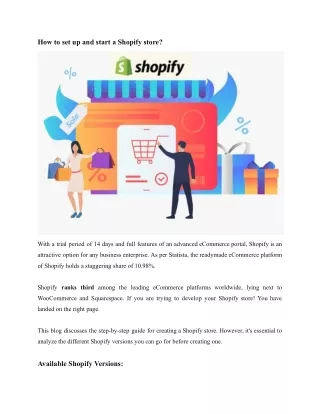
How to set up and start a Shopify store? With a trial period of 14 days and full features of an advanced eCommerce portal, Shopify is an attractive option for any business enterprise. As per Statista, the readymade eCommerce platform of Shopify holds a staggering share of 10.98%. Shopify ranks third among the leading eCommerce platforms worldwide, lying next to WooCommerce and Squarespace. If you are trying to develop your Shopify store! You have landed on the right page. This blog discusses the step-by-step guide for creating a Shopify store. However, it's essential to analyze the different Shopify versions you can go for before creating one. Available Shopify Versions:
To help business enterprises and entrepreneurs invest according to budget compatibility, Shopify offers four different versions. Starting from the Basic Shopify edition that suits entrepreneurs and startups with a limited budget, the Shopify version offers a readymade store to millennials. Along with additional benefits, each version of Shopify offers the following: ● An online eCommerce portal. ● A blogging section. ● Integrating and selling an uninterrupted or infinite number of products and services. ● Reliable client support services 24/7. ● SSL certified portal to enhance the security of the website. ● Abandon cart recovery feature. ● Gift cards. ● Discount coupons.
The Basic Shopify Edition: It can be bought at a rate of $29 per month and mainly provides all the features mentioned above. The Shopify Edition: Besides the basic features offered by the platform, the Shopify edition comes with customization, unlimited bandwidth, shipping, discount rates, etc. You are charged $79 per month for the Shopify Edition. The Advanced Shopify Edition: Apart from all the previously mentioned facilities, it provides the users with advanced report building, infinite capacity of storage, and allowing uploading of limitless images, videos, etc., for the product. Charges for the Advanced Shopify edition are $299 per month. The Shopify Plus Edition: Cloud hosting and multiple stores facility is available under the Shopify Plus edition of the portal. Shopify Lite at a rate of $9 per month is an edition of the readymade eCommerce platform. It can be combined with any of the above editions for selling products on the social media platform. Based on the budget compatibility, you can hire web developers to create a dedicated Shopify eCommerce portal for your business enterprise. Here's a step-by-step guide to create and start a Shopify store Step-1: Choose a catchy store name
The name of your store should be simple and easy to remember for the clients. It should preferably have a direct connection with the products you have planned to sell on the portal. For example, when dealing with Sunglasses, you can go for Sunglassesall, Toplinesunglasses, etc. Shopify offers a dedicated page for creating a brand name. You can use it to find something suitable. Creating a catchy brand name that directly connects with the products and services offers convenience to the clients. The idea is not to go wholly vague nor to try to be too meaningful. Simply be creative with the relatable words. Caution: Avoid using a personal name unless you are already a trusted brand among clients. Also, strictly avoid copying your competitor's words as it reduces originality to a significant extent. Step-2: Register for a free Shopify Account This one is straightforward. Go to the Shopify official web page and click on the "Start your free trial" icon. Enter your chosen store name and click on the icon "Create your store."
Step-3: Choose a compatible theme Shopify offers multiple free themes that you can use to ensure an enhanced outlook of your digital retail store. To try themes over your store, you need to click on the icon "Start with this theme." To customize your store outlook, you need to do the following: ● Click on the icon of "Online Store." ● Select the option of "Themes." ● Click on the option of "Customize Theme." Custom eCommerce development company can customize your Shopify store as per your target audience and business aims. Must Read: 7 Best reasons to Choose xamarin for cross platform development Step-4: Integrate your logo
Attach your brand logo to the Shopify eCommerce store. Ensure that the logo is visible and goes with the chosen theme. You may need to switch the colors of fonts to ensure greater visibility of the brand logo. Step-5: Ready your website pages Clients judge the credibility of an ecommerce store based on its design and visible policies. You need to add multiple pages to ensure greater transparency of the business policies. Creating an online page involves the following: ● Go to the section of "Online Store." ● Click on the icon of "Pages."
● Select the option of "Add Page." Here are some of the standard pages that you must create for your eCommerce store: About Us Page: You need to tell the users why you have started this ecommerce platform, the services you cater to, etc., on this page. Terms and Conditions or Policies page: Here on this page, users will have access to all the norms to be followed under diverse situations. The different policies regarding the orders, returns, refunds, etc., will be detailed on this page. Contact Us Page: The 'Contact Us' link on this page will land the user where he/she can report grievances, demand aid, etc. Caution: Refrain from copying the content of competitors' websites as it negatively impacts the users. Step-6: Integrate Payment Gateway
You can integrate Shopify Payment Gateway over the website. The Shopify Gateway charges vary from 2% to 5% on each transaction. Try to add multiple Payment Gateways. As per Web Development Stats, 69% of users abandon carts due to a lack of trusted Payment Gateways over the eCommerce portal. Must Read: Top 10 Companies to hire Indian Programmers and Developers Step-7: Billing Information Setup It is the final step that needs to be done before you launch your eCommerce platform. Go to the 'settings section. Choose 'Account' and fill up the billing information. On completion of this step, you can launch your Shopify store. Final Words That was all about setting and launching your Shopify store. An ecommerce website development company in India can develop an intuitive eCommerce platform for your ambitious project. Connect with them to experience dedicated development at an affordable budget. Original source