Download
1 / 26
260 likes | 360 Vues
This Photo Link Manager allows users to efficiently organize and manage their photos. Explore its layout, analysis tools, and filtering options. Easily link photos to site observations and view them in different categories. This tool provides a user-friendly interface for editing, copying, and deleting photos. Learn about the repath function to globally change file locations for linked photos. Enhance your photo management process with this comprehensive tool.

E N D
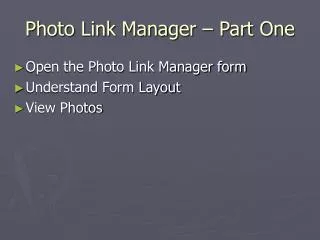
Photo Link Manager – Part One • Open the Photo Link Manager form • Understand Form Layout • View Photos
Open the Analysis Tools Menu and then open the Drill Down Analysis Form. • Filter Data to a Selected Set. • Click the Camera Icon to open the Photo Link Manager.
All Photos Site Photos Active Photo
All Photos • View Source Options • Selected Sites • displays photos from sites in the current filtered selected set on the Drill Down Analysis Form. • Directory (all) • displays all photos stored in a directory. • Directory (unmatched) • displays photos stored in a directory that are not yet linked to a site observation. • Directory (Link by Nearest Date-Match) • method of initially linking photos to site observations. • attempts to link a photo to a site observation in the selected set with the nearest date/time.
All Photos • Next Page button • Displays thumbnails of the next 5 photos in the set. • Previous Page button • Displays thumbnails of the last 5 photos in the set. • Photo Category Options • Photo • Displays photos from ALL photo categories OR just Photo category photos. Prompt based. • Photos are defaulted to this category. • Photo/Landscape • Displays Photo/Landscape photos • Designed for aerial views, landform views, etc. • Photo/Soil • Displays Photo/Soil photos • Designed for photos of profiles, roadcuts, pits • Photo/Vegetation • Displays Photo/Vegetation photos • Designed for site or vegetation photos • Zoom button • Allows you to open the full sized photo in the default Windows .jpg viewer. • The file name is shown for each photo.
Active Photo Fields • Date Picture Taken • This is the Date Picture Taken field that is stored with the photo. It is used to date match photos. • Site Observation Date. • The date of the site observation that this photo is linked to. Changing this value will move the photo to a different site observation. • User Site ID • The site observation that this photo is linked to. Changing this value will move the photo to a different site observation. • Category • Default categories for classifying photo types. • SubCategory • You can record a short free-form Caption for the photo here. • File Name All Photos Site Photos • Thumbnail Frame • Displays thumbnail of a photo in the selected set. • Mouse Click on thumbnail to load the photo into the Active Photo section at the center of the screen. • If the photo is already linked to a site observation, all photos linked to the same site observation will be shown in the thumbnails in the Site Observation section at the far right of the screen. • If the photo is not yet linked to a site observation, you will be prompted to add the photo to the current site observation. Active Photo • Active Photo Frame • Displays a LIVE record from the site observation text table. • Clicking on a thumbnail in either the View Photos in section or the Site Observation section will load the photo in the Active Photo Frame. • Editable Fields are White, locked fields are Grey. • Delete Photo Button • Deletes the Active Photo from the current site observation or all site observations in the select set. • Copy Photo Button • Copies the Active Photo to the current site observation or all site observations in the selected set.
Site Photos • Next Page button • Displays thumbnails of the next 5 photos in the set. This particular site observation only has 2 photo linked to it. • Site Observation Selector Button • Lists all site observations in the selected set – additional fields include map unit symbol (from a spatial intersection of points and polygons, if this has been setup) and soil name as sampled. • Selecting a site observation loads the thumbnails for all the photos linked to the site.
Repath Function • How it works • Set the new path that you would like the link records to be globally changed to by clicking the Browse for folder button and going to this location. • Click the Repath button. • A message will appear confirming the path change you wish to make. Be sure that you know the select set you are running this operation on so that you don’t mistakenly repath your photos. • Repath Photos Button • Will change the referenced file location for all linked photos in the selected set. • Can be used to change photo links to a different directory. • Example usage: Provide a database and corresponding photos on a CD. • Example • Original Path S:\Service_Center\NRCS\Soils\photos\08MT6455678_Linked_To_IMG_1171.jpg • Becomes C:\photos\08MT6455678_Linked_To_IMG_1171.jpg • The file name remains the same but the path in the link record is changed. • Rename Photo Button • Will look in a directory and rename all photos that are linked to at least one site. • Will also restore the photo name to the original name the camera gave it. • Naming convention includes the original photo name and User Site ID from the linked site observation.
Rename Function • How it works • There are two options for renaming, one is the original file name and the other includes the user site id and the original file name. The process inserts a “_Linked_To_” string between the user site id and the original name. • A message will appear confirming the rename option you have selected. • Rename Photo Button • Will look in a directory and globally rename all photo file names of photos that are linked to at least one site. • Will also restore the photo name to the original name the camera gave it. • Naming convention includes the original photo name and User Site ID from the linked site observation.
Photo Link Manager – Part Two • Field Practices • Photo Storage • Irfanview – Resample Photos • Create and Update Links to Photos in Directory via Date Match • Manually Create, Copy, and Delete Photo Link Records
Field Practices • Check the time on your camera at the beginning of each day. Make sure it is close to the time on the GPS. • Make a habit of recording your GPS point at the same time you take pictures. The time stamp stored on the GPS and with each photo is what is used for date-matching. • Take photos in an orderly and consistent pattern to maximize the value of the visual information. Example: • Take site photos across slope and with the pedon in the field of vision. • Use a flash if under dense cover. • You may never return to the site. Take extra pictures of landforms, vegetation close-ups, or anything that may prove valuable when correlating the site at a later date.
Photo Storage • When saving photos from your camera, use a logical directory structure that will ensure photos are linked to the correct site observation. • Example: Describer (MM,SS)
Date-Matching and Updating Links • If desired, filter the Analysis Form to a selected set and open the Photo Link Manager. • Open Photo Link Manager and Browse to the folder where the photos are stored. • Run Date-Match • Check the links created by the Date-Match process. Update the Category field. Assign a Caption (optional). Update the link if the photo was Date-Matched to the wrong site observation.
Open the Drill Down Analysis Form • If desired, filter to a selected set • Open the Photo Link Manager.
Load filtered set of site observations you want to link photos to from the Drill Down Analysis Form. • Browse to a directory where there are photos you want to Date-Match to. • Then select the Directory (Link by Nearest Date-Match)
Click on a thumbnail to make it the Active Photo • This will also load any associated photos in to the Site Observation section.
To Change the site observation that a photo is linked to, update either: • the Site Observation Date field – if you want to try to match the photo to a site by it’s date and time. • OR • The User Site ID field – if you know what site the photo belongs to • This will also change the photos in the Site Observation Section
Manually Creating, Copying, and Deleting Photo Links • Browse to a folder and select the Directory (unmatched) option. This displays the photos in the folder that have not been linked to a site observation. • Click on a thumbnail in the All Photos section (left hand side) to add a link to the current site observation. • Click on the Copy button to copy the Active Photo to the current site observation (or all in selected set). • Click on the Delete button to delete the Active Photo from the current site observation (or all in selected set).
Browse to a folder and select the Directory (unmatched) option. This displays the photos in the folder that have not been linked to a site observation.
Click on a thumbnail in the All Photos section to add a link to the current site observation.
To copy a photo link to another site, select a new site observation. • Click on the Copy button to copy the Active Photo to the current site observation (or all in selected set). • Click on the Delete button to delete the Active Photo from the current site observation (or all in selected set).
Additional Methods of Linking Photos • Browse directly to a photo and add it from a directory location to the current site observation.