Download
1 / 8
90 likes | 223 Vues
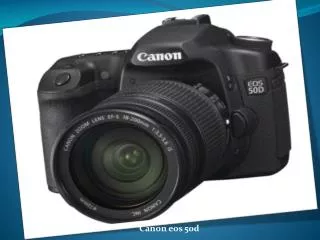
Introducing the Canon Powershot 410 Digital Still Camera. Click to advance to the next page. Taking Still Pictures. Press the “power button” on Move the “mode switch” dial to the right to “camera mode” Set the “shooting mode dial” as shown in illustration below

E N D
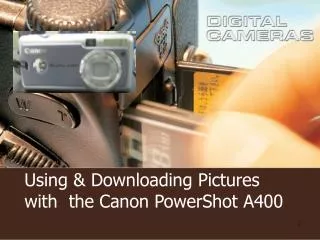
Introducing the Canon Powershot 410 Digital Still Camera Click to advance to the next page
Taking Still Pictures • Press the “power button” on • Move the “mode switch” dial to the right to “camera mode” • Set the “shooting mode dial” as shown in illustration below • Move the “mode switch” to “camera mode” • Use “wide angle” switch to zoom in or out as needed • Press the shutter button when ready to take a picture • To view the picture, move the “mode switch” to the left to “view picture mode”. Wide Angle (zoom) Power Button Shutter Button Mode Switch Shooting Mode Dial Camera Mode View Picture Mode
Using the Flash • Adjusting the flash. Using the button illustrated below, you may switch flash settings Using the Flash
Shooting Close-Ups/Landscapes • Using the button illustrated below, you may switch close-up settings Shooting Close-Ups
Taking Short Video Clips • Move Shooting Mode Dial to setting in illustration below • Make sure “mode switch” is set to camera mode • Press the shutter button and begin taking the video. A red dot will appear in the display screen indicating video is being recorded • When finished recording, press the shutter button again and the video will stop Shutter Button Mode Switch Shooting Mode Dial Camera Mode
Deleting Images from Computer Move “Mode Switch” to “view picture mode” Click on the “Menu” button Mode Switch View Picture Mode • Using the up and down arrows, scroll down to “erase all” • Press the “Set” button • You will be asked to erase all images. Using the right arrow button, scroll to the right and highlight “OK”. Press the “set” button • When you have erased all images the screen will say “No Image”. Up/down Right/left arrows
Transferring Images to the Computer Transferring to a PC computer Mode Switch View picture mode Plug the USB cable into the side of the camera labeled A/V out/digital. Plug the other end of the cable into the computer USB port Change the mode switch to “view picture mode” The computer will recognize the camera, read your data and instruct you to identify a program to download your pictures To computer USB port
Transferring Images to the Computer Transferring to a Macintosh computer Mode Switch View picture mode Plug the USB cable into the side of the camera labeled A/V out/digital. Plug the other end of the cable into the computer USB port Change the mode switch to “view picture mode” The computer will recognize the camera using iPhoto, read your data and instruct you to download the pictures To computer USB port