Download
1 / 35
350 likes | 481 Vues
Online Academic Community Workshop. Instructor: David Shaykewich | dshaykew@uvic.ca. Introduction. AGENDA. Agenda. Part 1: Introduction to OAC (Background) Features of the OAC Basics of using WordPress Part 2: Creating an OAC blog Hands-on opportunity to try the OAC.

E N D
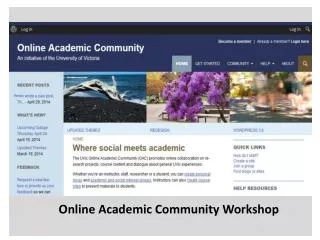
Online Academic Community Workshop Instructor: David Shaykewich | dshaykew@uvic.ca
Introduction AGENDA Agenda • Part 1: Introduction to OAC (Background) • Features of the OAC • Basics of using WordPress • Part 2: Creating an OAC blog • Hands-on opportunity to try the OAC < Click here to return to Table of Contents >
Introduction AGENDA Introduction to OAC • The UVic Online Academic Community (OAC) • Pilot introduced in May 2013 • WordPress-powered community • Hosted on UVic Servers < Click here to return to Table of Contents >
Introduction AGENDA WordPress Background • CMS = Content Management System • Popular format • Used by 20.3% of all websites (Source: W3Techs) • Powers blogs + web pages for many professional/corporate websites • Easy to use < Click here to return to Table of Contents >
Introduction AGENDA Who mayparticipate in the OAC? • Open to faculty, staff, researchers and students < Click here to return to Table of Contents >
Introduction AGENDA Uses of the OAC • Promote collaboration in research and general UVic initiatives • Course sites • Host course blogs + web pages for students • Provide an environment for online discussion • Personal blogs / sites • Discover individuals/groups with complementary interests < Click here to return to Table of Contents >
Introduction AGENDA Reasons to use the OAC • Centralized • Secure • Hosted locally (here at UVic) • FIPPA – Student content cannot be hosted outside Canada* • * Some widgets when enabled send information to the United States • UVic Systems manages all updates to ensure latest version of WordPress is running • Fast learning curve of WordPress interface • Supports active learning Student contributions • Space to continue discussions outside the classroom < Click here to return to Table of Contents >
Introduction AGENDA OAC privacy and security • OAC Terms of service • Presented upon first-time login to oac.uvic.ca • Is also accessible at the footer of OAC main page. • URL:https://onlineacademiccommunity.uvic.ca/about/terms-of-service/ < Click here to return to Table of Contents >
Introduction AGENDA Uses of the OAC • Personal blogs, academic sites and social interests groups < Click here to return to Table of Contents >
Introduction AGENDA Getting Started • Login to UVic Online Academic Community (OAC) using your NetLink ID • oac.uvic.ca • First-time login: READ and Agree to terms of service. < Click here to return to Table of Contents >
Getting Started AGENDA Dashboard • Behind the scenes of WordPress • Area where you add/modify content and customize your blog < Click here to return to Table of Contents >
Getting Started AGENDA Customizing Your Profile • Click on your My Sites tab in the top left corner • From the drop-down, select “Online Academic Site” and then click “Visit Site” < Click here to return to Table of Contents >
Getting Started AGENDA Customizing Your Profile… • On the OAC homepage, click on your avatar in the top right corner • From drop-down, select “Edit My Profile” < Click here to return to Table of Contents >
Getting Started AGENDA Customizing Your Profile… • Tips For Filling Out Your Profile • Fill out your profile for other OAC members to find you based on: • Research • Personal interests • Once complete, scroll to the bottom page and select “save changes” < Click here to return to Table of Contents >
Getting Started AGENDA Creating a Blog • Click on your avatar (top right corner) • From drop-down, select “Sites” and then click on “Create a Site” < Click here to return to Table of Contents >
Getting Started AGENDA Creating a Blog… • 1) Fill out the “Create a Site”form fields • “Site Name”: The URL identity for your blog • Please use lower-case without spaces and special characters • “Site Title”: The actual name you wish for your blog • You may use spaces • 2) Select your desired site visibility under “Privacy”. • 3) Choose one of the options under “Select a template” • 4) Once Finished, click the “Create a Site”button at the bottom of the page
Getting Started AGENDA Choosing Your Theme • A blog’s look and feel (layout, colors, fonts, etc.) is controlled by the theme. • If you desire, you may change the theme in the dashboard. < Click here to return to Table of Contents >
Getting Started AGENDA Choosing Your Theme… • From the Dashboard left side-bar click “Appearance” and then select “Themes” < Click here to return to Table of Contents >
Getting Started AGENDA Choosing Your Theme… • The OAC has over 100 themes available < Click here to return to Table of Contents >
Getting Started AGENDA Choosing Your Theme… • Locate desired theme and select “Activate” < Click here to return to Table of Contents >
Getting Started AGENDA Choosing Your Theme… < Click here to return to Table of Contents >
Getting Started AGENDA Customizing Your Theme…Widgets and Plugins • Widgets/plugins enable special features within WordPress like social media, video embedding, RSS feeds, etc. • Widgets are placed within the sidebars, headers and footers of the blog • Developed by 3rd parties • Note: Enabling widgets/plugins may expose personal information (you or your visitors) to other companies < Click here to return to Table of Contents >
Getting Started AGENDA Customizing Your Theme…Widgets • Widget compatibility depends heavily on the theme’s layout < Click here to return to Table of Contents >
Getting Started AGENDA Posts vs. Pages – What’s the difference? • Posts • The information you update regularly • Organized by category and date • Example: articles, products, news bulletins • 2) Pages • Information that remains relatively constant • Stand alone • Example: “contact information”, “about me” or “links” < Click here to return to Table of Contents >
Getting Started AGENDA Creating a Post • From left side bar in Dashboard, select “Posts”. • Click on “Add New” • Once you’re finished writing, click “Publish”. < Click here to return to Table of Contents >
Getting Started AGENDA Creating a Post – Adding Categories To Add Categories • Click “Categories” tab on the right side • Click on “+ Add New Category” • Type in name of category into field • Once finished, click “Add New Category” • Use categories to index and organize your blog posts • E.g. Food Blog Categories: • Breakfast • Lunch • Dinner < Click here to return to Table of Contents >
Getting Started AGENDA Adding Media • You can upload images and audio files to your blog’s library located in the Dashboard. < Click here to return to Table of Contents >
Getting Started AGENDA Adding Media • Click “Media” tab on the left side-bar in the Dashboard • Click on “Add New” < Click here to return to Table of Contents >
Getting Started AGENDA Adding Media • Simply drag and drop images and audio files into the “Upload New Media” dialogue box. < Click here to return to Table of Contents >
Getting Started AGENDA OAC privacy and security • Blog privacy settings • From “Reading Settings”, OAC users have the ability to restrict access to their blog < Click here to return to Table of Contents >
Getting Started AGENDA Add users to your site • Add users to your site • On the Dashboard menu left side bar select “Users” and then click “Add New” • Under “Add Existing User”, input the following: • Email or Username: Enter the NetLink-ID of user you wish to add • Role: Administrator • Click “Add Existing User” button < Click here to return to Table of Contents >
Getting Started AGENDA Further Assistance… • On OAC main page, click “Help” tabon the yellow ribbon • Quick start resources: OAC set-up video • WordPress tutorials: Training Videos created by WPMUDev • Community support: Ask/answer questions by OAC members • Contact support: Link to Computer Help Desk < Click here to return to Table of Contents >
Getting Started AGENDA Further Assistance… Community Support • On OAC main page, click “Help” and from the drop-down menu, select “Community Support” • Forum to ask and answer questions from other OAC members < Click here to return to Table of Contents >
Getting Started AGENDA Further Assistance… Computer Help Desk • To report any issues, provide feedback, or ask general questions about the Online Academic Community, please contact the Computer Help Desk. < Click here to return to Table of Contents >
Getting Started AGENDA Thank You < Click here to return to Table of Contents >