Download

1 / 38
380 likes | 498 Vues
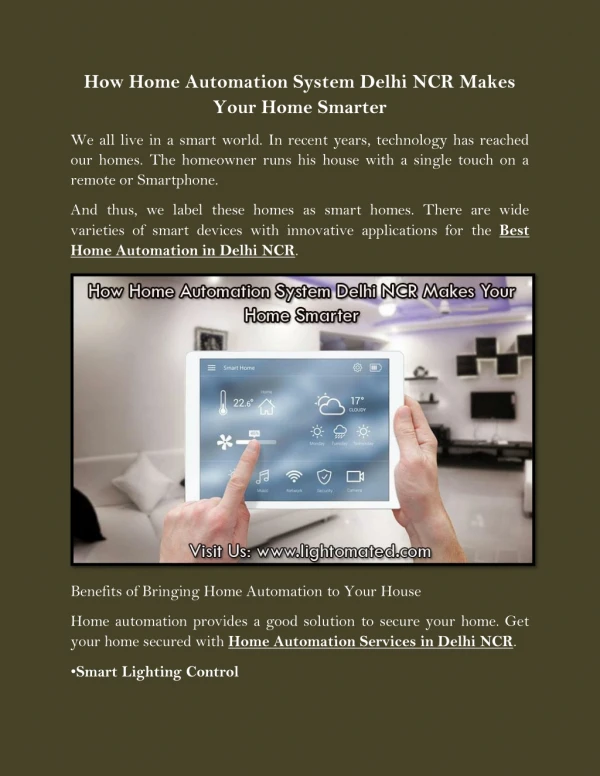
Our project aims to develop a prototype for a "Smart House" focusing on energy efficiency and automation. With rising energy costs, achieving energy independence is crucial. This system will reduce energy consumption by automatically shutting off appliances in unoccupied rooms and adjusting blinds based on light input. Users can remotely manage various household electronics through a user-friendly web interface. The project incorporates wireless communication using RF technology and is designed for future contests at UCF and Texas Instruments.

E N D
Smarter Than Your Home GROUP 4 Daniel Arnett, Joseph Vanciel, Brian Krueger
Motivation • Energy costs continue to rise • Energy independence is an important national issue, with energy conservation as a key component • With the advances in mobile technologies, people want increasingly more access and control over all aspects of their lives
Goals Create a prototype for a “Smart House” that will: • Reduce energy consumption • Increase energy efficiency • Allow for home automation • Allow for remote access via a user friendly GUI delivered through an internet browser
Objectives The objectives of the “Smart House” will be to: • Reduce wasted energy consumption by automatically shutting off nonessential appliances and lights in unoccupied rooms. • Allow the user to adjust blind settings in each room so the blinds will open/close automatically, adjusting appropriately to help reduce energy consumption • Allow the user to remotely view and adjust statuses of various lights and electronics in each room
Objectives Wireless communication: • The prototype will be coordinated by one main microcontroller, which will wirelessly communicate with the other components throughout the house via RF. Design Contests: • We hope to be able to enter this project in both UCF’s and Texas Instruments’ contest.
Requirements • Communicate to electronic devices through a webpage • Automated lights turn on and off as user enters/exits a room • Electronic devices and lights time out to save power • Blinds open/close according to amount of incoming light & user request • User has control over multiple electronic devices within the household from one source
Specifications (User End) • Lights & Electronics time out 5 minutes after doorway sensor is tripped & no activity (Power Savings) • Web interface accessible to user at all times (User Accessibility) • Web interface reports back status of all lights, blinds & electronics on the network (User Accessibility)
Specifications (Design End) • Spend at least 90% of time in sleep mode • External 4 bit dip switch on all devices to set unique address • Devices in sleep mode until external interrupt wakes them up • RF communications operate on 900 MHz frequency • USB, Ethernet connections for data transfer • Light Controllers are tied directly to doorway sensors
Overall Design • Main Processor –Stellaris LM3S8962 • Door Sensor & Light/Electronics Controller –MSP430G2553 • Communication – RF Transceiver CC1100 • (All TI Components)
Main Processor Functions • void UART_Config() • Initializes several variables (setting pin outs, initializing UART interrupts, configuring baud rate, stop bit, parity bit, word length) • void UART_Send(char dataOut) • Sends character to FIFO buffer to send out (8 bits) • char UART_Receive() • Returns character from FIFO buffer (8 bits) • int UART_CRC(char dataIn) • Runs CRC on received data to verify validity. • void UART_Store(char address, int status) • Stores latest On/Off status of device at any given address at the Default Register • int UART_Retrieve(char address) • Retrieves default status at device at any given device from the Default Register
Main Processor Communication • Communication protocol: RF • 900 MHz • 115,200 Baud Rate • 8 bits: • 3 bit digital handshake • 5 data bits • CRC algorithm for error checking
Main Processor Software • Protocol: UART • 5 data bits: • 4 address bits (configured through dip switch) • 1 status bit (on or off) • Default (Last checked) status stored to register in memory
Schematic of Motion Sensor MSP430
Motion MSP430 Functions • void initializepins(void) - perform the initial processor set up • char datain(void) - function for receiving data over UART from the brain • void dataout(char) - function for sending data over UART to the brain
Functions cont. • void lightcontrol(char) - controls the status of the lights depending on what needs to be on or off • void outletcontrol(char) - controls the status of any outlets depending on what signals are sent from the brain • void doorsensor(void) - contains the logic to be used for determining light status when the doorway is tripped
Testing Environment for motion sensors
Blinds MSP430 Functions • void initializepins(void) - perform the initial processor set up • char datain(void) - function for receiving data over UART from the brain • void dataout(char) - function for sending data over UART to the brain
Functions cont. • int tempin(void) - measures the outside temperature • int lightin(void) - measures the incoming light intensity • void servo(int) - controls the position of the servo motor for opening and closing the blinds
Graphical User Interface • Once the user pulls up the IP address of the Server in their browser, the GUI will appear in the user’s web browser. • The GUI will • display the status of the lights, electronics, and blinds in each room • allow the user to turn a light on or off by clicking the appropriate button • allow the user to open or close the blinds in each room
Remote Access-Routing • The Stellaris LM3S8962 will be on the PCB fitted with an RJ45 jack that will connect to the home’s internet connection through the Linksys WRT54G router via an Ethernet cable. • Since we are assuming that different people would have different routers, the choice of which router to use was fairly arbitrary, as the prototype would need to be compatible with a wide range of routers. • The Linksys WRT54G was chosen since it is a popular router which is reasonably priced • The main requirement for the router to be compatible would be that a user would be able to properly configure the router’s port forwarding
Remote Access Configure HTTP forwarding: • Application: HTTP • External port: 80 • Internal port: 80 • Protocol: TCP • IP Address: 192.168.200 Configure HTTPS forwarding: • Application: HTTPS • External port: 443 • Internal port: 443 • Protocol: TCP • IP Address: 192.168.1.200 Configure RWW forwarding: • Application: RWW • External port: 4125 • Internal port: 4125 • Protocol: TCP • IP Address: 192.168.1.200
Budget and Financing Funding will be provided by Work Force Central Florida
What is Left to Do: • Servo motors • Finishing the development of the GUI • RF • Testing • Power design • PCB layout
Issues • RF – Establishing handshake, CRC • Demonstration – Displaying household application in a presentation • Networking – Establishing our web page over an internet connection (specifically UCF’s internet connection)