CERNER MILLENNIUM Care Teams for Rounding Lists & Physician Handoff
440 likes | 824 Vues
CERNER MILLENNIUM Care Teams for Rounding Lists & Physician Handoff.

CERNER MILLENNIUM Care Teams for Rounding Lists & Physician Handoff
E N D
Presentation Transcript
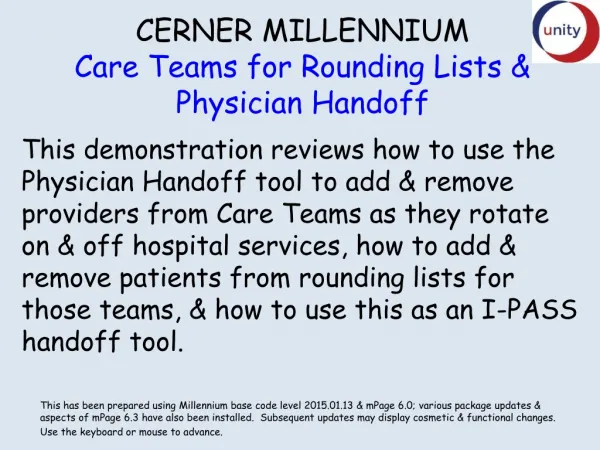
CERNER MILLENNIUMCare Teams for Rounding Lists & Physician Handoff This demonstration reviews how to use the Physician Handoff tool to add & remove providers from Care Teams as they rotate on & off hospital services, how to add & remove patients from rounding lists for those teams, & how to use this as an I-PASS handoff tool. This has been prepared using Millennium base code level 2015.01.13 & mPage 6.0; various package updates & aspects of mPage 6.3 have also been installed. Subsequent updates may display cosmetic & functional changes. Use the keyboard or mouse to advance.
Introduction Some of the Physician Handoff & Care Team functionality can be a little confusing at first, but hopefully we can break this down to make it easier for people to understand. One thing to note for starters is that Care Team Lists are different from Patient Lists. We’re focusing on Care Team Lists here, which are the more useful type of list for sharing a rounding list among several providers.
Access the Physician Handoff tool by clicking Physician Handoff on the toolbar.
When you first open Physician Handoff, there may not be much showing. To set things up, click this icon on the upper right. Then click Care Team Lists.
First look at the dropdown list on the left. It’s counterintuitive, but All Facilities doesn’t actually give you access to all medical services & teams. Most teams are filed under All Facilities, while OBGYN & Pediatrics are filed under C and W. In this example, we’ll select All Facilities.
Pick your service from the Select a medical service dropdown list.
Other services have several teams. For example, for Internal Medicine there are 5 individual teams; the team at the top labeled just Internal Medicine is the summation of all 5 of those teams, which comes in handy for evening call coverage.
What you’re doing here is picking the short list of teams you’d like available to have quick access to. You can add & remove teams as necessary for your rotation. E.G., you might add Red Medicine as you rotate on at the start of the month, then remove it when you rotate off. In this example, we’ll select Internal Medicine | Red, then click Add to move it to the Selected Teams list on the right.
Add other teams as desired. For this example, we’ll go ahead & add the summed Internal Medicine team as well. When done, click Save.
When you click the Select a list dropdown, you’ll see the two teams you’ve just added. (You can ignore the other listings for now.) Make a selection to display a list. For this example we’ll pick Internal Medicine | Red.
The selected Care Team List displays (though it is devoid of patients at the moment).
Click Add Patient. (Student Providers will not see this button; only residents, midlevels, & attendings can add patients to a Care Team List.)
The typical Patient Search window appears. Select your patient & encounter, then click OK.
The patient now appears on the list. Add more patients as necessary. The first time you do this it will take a few minutes, but after that you’ll just add new patients as they’re admitted, & remove them as they’re discharged.
Somewhat counterintuitively, you have to go to a different spot to remove patients. Click this icon on the upper right. Then click Patient Assignments.
Click the carat next to Internal Medicine | Red to expand that list.
If you ever have a need to move a patient to another list, or copy to another list, you can do that here as well. On the right, select the destination Care Team List.
On the left, select the patient. Moveremoves the patient from the Red Team & adds her to the Yellow Team. Copy adds the patient to the Yellow Team while leaving her on the Red Team as well.
Adding & Removing Providers on Care Teams It may not be strictly necessary for you to add providers to a Care Team. As shown above, anyone can view Care Team patient lists, & that may be all you need to do. But you might want to add providers to a Care Team at the start of a rotation, & remove them at the end, just so people will be able to look at the team & know who the current members are.
To add providers to a Care Team, click this icon on the upper right. Then click Manage Care Team Providers.
First select the service & team as you’ve seen before. Then search for the provider. Select the desired person.
Repeat until you’ve added all the desired providers; you can include student providers on the list here as well. To remove a provider, note the gray X that appears when you hover the cursor over the name. Click the X to remove the provider. When done, click Apply.
Primary Contact:A Problem With Care Team Lists Assigning a primary provider contact for each patient on the list at first appears logical, especially when the patient list is long & there are several providers. But DON’T DO IT! It causes a problem.
When viewing a Care Team List, you’ll notice a column titled Primary Contact, with a link to assign each patient’s Primary Contact. There is also a link to do this on the dropdown list at the right. DO NOT UTILIZE THIS FUNCTIONALITY! In our current version of the program, it makes it impossible to remove a patient from a Care Team List. We’ll need to continue to depend upon other mechanisms, like the published pager list, for staff to know who to contact.
Using Care Team Lists as a Physician Handoff Tool Care Team Lists give you a quick way to access patient charts, & a way to check out to covering teams at shift changes.
The first thing to know is that clicking on the patient’s name opens the chart. So you can use Physician Handoff as a “Home Base” in the hospital for rapid access to all your patients.
Next, note that clicking the carat to the right of the patient’s name opens a window with summarized information. There are 3 tabs. The Clinical Data tab shows recent labs & meds.
The Care Team tab shows what Care teams the patient belongs to.
But the I-PASS tab is probably the most important one. This allows you to provide physician handoff information using the familiar I-PASS format.
Illness Severity can be selected using these buttons. Click in each section & make entries as appropriate. When done with each section, click Save. Scroll down to see all of the sections.
Note that, if a patient belongs to more than one Care Team, e.g., Internal Medicine | Red & Orthopedics, that each team can use the I-PASS tool. If you want a note in a section to be seen by all teams, click Available to All. To display notes left by each team, click All Teams.
To collapse back to the full list, click the carat or the X.
Having rapid access to Physician Handoff makes it possible to avoid having to print rounding lists, reducing the chance of lost Personal Health Information & HIPAA violations. But if you ever need to print a list, click the icon at the upper right & select Print….
You can include all or selected patients. The Simplified option gives you a basic list. Click Continue.
The Detailed option includes much of the information entered in the I-PASS tool. Click Continue.
There are other things that can be done with the Physician Handoff tool, & this functionality is expanded in future program upgrades. But this should provide enough information to give most users a general understanding of how to use the tool.