Download
1 / 2
20 likes | 37 Vues
Go through the mention below solutions so as to easily connect Canon MX490 Printer to Wi-Fi. In case of any trouble, simply call at our toll-free for quick assistance.

E N D
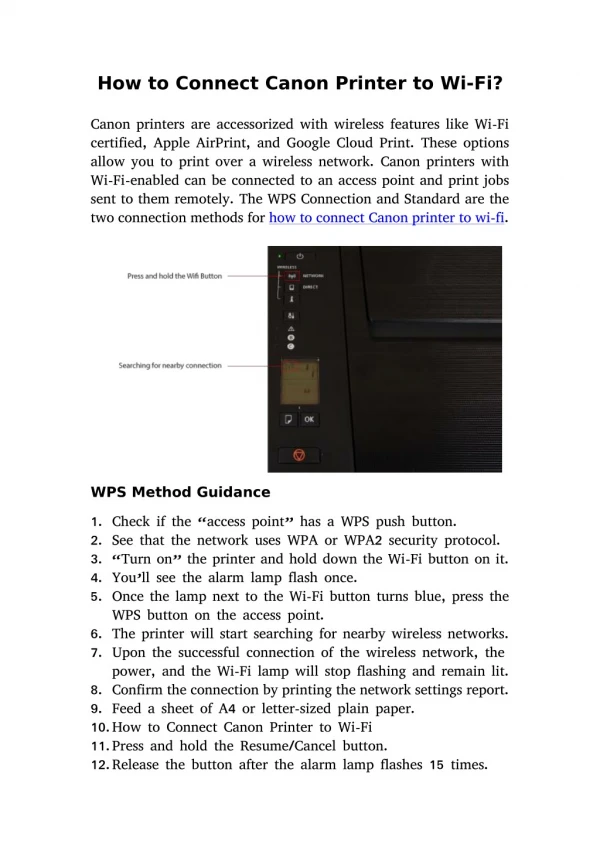
Best Solutions to Connect Canon MX490 Printer to Wi-Fi Canon Pixma MX490 printer is one of the top quality printers that got versatile usage. Being one of the leading printer brand, it gives you the option to connect its printer over a wireless network. Read the complete PPT to know the process to Connect Canon MX490 Printer to Wi-Fi. Steps for Canon PIXMA MX490 Wireless Setup: 1.Cautiously remove entire external protective material from the printer. 2.Open the front paper exhaust tray and take the cover of the scanner unit to expose the cartridge holder. 3.Remove the cartridge holder and remove its protective material. 4.Plug your printer to a power source by connecting one end to the printer’s suitable interface, while connecting the other to a wall outlet. 5.Switch on the unit and choose your preferred language, then click the OK button and shut the unit. 6.Now, take the scanner cover again to place the cartridge holder in place. Shut the lid. 7.Switch on the unit and click the configuration button. Choose the wireless LAN configuration through the Operation Panel. 8.Click OK 9.Choose easy configuration. 10.Click OK 11.Choose Access Point. 12.Click OK 13.Now, feed it with the WEP key. 14.Click ok 15.Then, insert a complimentary CD and run the program with automatic playback. 16.Choose country where you live at this time. Tap Next
17.Select the easy installation and click next. 18.Choose “Use printer on network” and now tapnext. 19.Soon, a printer detection window will emerge. Tap Next. Choose your printer and the connection will be complete. Contact Us: Company Name: Pcsolution Website: https://www.pcsolutione.com/ Email id: contact@pcsolutione.com For UK +44–1143602535 For USA +1-917-580-5618