Download
1 / 4
0 likes | 19 Vues
Introducing Dos and Don'ts of Repairing Drywall u2013 your definitive guide to fixing damaged walls like a pro! Discover expert tips and tricks to avoid common mistakes and achieve seamless results. From selecting the right tools to patching techniques, this comprehensive PDF will equip you with the knowledge to tackle drywall repairs confidently. Download your copy now and transform any wall into a masterpiece!<br>

E N D
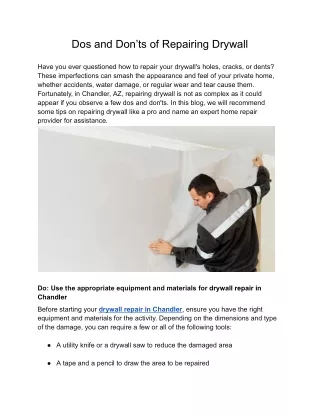
Dos and Don’ts of Repairing Drywall Have you ever questioned how to repair your drywall's holes, cracks, or dents? These imperfections can smash the appearance and feel of your private home, whether accidents, water damage, or regular wear and tear cause them. Fortunately, in Chandler, AZ, repairing drywall is not as complex as it could appear if you observe a few dos and don'ts. In this blog, we will recommend some tips on repairing drywall like a pro and name an expert home repair provider for assistance. Do: Use the appropriate equipment and materials for drywall repair in Chandler Before starting your drywall repair in Chandler, ensure you have the right equipment and materials for the activity. Depending on the dimensions and type of the damage, you can require a few or all of the following tools: ● A utility knife or a drywall saw to reduce the damaged area ● A tape and a pencil to draw the area to be repaired
● A piece of drywall or a drywall patch package to fill in the hollow or crack ● Drywall screws or nails to attach the patch to the wall ● A drill or a hammer to push the screws or nails ● A putty knife or a drywall knife to apply and clean the joint compound or the spackle ● Drywall tape or mesh tape to enhance the joint compound or the spackle ● Sanding sponge or sandpaper to rub the surface after the joint compound or the spackle dries ● Primer and paint to match the shade and end of the wall Don’t: Cut or damage any electrical wires or plumbing pipes behind the wall When repairing drywall, it's vital to avoid cutting or damaging any electric wires or plumbing pipes hidden at the back of the wall. Such an accident can lead to critical effects, consisting of electrical shorts, the hazard of electrocution, water harm, and costly upkeep. Before you start any work: 1. Locate wires and pipes using a stud finder with electrical and pipe detection functions. 2. See expert advice if you need more clarification about these utilities' areas. 3. Always turn off the power at the circuit breaker and close off the water supply while working close to electric or plumbing systems. Taking these precautions ensures your safety and protects the integrity of your home's crucial systems. Remember, protection is your priority through home repair projects. Do: Apply the joint compound or spackle in thin, even layers Applying joint compound or spackle in thin, even layers is essential to restore drywall. The restoration method guarantees that the compound dries calmly and minimizes the danger of cracks forming as it sets. Thin layers are also easier to
sand down, vital for creating a clean, undetectable restore. When the compound is implemented too thickly, it not only takes longer to dry but may shrink erratically, causing imperfections on the wall floor. By constructing the repair with multiple thin layers, every allowed to dry earlier than the following is carried out, you acquire a more substantial, extra solid restore that merges seamlessly with the surrounding area. This methodical technique is fundamental to expert-exceptional results, whether filling in minor dents or overlaying large regions of damage. Don't: Over-sand or under-sand the repaired area Sanding is vital in drywall repair because it helps clean and assemble the surface for painting. However, it might assist to be careful not to over-sand or under-sand the repaired place, as each can cause problems. Over-sanding can remove too much fabric and reveal the patch or the tape, making the repair visible. Under-sanding can leave some stiff or choppy spots to show through the paint. You have to gently and lightly sand the repaired area, using a fine-grit sandpaper or a sanding sponge, and often look to see if the surface is clean or even.
Do: Prime and paint the repaired area to match the wall Priming and painting the repaired drywall place are vital to ensure an unbroken and expert end. Priming serves as a preparatory layer that improves the adhesion of paint to the surface, fills the porous drywall, and lessens paint absorption, leading to higher coverage and uniform color development. It additionally prevents stains from bleeding through and complements the durability of the paint process. After priming, painting the area enables it to combine with the comfort of the wall, concealing the restoration work. Skipping the priming step can bring about uneven paint coverage, blotchiness, and potential crack because the unprimed drywall may soak up the paint unevenly. Therefore, pay attention to the significance of priming and painting the repaired drywall. Pay attention to a finish that suits the existing wall and stands the test of time. Don't: Attempt to repair drywall that is severely damaged or moldy While most drywall damages can be repaired quickly and inexpensively, a few instances may require a complete drywall substitute. This is specifically genuine if the drywall is seriously damaged, moldy, or sagging. These situations can suggest structural troubles, water damage, or health hazards that need to be addressed by a professional. If you observe any signs of intense drywall damage or mold, call a local expert repair service as quickly as possible to investigate and replace the drywall. If you are searching for reliable and trusted local drywall repair in Phoenix or Chandler, contact Professional Home Cleaning. It is a licensed and insured organization offering various local repair services, including drywall restoration, drywall patching, and new drywall installations. Its skilled and professional technicians can handle any local repair project, large or small. It additionally provides 100% satisfaction and a free service estimate. Source:https://stonesmentor.com/dos-and-donts-of-repairing-drywall