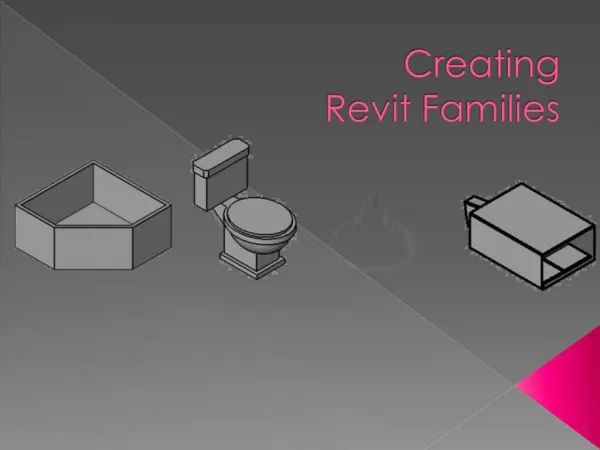
Revit Template Checklist
We have outlined the following checklist with they key components to consider when creating a Revit template from scratch. Learn more at https://projectbyn.com/

Revit Template Checklist
E N D
Presentation Transcript
R e v i t T e m p l a t e C h e c k l i s t projectbyn.com
The essential first step to working in Revit is to create a custom template that will be used for all projects. A good Revit template will economise your time + streamline your workflows. Your template should be specifically developed for the needs of your practice and should reflect the graphic style of your architecture studio. A well-developed template helps organise your drawings, sheets and views to navigate the complex Revit browser with greater ease. The template can be fully set up with custom settings, parameters and ready-to-use drafting elements to create beautiful, quality architectural drawings in a consistent graphic style across all projects. We have outlined the following checklist with they key components to consider when creating a Revit template from scratch. 1
T E M P L AT E C H E C K L I S T BROWSER ORGANISATION : views, sheets + Schedule catagories PROJECT PARAMETERS : determine necessary parameters for project SHARED PARAMETERS : create shared parameters file NAMING CONVENTIONS : establish + draft up all naming conventions Integrated Standards FILES LOCATION : determine all essential file paths EXPORT + IMPORT DWG SETTINGS : predefine dwg settings PROJECT INFORMATION : complete common project information PROJECT UNITS : define the units your projects will use KEYBOARD SHORTCUTS : set the commonly used command shortcuts SNAPS : adjust the snaps settings OBJECT STYLES : define the settings for all object styles LINE STYLES : set up a full suite of line styles LINES WEIGHTS : define the settings line weights at various scales LINE PATTERNS : set up all necessary line patterns TEXT STYLES : set up all necessary text styles Graphic Standards FILL REGIONS : set up a full suite of fill regions FILL PATTERNS : set up all necessary fill patterns MATERIALS : set up a suite of commonly used materials VIEW TEMPLATES : set up a suite of commonly used view tempaltes FILTERS : set up the commonly used view filters such as for fire plans COLOUR FILL SCHEMES : set up the relevant colour schemes 2
T E M P L AT E C H E C K L I S T LEVELS : set up default levels in elevation views PHASES : define the relevant phases e.g. existing, new construction Preset Elements SCHEDULES : set up commonly used schedules e.g. windows/doors KEYNOTES : add keynote data if this is used by your office LEGENDS : set up commonly used schedules e.g. for windows/doors TITLE BLOCKS : create a suite of titleblocks with parameters Families SYSTEM FAMILIES : include all standard wall, ceiling, roof + floors DIMENSIONS : create a suite of linear, angular, radial dimensions TAGS : create a suite of graphically elegant tags ANNOTATION SYMBOLS : add commonly used annotations Annotation Families GRIDS + LEVELS : customize grid + levels to your graphic style ARROWHEADS : customize arrow heads to suit your drawing output VIEW TAGS : add or customise callout, elevation + section tags 3
T E M P L AT E C H E C K L I S T Integrated Revit Standards When working in BIM, organisation is essential. The fundamental organisational elements to set up in your template include the project information, the file locations to link key files and folders on you server to your Revit project and naming conventions for all project elements. Setting up the project information and file locations in your Revit template will save considerable time in carrying this out for each individual project. The naming conventions for maintaining an organised Revit model and BIM standards are extensive. These should be outlined and readily available in the Revit template itself for reference. This practice is more likely to ensure the correct conventions are followed. The naming conventions should outline how the following Revit elements should be named and organized: views, sheets, schedules, legends, view templates, materials, families, groups and assemblies. This information can be typed in a drafting view and filed in the browser for easy access when building your project model. Family Naming Convention Project Browser - Sheet Naming Convention XXX_Description XXX 1 XXX 2 XX 3 XXX 4 XX 5 X 6 00 000 7 1 - Family Code 2 - Description 1 Project XXXX ANN CLG COL COM CAS CWM CWP CWS DAT DCT DET DOR ELE ELF FIR FLO FUR FRS GEN LAN LIT MAS MEC PIP PLM PAR M ROD RAL RAM ROF SFT SIT SPE SPK STA TBL TOP WIN WIR WAL Annotations Ceilings Columns (architectural placeholder columns) Communication Devices Casework Curtain Wall Mullions Curtain Wall Mullions Curtain Wall Systems Data Devices Ducts Detail Items Doors Electrical Equipment Electrical Fixtures Fire Alarm Devices Floors Furniture Furniture Systems Generic Models (avoid using if possible) Landscaping Lighting Fixtures Mass Mechanical Equipment Pipes Plumbing Fixtures Parking Profile Roads Railings Ramps Roofs Shaft Openings Site Specialty Equipment Sprinklers Stairs Title Blocks Topography Windows Wires Walls Description must be in CamelCase as per Revit standards i.e. with first letter in capital with no space in between [Project number] 2 Originator PBN - Project by n. [Company Name] eg: DOR_SingleSwing DOR_DoubleSwing_VisionPanel WAL_EXT_Type1 RAL_INT_StairCore 3 Volume / System Break project down to zones for multiple buildings ZZ All volumes XX Single building B1 Building 1 Detail Items As there are many detail items in a project, a second family code should be used in the description to define the element the detail item relates to 4 Level / Location B00 B01 B02 B03 G00 G01 G02 L01 L02 R00 R01 R02 XXX ZZZ Basement (buildings with only one basement level) Basement 01 Basement 02 Basement 03 Ground Floor Upper Ground Floor 01 Upper Ground Floor 02 First Floor Second Floor Roof (buildings with only one roof level) Roof 01 Roof 02 No level applicable Multiple levels eg: DET_DOR_LeverHandle DET_FUR_KitchenTap Annotations Annotations that are tags should have TAG in the description eg: ANN_TAG_RoomNameArea ANN_TAG_DoorNumber 5 Type BQ DR SC SK SP M2 M3 MR VS Bill of Quantity Drawing Schedule Sketch Specification 2D Model 3D Model Model rendering Visualisation 6 Role A B C E Architects Building Surveyor Civil Engineer Electrical Engineer K L M S Client Landscape Architect Mechnical Engineer Structural Engineer 7 Number 2 digits for Package Code (see below) + 3 digits sequential (100,200,300 series etc) Group + Assembly Naming Convention Building Package Codes XXX_Description Overview - Building Systems Secondary Elements Services - Mainly Electrical Fittings - Loose Equipment Groups and assemblies should follow the same naming conventions as the families where there is a dominant element in the group. 00 01 02 03 Surveys General Arrangements Area Diagrams Lease and Demise 31 32 33 34 35 37 Windows and Louvres Doors Access Floors Balustrades and Balconies Ceilings Rooflights 63 66 Lighting Lifts and Hoists 82 Furniture, Loose eg: a group for the external walls consisting of walls, windows and doors can be named as: WAL_EXT_FacadeType1 External Elements Fittings - Fittings/Fixtures A group containing a typical internal floor(s) can be grouped by zone (B1) and level (L01-L05) FLO_B1_INT_L01-L05 90 97 External Works External FF&E Substructure 71 72 73 74 75 76 78 Signage Furniture, Built-In Kitchens Sanitary and Bathrooms Cleaning and Maintenance Storage and Joinery Other Fittings Finishes 12 19 Enabling & Demolitions Tanking To further define groups + assemblies use the following where relevant: 40 41 42 43 44 45 47 Finishes General External Wall Finishes Internal Wall Finishes Floor Finishes Stair Finishes Ceiling Finishes Roof Finishes TYP for typical EXT for external INT for internal APT for apartment type COR for circulation core Primary Elements 21 22 23 24 27 External Walls Internal Walls Floors and Galleries Stairs and Ramps Roofs LINK - RIBA Package Codes i ⓒ Project by n. 2022 Image: Project by n. PRO Revit Template 4
Project Information T E M P L AT E C H E C K L I S T Start Screen Every template should include a specially developed start screen that also functions as a BIM transmittal sheet. This can be created as a drafting view and set as the default view that first appears when the project file is opened. The start screen operates as a record of key project information, such as the name, project base point, file format and template version. A transmittal sheet which acts as a record of when and for what purpose the model was issued, should be included in the start view. This is an important means of recording the transmittals of models both internally and for the wider consultant design team. Your practice logo and an image of the specific project can be added for easy identification of the individual project upon opening. BIM Transmittal No. Rev Date Notes 01 / 00.00.0000 Issue 1 - Design Team - WIP Architectural Model <<< PROJECT IMAGE >>> Image: Project by n. PRO Revit Template 5
T E M P L AT E C H E C K L I S T Title Blocks The template should be populated with your practice’s title blocks that reflect your standards and branding. Setting up the following title blocks: A1 landscape, A1 portrait, A3 landscape and A3 portrait in both titled and blank versions is a good place to start. The title blocks should have a range of integrated parameters that work with the template and project browser to easily categorise each drawing. Integrated parameters such as a scale bar, north sign, revision schedule and information labels can be contained within your title blocks to allow changes to be made to individual sheets quickly and easily from within your project. The naming and numbering format can be set up such that this information can be scheduled and placed on drawing issue sheets and drawing registers. Title blocks for drawing registers and schedules should also form part of your library and be included in the template. We recommend placing all your standard title blocks on one sheet in your template and filing it with the rest of your standards so that they are easy to see, select and modify where necessary. Image: Project by n. PRO Revit Template 6 © Copyright 2021 Project by n.
T E M P L AT E C H E C K L I S T Graphic Standards Once the above is all set up, the graphic standards can be added to the template. The first place to start is your lines and filled regions. Revit has a standard set of integrated line styles that cannot be deleted, but you can also add your own. Remember to keep these to a minimum so that there is no repetition or confusion, and follow a strict naming convention so that they can be easily found and their properties easily identified. Filled regions can be flat colours (opaque or transparent) or hatched. It is a good idea of have a large selection of patterns and a carefully selected colour palette available in your template to enrich your drawings and presentations. Image: Project by n. PRO Revit Template 7
T E M P L AT E C H E C K L I S T Materials Your template should have a standard set of materials that will be used in every project. Having a large number of materials leads to a larger than necessary file size and it’s important to keep your template file as lean as possible. Keep this material library to a maximum of 10-15 materials in your template so as not to over load the file size with unnecessary information. Additional materials can be contained in a separate library file in order not to overload the template file and keep the file size to a minimum. 8
T E M P L AT E C H E C K L I S T View Templates View templates are essential for the control of graphic output from Revit. A series of view templates should be provided for each set of plans, sections, elevations and 3D drawings. Inevitably, view templates will need to be tweaked or updated to suit the individual project but the standard view templates should be available in the template. As always, a strict naming convention must be used to make their purpose clear and avoid duplicates. Filters are a useful way to override the graphic display and visibility of elements that you select or that share common properties. A suite of filters that are commonly used on projects should be integrated into the template set up. Image: Project by n. Sample Revit Project 9
T E M P L AT E C H E C K L I S T Template Tips TIP #1: Watch the file size Keeping file sizes in Revit to a minimum is a constant challenge as your project progresses. As the first step in the creation of a new Revit model, your template should be kept as lean as possible. Keeping your template to a minimum file size while still packing it with all the essential information is a challenge. As mentioned above, materials and families should be kept to a minimum in the template. In the case of system families, such as walls, floors, ceilings and roofs, only a reduced set of generic build-ups should be contained in the template file. We recommend the use of a separate file that can be used as a content library for all your Revit families and materials. TIP #2: Create a separate content Library file It is a good idea to keep a content library file that is separate from your template file. Here you can house all the more heavy elements and families without over burdening your template file and therefore your project with superfluous elements and information. Your content library file can include annotations, materials, families and system families that are not communally used in every project. System families include wall, floor and roof families. A brief descriptor would be useful to include alongside the wall types. The elements in this file can be quickly and easily dragged and dropped into your new project if and when you need it. 10
T E M P L AT E C H E C K L I S T TIP #3: Update your template on a regular basis Your Revit template should not be a static file, but should evolve over time to include new features and updates based on your projects or practices needs. The template should also be tweaked to reflect changes in the industry as well updates to the Revit software itself as new versions are released. TIP #4: Visit projectbyn.com for more tips For further information on Revit graphics and how to develop a Revit template and see our free Revit Template Guide. Our detailed document showcases the key elements and settings to include in your template based on our custom graphic Revit template. It provides detailed descriptions of the functions of our integrated view templates, parametric annotations and graphic elements. It also outlines tips for how to adapt the template to your design practice standards where you may wish. GET OUR GUIDE 11
T E M P L AT E C H E C K L I S T Template Tools VISIT OUR SHOP We have developed fully customised Revit Templates. Our LITE Edition Revit Template is ideal for freelance architects, sole practitioners, students and beginners. Our PRO Edition Revit Template has been developed for architecture practices and has built-in features and tools for managing small to large scale projects from conception through to final completion. All our Revit Templates can be quickly and easily modified, updated or tweaked to add any graphic elements specific to your architecture studio and standards. Compatibility: Units: Revit + Revit LT 2018 - 2023 Metric + Imperial Versions Revit PRO Template Developed for Architecture Practices + Small to Large Scale Projects Revit LITE Template Ideal for Freelance Architects + Small Scale Projects 12
A B O U T U S Project by n. is an architectural graphics studio specialising in the design of elegant graphic solutions for architects + design professionals. Our objective is to help architecture practices create beautiful drawings in Revit while achieving efficiencies in the production of drawing information and in the delivery projects from conception through to final realisation. As architects ourselves, we have experience in working with architecture and design studios that share our passion for producing beautiful graphic drawing output and imagery. Our full custom graphic revit templates are available to be purchased and downloaded from our website: projectbyn.com VISIT OUR SITE hello@projectbyn.com 13 © Copyright 2023 Project by n.