Download
1 / 9
90 likes | 112 Vues
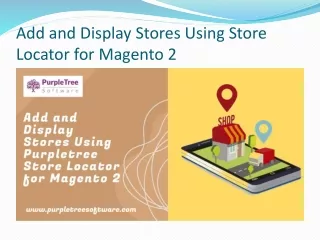
Using This extension is very useful for those business stores, which have multiple physical stores all around the world. see more details at:- https://bit.ly/2EXLPdd

E N D
Purpletree Store locator for magento 2 lets in magento admin customers to feature stores from the admin panel in order that customers you go to the website might get to know the precise place of the website physical shops. This extension may be very beneficial for those enterprise stores, which have a couple of multiple physical all over the global. Admin simply needs to feature the store information as soon as and person your visits the website could get the listing of shops with their Location in google map which is already incorporated in purpletreestore locator extension for magento 2.
To add store from admin, go to admin > Click Store Locator Menu from the left Menu. From there Click Manage stores. From there you would see a list of stores already added in-store locator, you can add or edit any store. To add any new store just click on Add New Store Button on top right side.
Now opens the form which have 3 tabs 1st one is Store Information, in here Admin can enter all the Store related info as follows: Store Name – Enter Store name over here, which would be the title of that store. Status - Select Status as Enable for this store to be visible in frontend else select Disable. Show View Page - Select Yes so that users can click on the store page from listing and can view details of the store along with store description, set No to show the Store in listing only, and no need for Store view page. Latitude - Enter the exact correct value here for store location, you can get this from Google maps. In URL 1st one is the Latitude value and 2nd one is Longitude as in the below screenshot. So here Latitude is 28.6129167, which is before Comma (,). Longitude – Enter the exact value for store locator, you can get this from Google maps. So here longitude is value after Comma (,), which is 77.227321
Country – Here just enter the country name. State – Enter State or Province over here. City – Enter your city name here. Postal code - Enter Postal or you can say Zip code here for store location. Address - Now enter the full address of the Store in this field. Enter the correct and full address for users to get the location. Phone Number - Here enter the Store Phone number
Store Description tab – In this tab, there is only one filed which is Store description, Enter full store description over here. You can use the WYSIWYG editor here for Designing HTML. Image Thumbnail - In this tab, Browse and select image for Store which will be visible in the Store locator listing page.
More Details of store locator for Magento 2 other related blog. Add and view stores in Magento store locator Use of Purpletree Store Locator for Magento 2