MacBook Screen Replacement: A Comprehensive Guide
E N D
Presentation Transcript
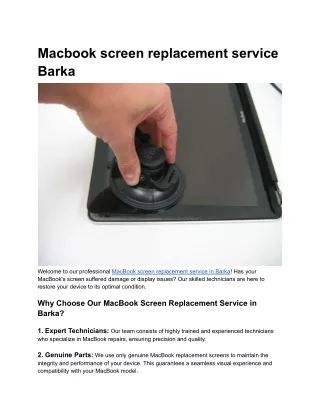
MacBook Screen Replacement: A ComprehensiveGuide IntroductiontoMacBookScreenReplacement WelcometoourdetailedguideonMacBookscreenreplacement.Inthis presentation, we'll walk you through the process of replacing a damaged or faulty screenonyourMacBook,ensuringyou havetheknowledgeandconfidencetotackle thistaskeffectively. WhyReplaceYourMacBookScreen? DamageorCracks IfyourMacBookscreeniscrackedordamaged,replacingit isessentialtorestore functionalityand visualclarity. DeadPixelsorDisplayIssues Deadpixels,flickering,orotherdisplayabnormalitiesindicatescreenmalfunction, necessitatingreplacementforoptimalperformance. Typesof MacBookScreens RetinaDisplay Found in newer MacBook models, Retina displays offer high resolution and vibrant colours,providingan immersiveviewingexperience. Non-RetinaDisplay OlderMacBookmodelsmay featurenon-Retinadisplays,whichofferstandard resolution and maybeeasiertoreplace.
PreparationforScreenReplacement GatherNecessaryTools Ensure you have the required tools, including screwdrivers, spudgers, and a replacementscreen compatiblewithyourMacBook model. BackupImportantData Before beginning the replacement process, back up your data to prevent loss in case ofanyunforeseen issues. Step-by-Step ReplacementProcess Step1:ShutdownandDisconnect Power off your MacBook and disconnect all cables, including the power adapter and anyperipherals. Step2: RemovetheBottomCase Use a screwdriver to remove the screws securing the bottom case, then carefully lift andremovethecase. Step3:DisconnecttheBattery Locatethebatteryconnector and gentlydisconnectitfrom thelogicboardto preventelectricaldamageduringthereplacementprocess. Step4: RemovetheOldScreenAssembly Using a spudger, carefully pry open the old screen assembly, taking care not to damagethesurroundingcomponents.
Step-by-StepReplacementProcess(Continued) Step5: InstalltheNewScreenAssembly Carefullypositionthenewscreenassembly inplace,ensuringproperalignment with theMacBookchassis. Step6: Reconnect CablesandBattery Reconnectthedisplaycablesandbatteryconnectortothelogicboard,securing themfirmlyin place. Step7: ReplaceBottomCaseandScrews Carefully reattach the bottom case to the MacBook and secure it with the screws removed earlier. Step8:PowerOnandTest Poweron yourMacBookandtestthenewscreentoensure itfunctions properly, checkingforanydisplayabnormalities. Conclusion ReplacingaMacBookscreenmay seem daunting,butwiththerighttools and knowledge,it'samanageabletask.Byfollowingourstep-by-step guide,youcan successfullyreplaceyourMacBookscreenandrestoreitsfunctionality.