Crash Course in HTML: Fundamental Concepts and Elements Overview
Join Craig Duckett for an engaging lecture on the fundamentals of HTML, covering the essential elements and attributes needed to create basic web pages. This crash course will explore different versions of HTML from its inception in 1993 to XHTML 1.1 in 2001, highlighting key changes and features over time. Perfect for beginners and those looking to refresh their knowledge, the session will dive into various HTML tags, their usage, and best practices for structuring web content.

Crash Course in HTML: Fundamental Concepts and Elements Overview
E N D
Presentation Transcript
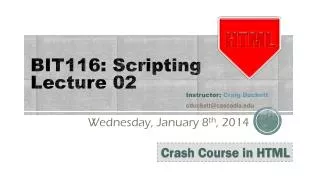
BIT116: ScriptingLecture 02 Instructor: Craig Duckett cduckett@cascadia.edu Wednesday, January 8th, 2014 Crash Course in HTML
HTML1 (1993) <A> <ADDRESS> <B> <BASE> <BLOCKQUOTE> <BODY> <CITE> <CODE> <DD> <DFN> <DIR> <DL> <DT> <EM> <H1> <H2> <H3> <H4> <H5> <H6> <HEAD> <HTML> <I> <IMG> <ISINDEX> <KBD> <KEY> <LI> <LINK> <LISTING> <MENU> <NEXTID> <OL> <P> <PLAINTEXT> <PRE> <SAMP> <STRONG> <TITLE> <TT> <U> <UL> <VAR> <XMP>
HTML2 (1995) <A> <ADDRESS> <B> <BASE> <BLOCKQUOTE> <BODY> <BR> <CITE> <CODE> <DD><DFN><DIR> <DL> <DT> <EM> <FORM> <H1> <H2> <H3> <H4> <H5> <H6> <HEAD> <HR> <HTML> <I> <IMG> <INPUT> <ISINDEX> <KBD> <KEY> <LI> <LINK> <LISTING> <MENU> <META> <NEXTID> <OL> <OPTION> <P> <PLAINTEXT> <PRE> <SAMP> <SELECT> <STRONG> <TEXTAREA> <TITLE> <TT> <U> <UL> <VAR> <XMP>
HTML3.2 (1997) <A> <ADDRESS> <APPLET> <AREA> <B> <BASE> <BASEFONT> <BIG> <BLOCKQUOTE> <BODY> <BR> <CAPTION> <CENTER> <CITE> <CODE> <DD> <DFN> <DIR> <DIV> <DL> <DT> <EM> <FONT> <FORM> <H1> <H2> <H3> <H4> <H5> <H6> <HEAD> <HR> <HTML> <I> <IMG> <INPUT> <ISINDEX> <KBD> <LI> <LINK> <LISTING> <MAP> <MENU> <META> <NEXTID> <OL> <OPTION> <P> <PARAM> <PLAINTEXT> <PRE> <SAMP> <SCRIPT> <SELECT> <SMALL> <STRIKE> <STRONG> <STYLE> <SUB> <SUP> <TABLE> <TD> <TEXTAREA> <TH> <TITLE> <TR> <TT> <U> <UL> <VAR> <XMP>
HTML4 (1998) <A> <ABBR> <ACRONYM> <ADDRESS> <AREA> <B> <BASE> <BDO> <BIG> <BLOCKQUOTE> <BODY> <BR> <BUTTON> <CAPTION> <CITE> <CODE> <COL> <COLGROUP> <DD> <DEL> <DFN> <DIV> <DL> <DT> <EM> <FIELDSET> <FONT> <FORM> <H1> <H2> <H3> <H4> <H5> <H6> <HEAD> <HR> <HTML> <I> <IMG> <INPUT> <INS> <KBD> <LABEL> <LEGEND> <LI> <LINK> <LISTING> <MAP> <MENU> <META> <NEXTID> <NOSCRIPT> <OBJECT> <OL> <OPTGROUP> <OPTION> <P> <PARAM> <PRE> <Q> <SAMP> <SCRIPT> <SELECT> <SMALL> <SPAN> <STRONG> <STYLE> <SUB> <SUP> <TABLE> <TBODY> <TD> <TEXTAREA> <TFOOT> <TH> <THEAD> <TITLE> <TR> <TT> <UL> <VAR> <XMP>
XHTML1 (2000) eXtensibleHTML <A> <ABBR> <ACRONYM> <ADDRESS> <AREA> <B> <BASE> <BDO> <BIG> <BLOCKQUOTE> <BODY> <BR> <BUTTON> <CAPTION> <CITE> <CODE> <COL> <COLGROUP> <DD> <DEL> <DFN> <DIV> <DL> <DT> <EM> <FIELDSET> <FORM> <H1> <H2> <H3> <H4> <H5> <H6> <HEAD> <HR> <HTML> <I> <IMG> <INPUT> <INS> <KBD> <LABEL> <LEGEND> <LI> <LINK> <MAP> <META> <NOSCRIPT> <OBJECT> <OL> <OPTGROUP> <OPTION> <P> <PARAM> <PRE> <Q> <SAMP> <SCRIPT> <SELECT> <SMALL> <SPAN> <STRONG> <STYLE> <SUB> <SUP> <TABLE> <TBODY> <TD> <TEXTAREA> <TFOOT> <TH> <THEAD> <TITLE> <TR> <TT> <UL> <VAR> The main difference between XHTML1 and HTML4 is that all tags, once opened, must be closed. There are also some restrictions about what tags can be nested inside each other.
XHTML1.1 (2001) <A> <ABBR> <ACRONYM> <ADDRESS> <AREA> <B> <BASE> <BDO> <BIG> <BLOCKQUOTE> <BODY> <BR> <BUTTON> <CAPTION> <CITE> <CODE> <COL> <COLGROUP> <DD> <DEL> <DFN> <DIV> <DL> <DT> <EM> <FIELDSET> <FORM> <H1> <H2> <H3> <H4> <H5> <H6> <HEAD> <HR> <HTML> <I> <IMG> <INPUT> <INS> <KBD> <LABEL> <LEGEND> <LI> <LINK> <MAP> <META> <NOSCRIPT> <OBJECT> <OL> <OPTGROUP> <OPTION> <P> <PARAM> <PRE> <Q> <RB> <RBC> <RP> <RT> <RTC> <RUBY> <SAMP> <SCRIPT> <SELECT> <SMALL> <SPAN> <STRONG> <STYLE> <SUB> <SUP> <TABLE> <TBODY> <TD> <TEXTAREA> <TFOOT> <TH> <THEAD> <TITLE> <TR> <TT> <UL> <VAR>
HTML5 (2008 Working Draft; 2012 - ?) <A> <ABBR> <ACRONYM> <ADDRESS> <AREA> <ARTICLE> <ASIDE> <AUDIO> <B> <BASE> <BDI> <BDO> <BLOCKQUOTE> <BODY> <BR> <BUTTON> <CANVAS> <CAPTION> <CITE> <CODE> <COL> <COLGROUP> <COMMAND> <DATA> <DATAGRID> <DATALIST> <DD> <DEL> <DETAILS> <DFN> <DIV> <DL> <DT> <EM> <EMBED> <EVENTSOURCE> <FIELDSET> <FIGCAPTION> <FIGURE> <FOOTER> <FORM> <H1> <H2> <H3> <H4> <H5> <H6> <HEAD> <HEADER> <HGROUP> <HR> <HTML> <I> <IFRAME> <IMG> <INPUT> <INS> <KBD> <KEYGEN> <LABEL> <LEGEND> <LI> <LINK> <MARK> <MAP> <MENU> <META> <METER> <NAV> <NOSCRIPT> <OBJECT> <OL> <OPTGROUP> <OPTION> <OUTPUT> <P> <PARAM> <PRE> <PROGRESS> <Q> <RUBY> <RP> <RT> <S> <SAMP> <SCRIPT> <SECTION> <SELECT> <SMALL> <SOURCE> <SPAN> <STRONG> <STYLE> <SUB> <SUMMARY> <SUP> <TABLE> <TBODY> <TD> <TEXTAREA> <TFOOT> <TH> <THEAD> <TIME> <TITLE> <TR> <TRACK> <U> <UL> <VAR> <VIDEO> <WBR> http://www.w3schools.com/tags/default.asp
The DOCTYPE A statement or declaration which tells the browser what version of HTML our file is using and therefore how the code should be rendered by the browser at view time. The DOCTYPE has to appear at the very top of the file, even before the opening HTML tag HTML3.2 DOCTYPE <!DOCTYPE HTML PUBLIC "-//W3C//DTD HTML 3.2 Final//EN"> HTML4 DOCTYPE <!DOCTYPE HTML PUBLIC "-//W3C//DTD HTML 4.01//EN" "http://www.w3.org/TR/html4/strict.dtd"> XHTML1 DOCTYPE <!DOCTYPE html PUBLIC "-//W3C//DTD XHTML 1.0 Strict//EN" "http://www.w3.org/TR/xhtml1/DTD/xhtml1-strict.dtd"> HTML5 DOCTYPE <!DOCTYPE HTML">
The HTML 5 DOCTYPE Universal Character Set Transitional Format 8-Bit http://en.wikipedia.org/wiki/UTF-8 Meta Tags http://www.w3schools.com/tags/tag_meta.asp <!DOCTYPE HTML"> <!–- case SENSITIVE, and OPTIONAL, but its use is highly recommended --> <html lang ="en"> <head> <meta charset="utf-8"> <title>A Groovy Page</title> </head> <body> . . . </body> </html> (DEMO) DOCTYPE
The Basic HTML Page The browser uses this information "behind the scenes" The browser uses this information To display page content Demo <html><head><title>Simplest HTML page</title></head> <body>Hello Everybody. What's happening? </body></html>
The Template HTML Page The browser uses this head information "behind the scenes" The browser uses this body information to display page content <h1> element displays a header of a larger font size based on the default styles of the browser <!doctype html><html lang="en"><head> <meta charset="utf-8"> <meta name="author" content="Rex Winkus"> <title>HTML Template</title></head> <body> <h1>Page Heading</h1> <!-- heading --> <p>Page Content</p> <!-- paragraph --></body></html> template.html
The Absolute & Relative Linking Absolute Linking A link that includes the entire http path Example http://programajama.com/foundations/rexwinkus/index.html Relative Linking A link that only includes the file path in relation to the files and folders in your remote directory Example blue/moon.html
Common Tags W3Schools: <p> tag
Back before HTML5, if you wanted to design a page into sections you had to use the <div> or "division" tag and creating a separate "id" or "class" for each section you wanted (we'll talk about divs, ids, and classes a bit later)
With HTML5, there are several new tags with this section functionality built in by default. You still need to position and format these sections using CSS, but you don't have to create separate or unique "classes" or "ids" anymore to do it.
Also: mention <span> here. W3Schools <div> tag
<!DOCTYPE html> <html lang="en"> <head> <meta charset="UTF-8" /> <title>Putting It All Together</title> </head> <body> <header><h1>My Page</h1></header> <nav> <a href="index.html">Home</a> </nav> <section> <article> <h2>My Article</h2> <p>Some Content</p> </article> <aside> <p>More information</p> </aside> </section> <footer><p>© Rex Winkus 2013 <a href="mailto:winkus.rex@gmail.com">Email Me</a><p></footer> </body> </html>
Images • SRC is required • WIDTH, HEIGHT may be in units of pixels or percentage of page or frame • WIDTH="357" • HEIGHT="50%" • Images scale to fit the space allowed • ALT tags (for "alternate") is text that gives a name for the image, and will appear in case the image is missing, as a mouseover popup, and in browser text readers for the visually impaired.<imgsrc="dude.jpg" alt="The Dude Abides">
Images This is "old school" – Now images are aligned now using CSS
Images <BODY> <imgsrc="dolphin.jpg" align="left" width="150" height="150" alt="dolphin jump!"> This is a very cute dolphin on the left!<br> This is a very cute dolphin on the left!<br> This is a very cute dolphin on the left!<br> This is a very cute dolphin on the left!<br> This is a very cute dolphin on the left!<br> This is a very cute dolphin on the left!<br> This is a very cute dolphin on the left!<br> This is a very cute dolphin on the left!<br> This is a very cute dolphin on the left!<br> This is a very cute dolphin on the left!<br> You can see text wrap around it<br> </BODY> </HTML> This is "old school"Now images are aligned using CSS
Note: I have not yet talked about color, tables, forms (including checkboxes, radio buttons, or select elements), or linking files in and out of sub-folders. I will be bringing these up—as well as a few other HTML features—as the quarter progresses. The use of color I will introduce with the next lecture when we move into CSS.
Cascading Style Sheets CSS1 (1996 Draft; 2000 Browser Support)to coincide with HTML4/XHTML1 CSS2 (1998 Draft; 2010 Browser Support) CSS3 (1999 Draft; 2012 Browser Support)to coincide with HTML5 http://www.csszengarden.com/
Lecture 2 Please begin working on the LECTURE 2 In-Class Exercises. When you have completed your ICE, call the Instructor over to verify your work. If you have questions about your work, please call over the Instructor to clarify. Once you have completed your ICEs, you are free to go for the day. If you don't finish your ICEs by the end of class, you will still get full credit for actively doing the work, but it is greatly recommended you finish any outstanding ICEs outside of class.