Download

1 / 17
170 likes | 284 Vues
Repairing and Reconditioning Tools. Tool Fitting. Objectives : . Identify and remove rust from tools in the lab with 100% accuracy Demonstrate the application of rust-inhibiting materials to metal surfaces in the lab with 100% accuracy

E N D
Repairing and Reconditioning Tools Tool Fitting
Objectives: • Identify and remove rust from tools in the lab with 100% accuracy • Demonstrate the application of rust-inhibiting materials to metal surfaces in the lab with 100% accuracy • Define proper repair techniques for split wood handles on a quiz in the classroom with 90% accuracy • Define proper replacement techniques of broken wooden handles on a quiz in the classroom with 90% accuracy • Demonstrate proper techniques for reshaping screwdriver tips in the lab with 100% accuracy • Demonstrate proper techniques for reshaping heads of driving and driven tools in the lab with 100% accuracy
Reasons to Learn • Why is it important to be able to properly identify and remove rust from tools? • Why is it important to be able to demonstrate the application of rust-inhibiting materials to metal? • Why is it important to define proper repair techniques for split wood handles? • Why is it necessary to define proper replacement techniques of broken wooden handles? • Why is it important to be able to demonstrate proper techniques for reshaping screwdriver tips? • Why is it important to be able to demonstrate proper techniques for reshaping heads of driving and driven tools?
Questions to answer • What do we need to know in order to be able to properly identify and remove rust from tools? • How do we properly demonstrate the application of rust-inhibiting materials to metal? • What do we need to know to define proper repair techniques for split wood handles? • What do we need to know to define proper replacement techniques of broken wooden handles? • What do we need to know to be able to demonstrate proper techniques for reshaping screwdriver tips? • What do we need to know to be able to demonstrate proper techniques for reshaping heads of driving and driven tools?
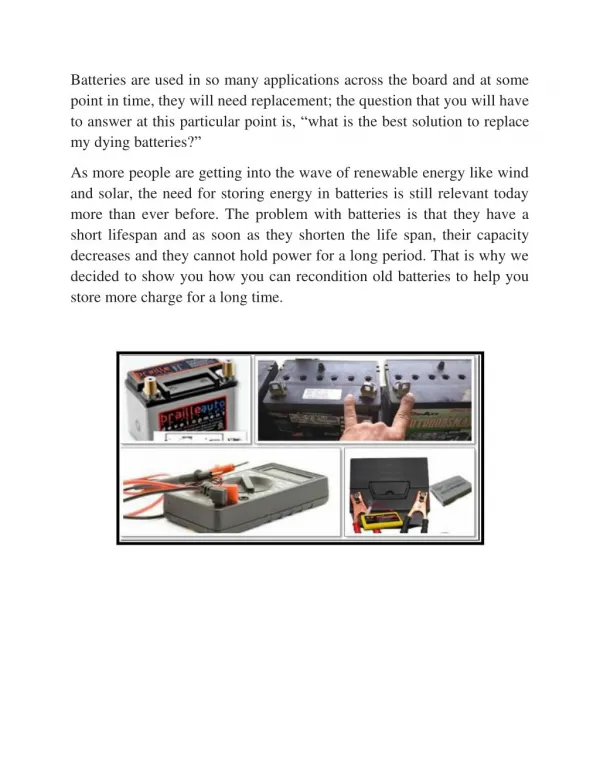
What do we need to know in order to be able to properly identify and remove rust from tools? • Light rust can be removed with solvents. • Pitting is an issue that requires more abrasive action such as, wire brushes, wheels, or emery cloth. • Wet sanding with 400 grit paper will smooth the finish • After sanding the metal should be dried and free of moisture • Oil should be applied to the tool surface to prevent future rust Fixable Not Fixable
How do we properly demonstrate the application of rust-inhibiting materials to metal? • Rust-resistant primers and paints are used to inhibit rust but are not suitable for tools that require a smooth or precision surface • Table tops of power tools can be protected by applying a thin coat of paste wax to the surface
What do we need to know to define proper repair techniques for split wood handles? • Sometimes handles can be repaired with wood glue by this process: • Split Handles: • Place tool in vise so the split can be forced open • Force the split open and apply glue to both surfaces • Close the split and clamp the handle to seal split • Wipe off excess glue • When glue is dry sand the handle as needed • Treat the handle with linseed oil and polish with a clean cloth
What do we need to know to define proper repair techniques for split wood handles? • Loose Handles: • Sometimes handles of hammers, hatchets, sledges, and axes become loose, this is a dangerous scenario and can be repaired by checking the existing wedge for tautness • Drive the wedge firmly into the handle or if it needs replaced, replace it • The handle of the tool may have dried over time which can shrink the handle • To remedy this the tool should be soaked in linseed oil over night
What do we need to know to define proper replacement techniques of broken wooden handles? • Handles are secured into tools through the eye of the head with a wedge. Handles generally break at the base of the tool head, so the remaining handle remnant and wedges still remain. These must be removed in order to install a new handle. • Removal: • Place the head in a vise • Using a ¼ or 3/8 in. drill bit, drill several holes into the wooden core • Drive the handle core out of the head with a drift or punch • Never burn out a handle core, this will damage the tool head
What do we need to know to define proper replacement techniques of broken wooden handles? • Installation: • Test fit the handle into the head • Reshape the handle as necessary to fit tool head using a rasp or file being sure not to remove too much, you want a snug fit • Head should be fitted to about ½ in from the enlarged part of the handle • Mark the handle on both sides of the head and remove the handle from the head • Reposition the handle in the vise • Use a handsaw to make a kerf across the longest center line of the handle, the distance should be 2/3 of the distance between the two marks made earlier • Reposition the handle in the vise and squeeze the kerf together • Run the saw down through the kerf again this creates an angled cut that is wide at the top and narrow at the bottom
What do we need to know to define proper replacement techniques of broken wooden handles? • Make a wedge as wide as the eye of the head that is thick enough to spread the cut handle • Attach the head to the handle snugly with a mallet • Place tool in the vise just below the head • Use a hacksaw to cut off excess handle (if any) • Drive wedge in squarely to spread handle inside eye • Use hacksaw to cut off excess wedge • Drive one or two metal wedges in at 90 degree angles to hold the wooden wedge in place • Place the tool head down into a container of linseed oil for several days • Remove the tool, rub down with oil, dry, and polish
Attaching handles to rakes, hoes, and forks: • These tools are driven into their handles, these handles have metal collars or ferrules, these collars act as a locking mechanism for the tool head to stay in place. Some ferrules have tangs that are hammered in to keep the ferrule from slipping up and down on the handle.
Attaching handles to shovels: • Grind the head off the rivet that holds the handle • Remove the rivet with a drift or punch • Spread the metal tube of the shovel to remove old handle • Drive new handle firmly into place • Close the metal tube of the shovel around the handle with a vise • Drill a hole in the handle through the rivet hole in the tube • Replace rivet securely
What do we need to know to be able to demonstrate proper techniques for reshaping screwdriver tips? • Obtain a screw the desired size you wish to drive with the screwdriver • Make sure the screwdriver tip is as large as the screw head if not obtain a wider screwdriver • Check the face of the grinding wheel for trueness • Make sure the tool rest is properly adjusted
What do we need to know to be able to demonstrate proper techniques for reshaping screwdriver tips? • Slowly push the flat end of the screwdriver tip across the tool rest and into the grinding wheel • Grind until the tip is flat, square, and even • Test fit into your screw • If the tip is too thick grind the flat sides of the tip slightly to narrow the blade • Dress the edges of the tip so they are equal to the width of the screw head
What do we need to know to be able to demonstrate proper techniques for reshaping heads of driving and driven tools? • Driven tools will eventually mushroom or flatten and push over the sides causing the tools to become dangerous. Fragments from a mushroomed tool crown (top edges) can break off when struck and cause injury to you or someone around you. • Examine the head of a similar tool in good condition • Reference the good tool as a guide and use a coarse grinding wheel to taper the edges of the crown • Always wear safety glasses, gloves, and make sure safety shields are in place • Finish the taper by twirling the tool so all corners are rounded at the crown
Summary: • We have defined repairing and reconditioning tools in an agriculture shop setting. • Being able to properly maintain tools will add life and value to our shop. • We understand that all tools can and will eventually become worn and will require repair or re-conditioning. • Knowing and utilizing the correct processes for these repairs will save us time and money.