Measuring Devices:
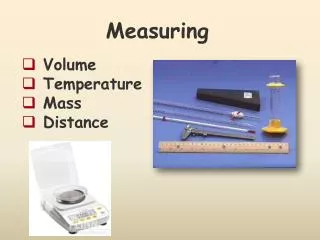
Measuring Devices:. MEASURING MASS . There are various types of laboratory balances. The triple beam beam balance you use may look somewhat different from the one in the Figure below, however all beam balances have some common features. . Carrying the Balance .


Measuring Devices:
E N D
Presentation Transcript
MEASURING MASS There are various types of laboratory balances. The triple beam beam balance you use may look somewhat different from the one in the Figure below, however all beam balances have some common features.
Carrying the Balance 1. Be sure all riders are back to the zero point.2. Place one hand under the balance and the other hand on the support (arm) to carry the balance.
Using the Balance 1. Zero the balance before you determine the mass of any substance. a) Slide all of the riders back to the zero point. b) Check to see that the pointer swings freely along the scale. c) Use the adjustment screw to obtain an equal swing of the beams, if necessary. You do not have to wait for the pointer to stop at the zero point. The beam should swing an equal distance above and below the zero point.You must repeat this procedure to "zero" the balance every time you use it.
2. Never put a hot object directly on the balance pan. Any dry chemical that is to be massed should be placed on paper or in a container. Never pour chemicals directly on the balance pan. Remember to mass the paper or container before adding the substance.
3. Once you have placed the object to be massed on the pan, move the riders along the beams beginning with the largest mass first. If the beams are notched, make sure all riders are in a notch before you take a reading. Remember; the pointer does not have to stop swinging, but the swing should be an equal distance above and below the zero point on the scale. 373.35 g
Meter stick. The simplest way to measure length is to use an ordinary meter stick. In the laboratory, our meter sticks are carefully calibrated in centimeters with a millimeter least count. That is, the millimeter is the smallest subdivision on the meter stick, which can be seen in Figure 1. This means the millimeter is the unit of the smallest reading that can be made without estimating. Figure 1. This meter stick is calibrated in centimeters (shown as the numbered major divisions) with a least count of millimeters. Figure 2. An example of a meter stick reading. The object's length is measured to be 41.64 cm. A measurement reading usually has one more significant figure than the least count reading of the scale. The least count of our laboratory meter sticks is 0.1cm and therefore a reading can be made to 0.01cm.
Vernier caliper. A vernier caliper (or vernier), is a common tool used in laboratories and industries to accurately determine the fraction part of the least count division. The vernier is convenient when measuring the length of an object, the outer diameter (OD) of a round or cylindrical object, the inner diameter (ID) of a pipe, and the depth of a hole.
Unlike a meter stick, the vernier caliper allows the fractional part of the smallest division to be accurately determined, not merely estimated. The vernier consists of a main scale engraved on a fixed ruler and an auxiliary scale engraved on a moveable jaw. The moveable jaw is free to slide along the length of the fixed ruler. The main scale is calibrated in centimeters with the smallest division in millimeters. The moveable auxiliary scale has 10 divisions that cover the same distance as 9 divisions on the main scale. Therefore, the length of the auxiliary scale is 9 mm. When the vernier is closed and properly zeroed (see Figure 4), the first mark (zero) on the main scale is aligned with the first mark on the auxiliary scale. The last mark on the auxiliary scale will then coincide with the 9-mm mark on the main scale. Figure 4. With the jaws closed, this is what a properly zeroed vernier caliper should look like.
A reading is made by closing the jaws on the object to be measured. Make a note of where the first mark on the auxiliary scale falls on the main scale. In Figure 5, we see that the object's length is between 1.2 cm and 1.3 cm because the first auxiliary mark is between these two values on the main scale. The last digit (tenths of a millimeter) is found by noting which line on the auxiliary scale coincides with a mark on the main scale. In our example, the last digit is 3 because the third auxiliary mark lines up with a mark on the main scale. Therefore, the length of the object is 1.23 cm. Figure 5. An example of a vernier reading. The object's length is measured to be 1.23 cm.
Care must be taken to insure that the vernier caliper is properly zeroed (see Figure 4). (With misuse, it is possible that the vernier will not read zero when the jaws are closed, thus leading to systematic errors.) The vernier in Figure 6 is improperly zeroed. Figure 6. An improperly zeroed caliper. In this case, the error is positive (+0.05 cm) and is to be subtracted from the measurement reading.
Graduated cylinder. The volume of an irregularly shaped object may be determined with the use of a graduated cylinder. To do so, fill the cylinder with water or other liquid and completely submerge the object in the liquid. The volume of the object is measured by calculating the difference in the water level before and after the object was submerged. Graduated cylinders are usually calibrated in milliliters or cubic centimeters (1ml = 1cc = 1cm3) but their least counts vary from 1ml to 10ml depending on the size of the vessel.