Sump Pump Installation Made Easy
The truth of the matter is that most basement waterproofing problems are not basement problems at all, but exterior drainage problems. So before you consider a sump pumps best installation, take a good look (in the rain, if you must) at the drainage around your home and you may also need to know the cost of a sump pump. Make sure that gutters aren't clogged, that downspout extensions move roof runoff at least 4 ft. beyond the foundation and that the soil within 3 ft. of the foundation slopes away from the house.<br><br>


Sump Pump Installation Made Easy
E N D
Presentation Transcript
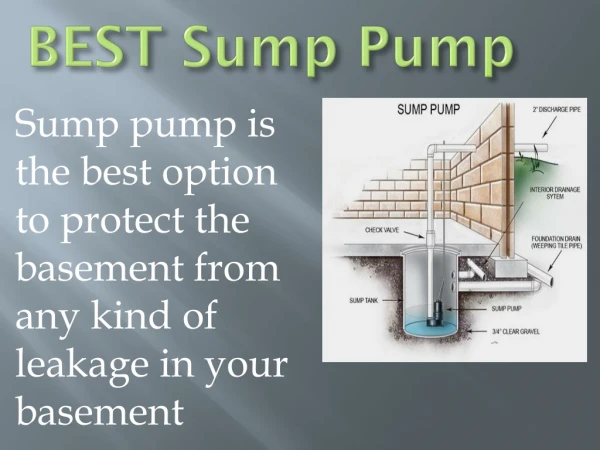
If you have water problems in your basement that you've been ignoring, there's a good chance you're losing up to half of your home's living space. And at the cost of housing these days, that's a substantial loss. While water that collects in a basement may originate from several possible sources, almost all such problems can be corrected. And for many, the simplest solution is to install a sump pump. While a pump doesn't cure the disease, it goes a long way toward treating the symptoms. And it does the job at a price that most of us can afford. The truth of the matter is that most basement waterproofing problems are not basement problems at all, but exterior drainage problems. So before you consider a sump pumps best installation, take a good look (in the rain, if you must) at the drainage around your home and you may also need to know the cost of a sump pump. Make sure that gutters aren't clogged, that downspout extensions move roof runoff at least 4 ft. beyond the foundation and that the soil within 3 ft. of the foundation slopes away from the house. Even if these conditions have been met, water may still accumulate in your basement. The problem may be a utility trench that invisibly channels runoff back to the house or a seasonally high ground-water table. In these cases, a sump-pump installation is a good solution. Many new homes have a sump pit already in place, complete with a drainage-tile system under the basement floor that's designed to channel water to the pit. If your home doesn't have this feature, and your water problem affects most of the basement, a retrofit system of this type is a good option. However, it's a big job that involves removing a 24-in.-wide swath of concrete and soil from the inside perimeter of the basement, adding gravel, draintiles and a pit and replacing the concrete. While this isn't an impossible DIY job, it's backbreaking work. You can pay a professional $2500 to $5000 to do it for you--not necessarily a bad price, though, considering that you'll perhaps double your living space.
A more manageable approach, in the right circumstances, is to install an isolated sump pit with several feet of gravel around it. To have this system installed may cost between $300 and $500. Or, you can devote a few weekends to the job and do it yourself for the price of the pump, pipe and fittings, pit liner, gravel and cement. This abbreviated system is most appropriate where water filteration only one area of the basement, or where the basement floor was poured over a gravel bed. Many homes built over the past 30 years have several inches of gravel beneath the concrete floor. The gravel was used to bring a slightly over-excavated floor back to grade. Because water seeks the path of least resistance and will migrate sideways before it moves up, moisture beneath the floor will move through the layer of gravel to a sump pit before flooding the floor. Unfortunately, it's difficult to tell if your basement floor floats on a gravel bed. The builder of the home or a neighbor who has done similar work might know. In most cases, though, you won't know until you break through the floor. Sometimes, a few holes bored through the floor with a hammer drill will reveal the information you need. Our installation We had a periodic water problem in one corner of the basement that, while localized, spread mold throughout the basement area. To create our sump pit, we broke out a 4 x 4-ft. area in the corner, dug down about 30 in., installed a plastic pit liner and surrounded the liner with coarse gravel.
The upper half of the pit liner is perforated to allow water to seep in and collect at the bottom. A float-activated submersible sump pump at the bottom of the pit automatically pumps out the water when it reaches a preset level. To finish the job, we poured a new concrete floor around the pit to match the original floor. Preparation Before breaking through a section of concrete floor, try to anticipate what might lie beneath it. Your sewer line's location should be apparent, and you'll find an accessible cleanout fitting near a wall. Your home's main water supply line may be less obvious. If your main waterline enters the house through a wall, you should be safe. If it enters through the floor, there's a remote chance that it passes under your chosen pit location. How will you know where the waterline is? Most service lines that are under the floor enter from the street, usually 4 to 6 ft. from the sewer pipe. If you can't estimate where the water service line might be, check with your local building-codes office. In most cases, these measurements are recorded at the time of installation which are very important for the whole house water filteration. There are several ways to break through a concrete basement floor. The economical approach is to use a heavy-duty hammer drill to bore perimeter holes every 4 in., plus additional holes within the area to be removed. After the holes are in place, break the concrete into pieces with a sledgehammer. If you use a rotary hammer, you can handle the job in a similar way and the work should go quicker. For the cleanest-looking repair, you might consider renting a demolition saw designed for cutting concrete. Use the saw to make 1-in.-deep perimeter cuts and then break out the inscribed area. However, be aware that concrete saws generate a great deal of dust, and most installers avoid them when possible. We opted to rent an electric jackhammer that uses 120-volt household power. If you decide to do the same thing, the rental cost should be about $30 for 4 hours. With this tool you can get through the hard part fairly quickly and with less strain. To reduce the raggedness of the cut edge, equip the jackhammer with a flat spade bit. Step 1: Starting Out
Plan to install the pit at least 8 in. from the foundation walls to avoid encountering the foundation footing. Then lay out the area of concrete floor to be removed, allowing for at least 6 in. around the pit. Cut the perimeter with the jackhammer, then slice through the interior in 8- to 12-in. bites. When the entire area is shattered, drive the jackhammer in at an angle and pry up to loosen the first few pieces of flooring. Then, simply collect the remaining chunks of concrete and carry them away in a bucket.
After the concrete is removed, dig the soil from the area. Using the liner to check your progress, excavate enough soil to allow at least 6 in. of gravel all around the liner. When the top of the liner sits level with the top of your basement floor, you've dug deep enough. Step 3: Starting Out
Set the pit liner in the hole and fill the surrounding void with coarse gravel. Hire a reliable plumber. A gravel aggregate of 3/8 to 1/2 in. in diameter will work well. Step 4: Starting Out
Add enough gravel to bring the grade 1 in. above the underside of the basement floor--3 in. below the top surface for a 4-in.-thick floor.
Then, level the gravel with a wooden float. This will place the bottom of the new concrete bed 1 in. above the original slab bed and, more importantly, 1 in. above the foundation footing. This way, water that seeps between the footing and the wall will simply travel down the 1-in.-wide gravel path to the pit. Step 5: Starting Out
With the pit liner locked in place by the surrounding gravel, it's time to cap the area with concrete. Mix one part cement, two parts sand and three parts gravel, and then add water. If you use one bag of cement, which was the amount required for our job, use about 5 1/2 gal. of water. Rough in the pour with a screed board and a wooden float, and make sure that the new concrete is packed tightly against the cut edges of the existing floor. Finally, finish the new floor patch by smoothing the surface with a trowel. When you're done, let the concrete cure for a day or two before installing the pump and piping.
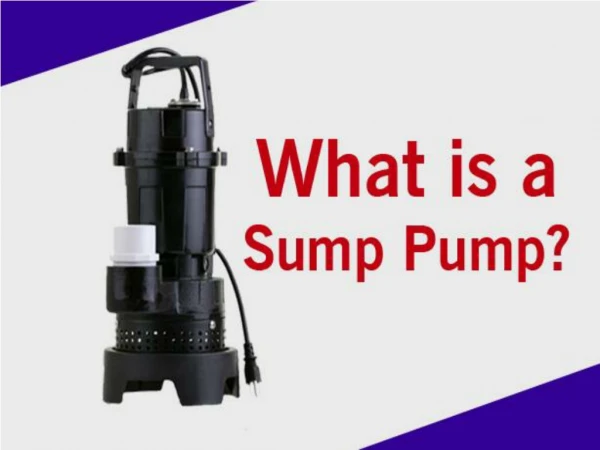
Submersible pumps generally cost between $75 and $125, and several manufacturers offer good-quality units. We chose a Hydromatic V25 model (Aurora/Hydromatic Pumps Inc., 1840 Baney Rd., Ashland, OH 44805). Considering the substantial goal of this project, it's not a good idea to economize when buying a pump. Expect your new pump to have a 1 1/2-in.-dia. threaded discharge port. Begin by threading a 1 1/2-in. PVC male adapter into the port and tightening it with pliers until it feels snug. Step 7: Installing the Pump
Then, using PVC cement, glue a short, schedule-40 PVC riser into the male adapter. The length of the riser will depend on the depth of the liner--the goal is to bring the riser just above the top of the pit liner.
Before setting the pump in the pit, bind its electrical cords to the riser with vinyl electrical tape or plastic electrical ties. Step 9: Installing the Pump
Then, gripping the pump's support ring and the riser, carefully lower the pump into the pit liner. Step 10: Installing the Pump
When the pump is resting on the bottom, check the float position. Locate the pump so that the float is several inches away from the liner and can therefore move up and down without interference. Then, install the liner lid over the riser. Some lids are
slotted, like the one shown, while others require that you bore a hole for the riser to fit. Step 11: Installing the Pump
With the pump in place, install a 1 1/2-in. check valve on the riser. This valve is absolutely essential because it keeps the pump motor from burning out. Without a check valve, water that is propelled up the riser would fall back into the pit each time the pump turned off. This small amount of water is often enough to activate the pump, which then runs for a few moments and shuts off again. The constant on/off sequence can quickly ruin a pump. The valve will usually come with rubber couplings and hose clamps. Be sure to position the valve with the arrow pointing up-the arrow indicates the flow direction. Then, tighten the lower coupling over the riser with a screwdriver or a nut driver. Step 12: Installing the Pump
Add a second riser section above the valve that extends into the space between the basement ceiling joists. The length of this piece will be determined by the position of
a horizontal run that exits the house, so cut this piece oversize for now. Then, secure the second riser to the upper coupling of the check valve with a hose clamp. Step 13: Moving Outside
Because ground-water discharge cannot be purged into the household plumbing system, piping must be connected to deliver the water outdoors. The easiest approach is to bore through the rim joist of the house and run the piping through the joist and outer wall. From there, it needs to be carried far enough from the house that water won't return to the basement. To avoid splintering the hole and damaging the exterior siding, it's best to bore from the outside in. To locate the hole on the outside, first bore a 1/4-in. hole through the rim joist and siding from the inside. Then, install a 2-in. bit in your drill and, using the small hole as a pilot, bore the finished hole from the outside. Alternatively, you could do the job with a holesaw, working from both sides of the wall and using the 1/4-in. pilot hole as a guide.
With the hole in place, slide a length of PVC pipe through the joist and bring the end near the vertical riser coming from the pump. Hold a 90-degree PVC elbow fitting against the two pipes and mark the height of the vertical riser. Trim the riser to exact length and assemble the pipes and elbow with PVC glue. Check to make sure that the riser is plumb before moving outdoors to complete the discharge piping. Step 15: Moving Outside
Once outside, cut all but 1/2 in. from the horizontal pipe that extends through the siding. Then, glue a 90-degree elbow to the end of the pipe so it points downward. Step 16: Final Connections
How you proceed from here depends on the slope of your yard and its specific landscaping features. The goal is to move the purged water away from the house in a manner that keeps it away. In cases where the yard slopes away rapidly, the pipe can discharge onto a long splash block, much like a downspout. In other cases, the purge pipe can be extended over the ground, or just underground, until it can terminate a safe distance away. As long as the horizontal run has sufficient slope, the pipe will drain after the pump stops and freezing shouldn't be a problem. After the discharge line is installed, caulk the rim joist opening on both the inside and outside of the house. Step 17: Final Connections
Use a high-grade, silicone-based caulk that's flexible enough to absorb the vibration of the pump. With the pump and all piping in place, finish the job by plugging the pump into a nearby GFCI-protected receptacle and test your work with about 5 gal. of water.