Download
1 / 3
30 likes | 62 Vues
14 Vines About Upholstered Glass 6 Drawer Tallboys That You Need to See

E N D
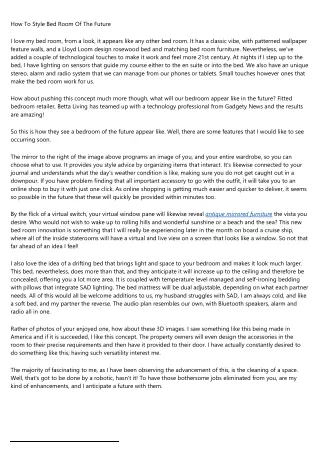
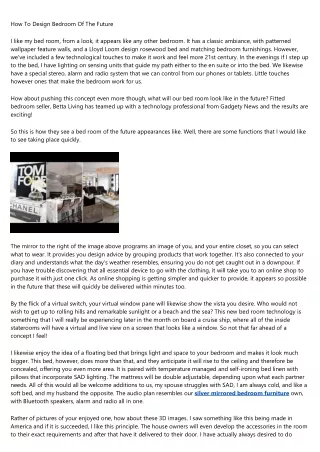
₤10 Mind-blowing Wooden-house Trays DIY Tutorial Hi there, sweet friends! You know how I love a good thrift store find. Well, I discovered these classic wood folding trays hiding at a local Goodwill and, at only $5 for a set of four, I couldn't pass them up! I don't know if you've ever tried trying to find folding trays, however let me inform you-- they can be so dang costly! A minimum of the stylish ones are. I had been browsing for a set for a while, however none were in a price variety I could justify costs. So, when I came throughout these folding trays at Goodwill, I thought it would be enjoyable to offer them a little chippy, farmhouse-style transformation! The thing I love about folding trays is that they're portable, so they can be moved practically anywhere you require them. In our house, we frequently use them as a makeshift side table, for eating in front of the TELEVISION or perhaps while I'm blogging from the couch. And after that I can save them away out of sight whenever they're not being used! It's actually truly practical, and I love that. The folding trays that I got at Goodwill were quite worn-- they had clearly been adoringly used for several years and had mirrored console table uk actually seen much better days! I wanted to provide them a vintage farmhouse feel while integrating some handpainted lettering. I truly enjoy how they turned out! MATERIALS set of folding trays chalk paint (I used Amy Howard in bauhaus buff + black). clear satin polycrylic (I've constantly used Minwax). medium-sized paint brush (I swear by Purdy brushes! They last permanently!). fine-tip paint brush. 50-grit sandpaper. pack of fabric rags. coloured chalk. printer paper (8.5 x 11 size). clear tape. fine-point marker, black.
ballpoint pen. determining tape. TOOLS. orbital palm sander. printer. PicMonkey (free online image editing tool). BlockPosters (complimentary poster making tool). DIRECTIONS. 1. Wipe down each folding tray with a moist fabric rag for a clean surface. Apply two coats of Bauhaus enthusiast (or another white) chalk paint, and let dry. (NOTE: With chalk paint, there's no need to sand the surface area before painting.). 2. As the chalk paint is drying, determine the length and width of the tray top. Use those dimensions to produce a typography design on PicMonkey. To do this, you'll choose "Design," then "Custom" and enter your measurements in pixels (I used unitconversions.org to convert from inches to pixels). Next, you'll pick your font styles (mine were Black Jack, Special Elite and Quicksand) and develop your style, waiting as a JPG. 3. Submit your design to BlockPosters by picking "Create Your Poster." Then, select "Upload Your Image" and customise your poster to be two pages large, portrait, letter and have a border. Select "Create My Poster" and print on two pieces of 8.5 x 11 paper, which you'll then tape together on the back so that the words line up on each page. 4. As soon as the chalk paint has actually completely dried, rub the coloured chalk onto the BACK of the printed poster (not the design side), and place it chalk side down centred on the tray top so that the design side is dealing with up. Next, tape the edges of the poster down onto the tray, and trace the overview of the style with a ballpoint pen. This will move the chalk to the tray top. Carefully remove the poster, and set aside. 5. Trace the chalk overview with a fine-point marker. When the ink is dry, use a slightly wet fabric rag to eliminate the chalk summary so that only the marker summary stays. 6. Fill out the chalk summary with black chalk paint using a fine-tip brush. Let dry.
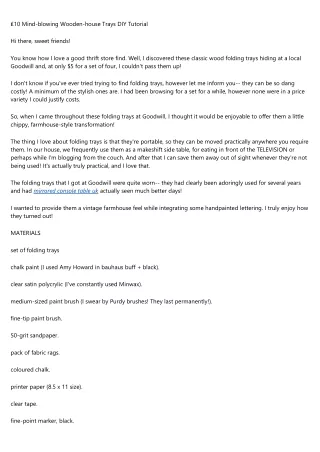
7. Then, utilize an orbital sander to (gently) smooth out the handpainted lettering and distress the edges of each folding tray. Clean down with a somewhat wet cloth rag to get rid of any remaining dust residue. 8. Lastly, use a couple of coats of polycrylic, and let dry overnight. And there you have it-- your really own distressed farmhouse trays for a fraction of the rate! I currently had many of the products on hand, so this job cost me less than $10 to make. What do you think? Would you make over a set of folding trays for your house? You can find the step-by-step tutorial on the blog site!