
FlexPlus
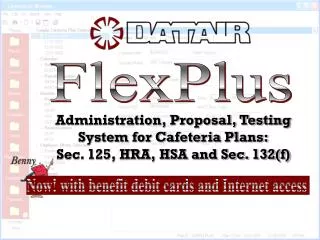
Now! with benefit debit cards and Internet access. FlexPlus. Administration, Proposal, Testing System for Cafeteria Plans: Sec. 125, HRA, HSA and Sec. 132(f). FlexPlus simplifies Cafeteria Plan administration including enrollment, contribution and claims processing, payment

FlexPlus
E N D
Presentation Transcript
Now! with benefit debit cards and Internet access FlexPlus Administration, Proposal, Testing System for Cafeteria Plans: Sec. 125, HRA, HSA and Sec. 132(f)
FlexPlus simplifies Cafeteria Plan administration including enrollment, contribution and claims processing, payment handling, and reporting for employers and participants. FlexPlus lets you import data from other sources and shares information with other DATAIR Systems: Pension Reporter Document System Client & Task Manager. FlexPlus produces proposal reports that illustrate the benefits of the plan for the employer and for the employee. FlexPlus performs all required Cafeteria Plan compliance tests, and monitors regulatory and plan design limits. FlexPlus options: plan documents, ACH direct deposit, MICR checks, and benefit debit cards with Internet access.
Demo Sections: Part 1 -- Navigation Part 2 -- Plan Set-Up Part 3 -- Claims Processing Part 4 -- Reporting Part 5 -- Debit Benefit Cards
Part 1: Navigation
To start, click on or select an existing plan. <New Plan>
Enter part of a name or number to “zero in” on your selection. Locating plans couldn’t be easier! Find existing plans by plan name, company name, EIN, TIN, or ID number.
FlexPlus lets you choose different ways to get where you want to go. Click buttons on the FlexPlus List Bar to jump to different sections of the system including…
Click buttons on the Activities List Bar to access FlexPlus processes including…
Or navigate the commands on the Menu Bar (this one takes you to the Contributions screen).
Or click an icon on the Tool Bar (in this case, Batch Print).
Part 2: Plan Set-Up
Plan Information Screen: Complete the Sponsor tab with company information. If company already exists in the database, just click Select Sponsor.
Complete the Plan Info tab. Be sure to select the Sub Type and indicate the beginning and ending Plan Year dates.
Tip: The 132(f) Transportation Reimbursement Plan may have the same Sponsor as the 125 plan, but must be set up as a separate plan.
The FlexPlus Info tab allows you to set certain default settings such as the check template and stub formats for checks and ACH advice reports.
Tip: The Electronic Communications settings here and on the View | Options | General screen lets you email reports to employees.
Set up Calendars to automate tracking of insurance premiums and participant benefit deductions. You can define multiple calendars (i.e., when groups of employees are on different payroll frequencies).
Enter the Start Date and choose the Frequency. Then click Recalc. The dates for the entire year will be highlighted. You can easily change selected dates by clicking on the calendar.
Now define each benefit: Use the Benefit Type box to choose a Premium benefit (e.g., health, dental, life, etc.) or a Reimbursement benefit such as MFSA or DCAP.
Next choose the specific Classification. You may also choose to funnel the premiums for “outside” insurance through the plan.
Tip: Only use the Available Starting date if participants may not enroll in this benefit earlier. Only use the Discontinued As Of date if participants may not enroll after that date. The System will then ignore Grace Period.
Set up the premium benefits Rates for any combination of Employee, Spouse and Dependent coverage.
For Reimbursement Accounts, FlexPlus lets you specify minimum payment amounts, and Run-out and Grace periods as permitted by the Plan…
Participant Eligibility may be defined for each benefit and for each group of employees.
Tip: You can specify an individual rate for a participant by entering their SSN, coverage level, and premium amount.
Employee Information: The only required fields are the first and last name; but the more information you enter, the better the system can do its job!
Tip: Just clicking on the icon when you are in the Employees folder will create a new Employee. Note: The system will prevent you from saving a new employee with the same SSN as an existing employee; it will allow an employee with the same name, but a different SSN.
Enrollment and mid-year changes are easy! Indicate the coverage level for elected benefits and FlexPlus calculates the payroll period premium.
Enter spending account pay-period elections and FlexPlus calculates the annual amount – and warns you when it exceeds the annual election.
Use the Check Designer to choose fields and to position them on preprinted checks. Define the font type, size and attributes for each field. You may also indicate where the check stub will appear.
Part 3: Claims Processing
Select the type of Benefit (e.g., MFSA or DCAP). Enter at least Date Incurred and dollar Amount. The more details you can provide, the better the system will catch duplicates. Adjudication may be done now or later.
Quick Tip: Do not deny claims that you feel may be in excess of the annual election – let FlexPlus keep track of that for you. Note running totals at bottom of screen.
FlexPlus will immediately alert you to a possible duplicate claim.
Additional claims handling features: Manual processing of “outside” benefit debit card transactions. Master Claims let you adjudicate claims across multiple reimbursement accounts.
FlexPlus lets you choose to adjudicate claims as you enter them on the Claims screen, or approve or deny them later on this Claims Processing Screen.
Use the search criteria at the top of the screen to identify a group of claims to process.
Use the search criteria at the top of the screen to identify a group of claims to process.
Click the Approve button to adjudicate all the claim items in the selected claim…
Now you can choose to pay all approved claims and/or premiums for a date range. Quick Tip: At year end, you will want to ignore your pre-set Minimum Check Payment Amount and pay out all approved claims.
FlexPlus generates pre-printed checks or, optionally, MICR Checks or ACH direct deposit payments.
FlexPlus prints detailed check stubs and ACH advice letters.