Tech/ME 140 Lecture 3
530 likes | 935 Vues
Tech/ME 140 Lecture 3. Design Process, DFM/DFA, and Rapid Prototyping Techniques. Product Development Process. The Design Process. Has 5 Steps: Step 1: Conceptualization Step 2: Synthesis Step 3: Analysis Step 4: Evaluation Step 5: Documentation. Divided into two: Typical design and

Tech/ME 140 Lecture 3
E N D
Presentation Transcript
Tech/ME 140 Lecture 3 Design Process, DFM/DFA, and Rapid Prototyping Techniques
The Design Process • Has 5 Steps: • Step 1: Conceptualization • Step 2: Synthesis • Step 3: Analysis • Step 4: Evaluation • Step 5: Documentation
Divided into two: Typical design and Atypical design Typical design relates to repetitive design Atypical design is for new product: May involve market study or research to determine customers’ need or other need May also emerge from request from customers Brainstorming Can be other unexpected opportunities Step 1: Conceptualization Or Recognition of Need & Definition of the Problem
Step 2: Synthesis • Literally means the combining of the constituent elements of separate material entities into a unified entity, to include: • Specification of material • Addition of geometric features • Inclusion of greater dimensional details to conceptualized design • Removes (filters) cost-adding features and materials • Employs DFM and DFA to ensure good design • About 70% of manufacturing cost is fixed in steps 1 and 2 activities
Step 3: Analysis • Analysis means determining/describing the nature of the design by separating it into its parts to determine the fit between the proposed design and the original design goals • Two categories of analysis are: • Mass properties analysis, and • Finite element analysis • Can be performed manually, but the computer increases analysis capability and reduces its time
Step 4: Evaluation • Checks the design against the original specifications • Often requires construction of a prototype to test for conformance • Often employs rapid prototyping technique • Rapid prototyping techniques to be discussed
Step 5: Documentation • Creating all necessary product and part views in the form of: • Working part drawings, • Detailed and assembly drawings • Addition of dimensions, tolerances, special manufacturing notes, and standard components • Creation of: • Part numbers, • Bill of materials, and • Detailed part specifications • Creation of product electronic data files used by manufacturing planning and control, production engineering, marketing and quality control
Design for Manufacture (DFM) Definition: DFM is the method of design for ease of manufacturing of the collection of parts that will form the product after assembly. Easy and cost efficient to manufacture Applies to all manufacturing processes It is relative to: Material Type Material Form and Shape Dimensional Tolerances Design and Shape Manufacturing Process Others
General Design Principles Symmetry eliminates reorientation Symmetry of a part makes assembly easier Asymmetric Part
Design for Assembly (DFA) Definition: DFA is the method of design of the product for ease of assembly. A process by which products are designed with the following in mind: Ease of assembly Contains fewer parts Takes less time to assemble Reduces assembly costs Easy orientation and insertion of parts
Design for Assembly Principles • Minimize part count • Design parts with self-locating features • Design parts with self-fastening features • Minimize reorientation of parts during assembly • Design parts for retrieval, handling, & insertion • Emphasize ‘Top-Down’ assemblies • Standardize parts…minimum use of fasteners. • Encourage modular design • Design for a base part to locate other components • Design for component symmetry for insertion
Component Elimination Example: Rollbar Redesign ‘..If more than 1/3 of the components in a product are fasteners, the assembly logic should be questioned.’ • 24 Parts • 8 different parts • multiple mfg. & assembly processes necessary • 2 Parts • 2 Manufacturing processes • one assembly step
Eliminated Parts are NEVER… • Received • Inspected • Rejected • Stocked • Outdated • Written-off • Unreliable • Recycled • late from the supplier! • Designed • Detailed • Prototyped • Produced • Scrapped • Tested • Re-engineered • Purchased • Progressed
Eliminate Secondary Operations • Re-orientation (assemble in Z axis) • Screwing, drilling, twisting, riveting, bending, crimping. Rivet
Eliminate Secondary Operations • Welding, soldering, gluing. • Painting, lubricating, applying liquid or gas. • Testing, measuring, adjusting.
DFM and Machining Not all designs can be machined by all machines Design must align with machining process Machining process must align with part form Material must match machine selected Material size must fit machine selected
DFM Ideas In Turning Processes Consider Turning: Solid cylindrical parts with multiple shapes Solid tapered parts with multiple shapes Prototypes of few orders Automated process for small hardware items like screws, nuts, bolts etc.
DFM Ideas In Milling Processes Milling is for solid prismatic parts Ideal for multi-axis machines Ideal for multi-sided parts Ideal for complex prototypes
Some DFM Ideas in Plastic and Composite Forming Consider: Simple designs Best/simplest available process Avoid too complex designs when possible The need for rounds and fillets The fact that plastic materials are in various forms and shapes Using biodegradable plastics when possible The difference in thermoplastics and thermosets Using only recyclable plastics when possible
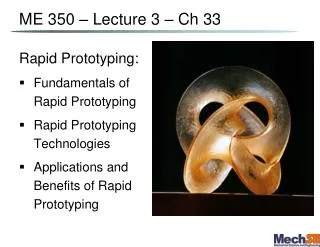
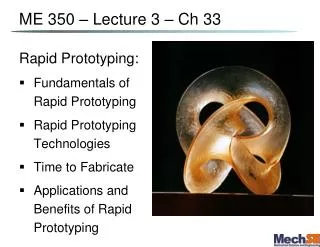
Rapid Prototyping • Rapid prototyping uses modern technology to produce a physical prototype from a CAD (Computer Aided Design) file in a matter of hours instead of days or weeks. • These techniques shorten the time required for product development. • The ability to translate a 3D computer model into a physical model in a very short time enables you to quickly evaluate your products to ensure a basic fit, form and function.
Advantages • Rapid prototyping techniques shorten the time required for product development. • The ability to translate a 3D computer model into a physical model in a very short time enables you to evaluate your products to ensure a basic fit, form and function.
Applications • Prototyping • Rapid tooling • Rapid manufacturing
Some of the Methods/Techniques • Stereolithography (SLA) • Solid Ground Curing (SGC) • Laminated Object Manufacturing (LOM) • Fused Deposition Modeling (FDM) • Selective Laser Sintering (SLS) • Ballistic Particle Manufacturing (BPM) • 3D Printing and Deposition Milling (3DP) • Direct Shell Production Casting (DSP)
Stereolithography (SLA) Stereolithography (SLA) is the most widely used type of rapid prototyping. Stereolithography produces 3D parts by curing successive layers of UV-curable resin. The parts of the resin that the laser cures in each layer are defined by a CAD model of the part. Because of the accuracy and ability to produce highly detailed parts, Stereolithography is excellent for concept models, masters, assemblies, and patterns for investment casting.
Solid Ground Curing (SGC) Solid Ground Curing (SGC), is somewhat similar to stereolithography (SLA) in that both use ultraviolet light to selectively harden photosensitive polymers. Unlike SLA, SGC cures an entire layer at a time. First, photosensitive resin is sprayed on the build platform. Next, the machine develops a photomask (like a stencil) of the layer to be built. This photomask is printed on a glass plate above the build platform using an electrostatic process similar to that found in photocopiers. The mask is then exposed to UV light, which only passes through the transparent portions of the mask to selectively harden the shape of the current layer.
Solid Ground Curing (SGC) • After the layer is cured, the machine vacuums up the excess liquid resin and sprays wax in its place to support the model during the build. The top surface is milled flat, and then the process repeats to build the next layer. When the part is complete, it must be de-waxed by immersing it in a solvent bath.
Laminated Object Manufacturing (LOM) • Profiles of object cross sections are cut from paper or other web material using a laser. The paper is unwound from a feed roll onto the stack and first bonded to the previous layer using a heated roller which melts a plastic coating on the bottom side of the paper. The profiles are then traced by an optics system that is mounted to an X-Y stage. • After cutting of the layer is complete, excess paper is cut away to separate the layer from the web. Waste paper is wound on a take-up roll. The method is self-supporting for overhangs and undercuts. Areas of cross sections which are to be removed in the final object are heavily cross-hatched with the laser to facilitate removal. It can be time consuming to remove extra material for some geometries, however.
Fused Deposition Modeling (FDM) FDM is one method to develop rapid prototypes or models. The FDM machine builds the part by extruding a semi-molten filament through a heated nozzle in a prescribed pattern onto a platform. ... available from Stratasys, the inventor of Fused Deposition Modeling technology
Selective Laser Sintering (SLS) In Selective Laser Sintering (SLS), thermoplastic powder is spread by a roller over the surface of a build cylinder. The piston in the cylinder moves down one object layer thickness to accommodate the new layer of powder. The powder delivery system is similar in function to the build cylinder. Here, a piston moves upward incrementally to supply a measured quantity of powder for each layer.
Selective Laser Sintering (SLS) A laser beam is then traced over the surface of this tightly compacted powder to selectively melt and bond it to form a layer of the object. The fabrication chamber is maintained at a temperature just below the melting point of the powder so that heat from the laser need only elevate the temperature slightly to cause sintering. This greatly speeds up the process. The process is repeated until the entire object is fabricated.
Ballistic Particle Manufacturing (BPM) Developed by BPM technology, it sprays material (wax) in 0.002" drops at rates of 12,500 drops per sec to build up slices. The elevator drops as slices are formed. Variable slice thickness is set by changing the flow rate. Part material supports are made from water soluble wax (polyethelene glycol) and are removed after completion by placing the model in water.
3-D Printing and Deposition Milling (3DP) 3D Printing and Deposition Milling (3DP) is a low-end version of additive fabrication technology. One variation consists of an inkjet printing system. Layers of a fine powder (either cornstarch or plaster) are selectively bonded by "printing" a water-based adhesive from the inkjet printhead in the shape of each cross-section as determined by a CAD (computer aided design) file. Alternately, these machines feed liquids, such as photopolymer, into individual jets that deposit tiny droplets as they are scanned to form a layer of the model. The liquid hardens after being deposited. Materials available for spraying include glue, wax, and photopolymer. Photopolymer Phase machines employ an ultraviolet (UV) flood lamp mounted in the print head to cure each layer as it is deposited.
Direct Shell Production Casting (DSPC) Direct Shell Production Casting (DSPC) is a revolutionary patternless casting process for metal parts in which the casting molds are generated automatically, directly from 3-D CAD data. With DSPC there is no need for physical patterns, core boxes or any other tooling, and no part-specific setup. The only "pattern" is the CAD design itself. DSPC enables production of a functional metal prototype or parts without a production tool. DSPC works by producing ceramic molds directly from a CAD file, which are then poured with any metal alloy, obtaining a fully functional part in a matter of days. A ceramic mold can be made with an integral core, which separates it from other rapid prototyping methods that have no way of incorporating complex cores in their plastic, wax, or paper patterns. DSPC is a proprietary technology developed at Soligen. Its core technology is based on Three Dimensional Printing (3DP) a patented technology invented at the Massachusetts Institute of Technology (MIT), and licensed exclusively, on a worldwide basis, to Soligen for the metal casting field of use.