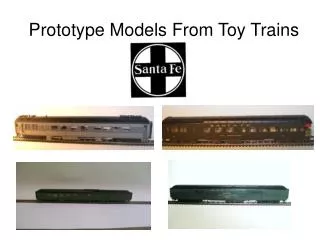
Modeling Toy Trains: Revamp The AHM/IHC Model for Realistic Detailing
Learn how to transform the AHM/IHC toy train model into an authentic replica by fixing errors, adjusting height, adding depth to doors, and more. Improve accuracy by adhering to prototype specifications and crafting intricate modifications for a closer-to-reality finish.

Modeling Toy Trains: Revamp The AHM/IHC Model for Realistic Detailing
E N D
Presentation Transcript
The one car that leads to many good models: Preserved 2602 Mail Rider Combine at Orange Empire Railway Museum The AHM/IHC Model
The one car that leads to many good models: The AHM/IHC Model: blank out remaining windows, new doors A “1: to: 1” conversion The AHM/IHC Model: back date to buffet library cars A “2: to: 1” conversion The AHM/IHC Model: re-detail combine as is to get the mail rider
First things to fix:Identify the errors that can be fixed Correct car height to 14’ – 3” standardRemove or replace overall details meant for “toy” market
First things to fix: Doors & Side Sill Fixed!! Café Lounge shown, but: Same changes apply to the Café observation Cut away the flat side channel & replace with true 3D channel Add depth to the door by recessing behind the side Note that heavyweight era cars did not have flush doors and windows!
First things to fix: The FloorFixed!! Mail Rider Combine shown. Same changes apply to ALL AHM/IHC cars Cut away the flat side channel & replace with true 3D channel: (Evergreen .100”) Cut out the original floor from nearly bolster to bolster & replace with a new floor. New floor made from Evergreen sheet flush with the bottom of the old floor depth. Cut and fit the replacement floor with great care! New Center sill channel made from Evergreen 5/16” channel
First things to fix: Roof attachment Fixed!! Centerline mounting Side/Lav mounting Longer bolt length Shorter bolt length Only bolt length & alignment matter! As seen from above Underneath Side glazing cut away Leave 1/16” – 1//8” attached to align sides Create a new attachment system; Cut a 2” long 10-24 brass bolt to the correct length, Imbed a matching nut into blocks of scrap styrene glued inside the roof
Pick a Prototype to model:The “Rules” • The “cant’s”: • The die work molded into the sides determines which prototype can be done, • You can’t mix & match side components between the AHM cars because of letter board height, “belt rail” and window rivet patterns. • The “can do’s” • The car length can be changed to match a chosen prototype, • Window & door rearrangement is fair game.
Pick a Prototype to model:Introducing “Flat Kit Side Scrabble” No “belt rail”, so this car is not an option Has a “belt rail”, so this car is an option Use 2 AHM combines, plug windows, splice to 83’ • Example showing the café lounge made from two café observations • Kitchen side Note: Freight cars have a “B” and “A” end, passengers cars are not so obvious! The hand brake housing is normally inside the vestibule, except for head end cars & cars with out vestibules. (generally, but not always!) Instead, think of “aisle side” or “kitchen side” Published floor plans reveal window spacing • Aisle side
Flat Kit Side Scrabble Extreme, since only selected parts of the sides of 2 cars were reused 3 • Kitchen side This scheme will require a new floor and creation of vestibules, Not hard to do, really! Locate cuts next to an existing seam or window edge to hide the resultant splice 1 2 3 4 5 6 7 8 9 10 11 12 • Aisle side 6 2 3 4 5 1 7 8 9 10 11 12 • Aisle side
Flat Kit Side Scrabble The café lounge. The new floor as a base to assemble the side pieces Fill recessed side panels Salvaged & modified ends from the café obs Mark center line, truck centers • Aisle side • Bottom view Cut notches for vestibule doors & steps • Kitchen side Sizing and cutting the floor is the most “fussy” step, it must be correct dimensionally, true edges, square corners. Use a good pair of calipers to measure the interior width of an intact car near the floor to determine the replacement floor width. The length is the final side length, plus the width of the two vestibules. Maintain the overall car length. Reference the floor plan for dimensions!
Flat Kit Side Scrabble The café lounge. The new floor as a base to assemble the side pieces • Top view • Lounge seating • Café seating • Kitchen • Aisle/passage way Assemble the side pieces as flat parts first, then join to each side to the floor. Working with the parts as flat subassemblies allows for an easier time to check dimensions from side to side and match to the floor The interior partitions aid in squaring and bracing the assembly. Note that the width is EXACTLY the same as the floor. • Next, • the ends …
Flat Kit Side Scrabble The café lounge. Build & detail the vestibule ends Build new vestibule ends from 0.020” sheet Build interior doors & trim with strip stock Exterior doors also made from 0.020” stock Assembled & detailed: Standard for ALL cars in black, Unique to this conversion in RED Interior brace end Window sills Door edges Kitchen door Door sill Notch interior partitions to allow clearance for glazing left on roof Stirrup steps Salvaged end Diaphragm Body mounted KD’s Warning! Detail to the level you desire, this example was done to enter in a contest ! Air, steam & signal lines Marker light brackets Door handle Cut levers Vestibule door Grab irons Vestibule steps If your workbench isn’t messy by now, you’re not using it!
Flat Kit Side Scrabble The café lounge. Build & detail the floor ends Coupler yoke (resin) Assembled & detailed: Standard for ALL cars in black, Unique to this conversion in RED Body mounted KD’s S/E Valve box (2) Steam line Air, & signal lines APWS air tank APWS water tank Stirrup steps Waste chute Waste chute Salvaged truck bolster UC Brake Set Vapor traps (2) UC Brake Valve & Lines Warning! Detail to the level you desire, this example was done to enter in a contest ! Or be required to run your cars up-side down every April 1st. Brake levers & rods Battery boxes (resin) If your workbench is TOO messy, you can’t find anything!
Flat Kit Side Scrabble The café lounge. Build & detail the roof : Part 1 kitchen end, aisle side. The roof is a model within a model, especially so for diners with A/C. “wind vane” vent: 1/8” tube, formed aluminum cap, 0.010” vane Roof rivet strips 0.005” ‘Mushroom” vent 1/16”rod + tube Grab irons (various locations) Steam line Box vent: 0.010” base flange, 0.030” body, angle & sheet top Lid stop brace: brass shim “Ice hatch” 0.020” sides , 0.010” lid, 0.005” hinge leaf & 0.010 rod hinge , brass wire handle, Gutters, scale 1” x 2” strip preformed & glued on edge Assembled & detailed: Standard for ALL cars in black, Unique to this conversion in RED Waste chute Battery boxes (resin) “box” vent Warning! Detail to the level you desire, this example was done to enter in a contest ! ‘Mushroom” vent 1/16”rod + tube Hand brake chain housing If you can’t FIND your workbench , The maid quit!
Flat Kit Side Scrabble The café lounge. Build & detail the roof : Part 2 kitchen end, kitchen side. Note that these details could also be added to the café-obs, minus the “scrabble”. The roof is a model with a model, especially so for diners with A/C. Assembled & detailed: Standard for ALL cars in black, Unique to this conversion in RED Pantry area ice hatch: 0.010” base flange , 0.030” body, 0.010” lid, 0.005” hinge leaf & 0.010 rod hinge , brass wire handle, Small grab on side of hatch Box vent : sq tube Work platform: shim brass support legs, 2” x3” strip boards (3), scribed wood graining Long grab iron with ladder notches (various locations) Gutters, scale 1” x 2” strip preformed & glued on edge Warning! Detail to the level you desire, this example was done to enter in a contest ! Tichy rivets Long grab iron with ladder notches If can SEE your workbench from the other side of the room, Fire the maid …
Flat Kit Side Scrabble The café lounge. Build & detail the roof : Part 3 lounge endS/E A/C hatch The roof is a model with a model, especially so for cars with A/C. Hatch cover hold down dogs: 0.010” X 0.015” flat brass bar Assembled & detailed: Standard for ALL cars in black, Unique to this conversion in RED Roof vent , round tube trimmed & capped Hatch cover: 0.010” sheet, creased & bent for “peak”, W/ rivet detail Hatch base: 0.030” sheet, creased & bent for “peak” ‘Mushroom” vent 1/16”rod + tube Long grab iron with ladder notches (various locations) Gutters, scale 1” x 2” strip preformed & glued on edge Warning! Detail to the level you desire, this example was done by someone allegedly NUTS! Because your stuff is now on EBay!
Flat Kit Side Scrabble • Lots of “work” so, if not building a model for a contest, why bother? • Passenger train consists, unlike freight trains, had relatively constant consists. • Santa Fe cars were of a unique appearance, and only a few cars are needed to fill out a consist. • The old AHM/IHM cars can be brought up to the current state of the art in appearance to work well with new offerings from Branch Line and Walthers Time to wake up, clinics almost over!
Some other cars to consider: A “1: to: 1” conversion but, every window is replaced! The AHM/IHC 12-1 sleeper conversion to a 16 section tourist sleeper A “2: to: 1” conversion, described in nauseous detail in the other clinic The AHM/IHC diner, rearranged ”scrabble style” Consider detailing the AHM cafe/obs: The AHM/IHC 12-1 sleeper conversion to a 3-2-obs A “1: to: 1” conversion, every window is replaced, unnecessary now with the Walthers 3-2-obs To a higher level of detail….. Painted in two-tone grey…….
Prototype Models From Toy Trains • A debt of gratitude to the many authors, editors, prototype photographers represented in the Society publications, all the information you could want is found there! • Thanks for your time and attention! • If you’d like a copy of this presentation, email me at: tyesac@aol.com • Any questions? Ship and travel Santa Fe -All the way!