Download

1 / 25
270 likes | 427 Vues
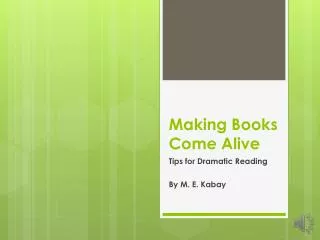
MAKING BOOKS WITH CHILDREN. Picture It! Publish It! Read It!. Why Create Books?. Integration: Making picture books draws, in a natural way, on children’s abilities to think and express themselves through speaking and visualizing.

E N D
MAKING BOOKS WITH CHILDREN Picture It! Publish It! Read It!
Why Create Books? • Integration: Making picture books draws, in a natural way, on children’s abilities to think and express themselves through speaking and visualizing.
2. Documentation: By making books with children you can capture and record meaningful experiences, while at the same time, create a lasting object that can be read and re-read time and again. Books create lasting memories!
3.Validation: When you make books with children you demonstrate that you value their thoughts, ideas and abilities.
4.Communication: Making books provides opportunities for children to express feelings, ideas, interests, and creativity for themselves or for public sharing.
5.Collaboration:Making books with your whole family provides your child with an opportunity to contribute to a shared effort in a true partnership.
6.Coordination: Making picture books is a way for your child to use many fine motor skills; as well, it provides your child with many opportunities for problem solving.
7.Motivation: Children love to make books. It is a highly motivating activity enjoyed by children of all ages and abilities, particularly children who are just learning to read and write. Plus, books can be read and re-read for many audiences. (Brewster, 1997)
GETTING STARTED!What will we write about? Look for opportunities to turn an experience, special event or activity into a book idea: a trip to the store a birthday a favorite recipe
Use simple patterns from familiar books: • Once upon a time… stories • Repetitive stories (I was walking down the road. Then I saw a….) • Cumulative stories (On Monday I…) Cause/Effect (If you give a ___ a ___ then he’ll ____...) 4. Rhyme/Rhythm (change the words of songs and nursery rhymes )
4.Opposites (In and Out; Up and Down) 5.Counting Books (The Number of People In My Family) 6.Alphabet Books (My Food Alphabet, An Alphabet of Pets) 7.Time Sequence (time of day, days of the week, months of the year)
Write books about one concept: I Can… I Like… My Brother My Dog At the Store Count With Me
Write information books: Some Things You Should Know About… How To Make… Come With Me To… An Alphabet of … All About…
SUPPLIES • Look for inexpensive materials around the house at yard sales in dollar stores or discount shops
A SIMPLE HOMEMADE BOOK • Take several (4-6) sheets of unlined white paper and fold in half (You can also use a piece of colored paper as a cover). • Staple or sew pages together with yarn or dental floss.
3. Hand write the story or type on the computer and print out. Cut and paste on the appropriate page.
A SIMPLE HARDCOVER BOOK Materials: • White computer paper • Paper fasteners • Single hole punch • 2-3 squares of 8-1/2x11" fun foam • 2 squares (5”x5”) light weight cardboard • Ruler • Glue or glue gun
1. Cut 4-8 (or as many as you need for the book your child has written) sheets of computer paper into 5 by 5 inch squares. Use a ruler and pencil to section off a 1 inch section by the left side of one of the sheets of paper.
2. Using a single hole punch, punch two or three holes along the side making sure you are far enough in from the margin.
3. Cut two pieces cardboard (5”x5”) from a cereal box or similar light weight card stock for the front and back cover.
4. Use the hole punch to punch through the cardboard. It's a little harder to punch through. 5. Place the paper between the cardboard covers and line up the holes.
6. Put the paper fasteners through the holes in the cardboard and fold back the ends to secure in place.
Tip: For a nice effect cover the cardboard by gluing fun foam, colored paper or cloth to the front and back covers before fastening.
For more information about PICTURE IT! PUBLISH IT!READ IT! Contact Dr. Jane Baskwill (902) 457-6189jane.baskwill@msvu.caDr.Mary Jane Harkins(902) 457-6595 maryjane.harkins@msvu.ca Faculty of EducationMount Saint Vincent University166 Bedford Highway,Halifax, NS B3M 2J6Produced with the support from the Canadian Council on Learning, Knowledge Development Grant, 2007