Download
1 / 33
330 likes | 473 Vues
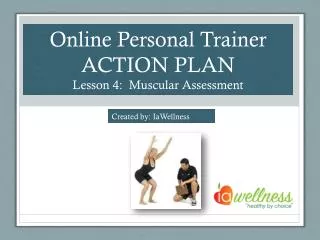
Online Personal Trainer ACTION PLAN Lesson 4: Muscular Assessment. Created by: IaWellness. Control Panel (bottom of screen). Click the “Pause” button located on the bottom of your screen. You will now have control of the slides. .

E N D
Online Personal Trainer ACTION PLAN Lesson 4: Muscular Assessment Created by: IaWellness
Control Panel (bottom of screen) Click the “Pause” button located on the bottom of your screen. You will now have control of the slides. After you have read and understood each slide, click “Next Slide” If you need to go back to a previous slide, click “Previous Slide”
Functional Movement and Resistance Training Lesson 4 will review the first TWO Phases of the Functional Movement and Resistance Training Components • Stability and Mobility • Movement The focal point of this lesson is to assess the body’s ability to move through its most basic and fundamental movements without limitations and pain.
PHASE 1 Stability and Mobility • The goal of the Stability and Mobility Phase is to “develop postural stability throughout the kinetic chain without compromising mobility at any point in the chain.” • In simpler terms, the body parts that should be stable are stable, and the body parts that move should move correctly which leads to postural stability. • Example: Your spine should be stable AND your ankles should be mobile • Onceyouhave that stabilityyoucan startlearninghow to move your body. This lesson will help you understand the terms mobility and stability.
PHASE 1 Stability and Mobility (cont.) • Your initial posture will determine how well youmoveor if you have a high risk of injury when exercising and moving. • Proper posture helps your body absorb and distribute forces throughout your body evenly. It also reduces your risk of injury in sports, exercise and day-to-day activities (house work, gardening, reaching in the back seat, etc).
Definitions • Mobility: The combination of muscle flexibility, joint range of motion and a body segment’s freedom of movement. • Stability: The ability to maintain posture and/or control motion. Stability can be divided into two categories—static stability and dynamic stability. • Static Stability: Assessed during single leg stance • Dynamic Stability: Assessed during functional movement such as pushing, pulling, stepping, squatting, running, jumping, etc.
Phase 1: Assessment • Assessing yourself can be challenging and not the most accurate. Find a friend that can help you. Workout buddies can keep you accountable and help you maintain proper form. If you are doing this assessment by yourself, do it in front of the mirror. Assessment: Using the Functional Movement System (FMS): • Shoulder Mobility (and Clearing Test) • Rotary Stability (and Clearing Test) • Trunk Stability Push Up (and Clearing Test) *There is a clearing test at the end of each screen because sometimes injuries can go undetected by the testing alone. This movement is not scored; it is simply performed to observe if there is a pain response. If pain is produced, a positive is recorded and a score of 0 is given to the entire test.
Phase 1: Assessment Scoring: The scoring for the FMS is very simple. There are four possible scores for each test. The scoring is as follows: 3 Points= NO movement problems 2 Points= MINOR issues (Small limitations in movement) 1 Point= MAJOR issues (Large limitations in movement) 0 Points= PAIN associated with movement (a medical professional should perform a thorough evaluation of the painful area)
Shoulder Mobility Purpose Testing Procedure Feet together Make a fist in each hand (thumb inside the fist) Testing Right Shoulder:At the same time, reach your right fist over your right shoulder (Palm on neck/upper back) and reach your left fist under (Knuckles on lower back) Get your fists as close together as possible, but as soon as you set them down, do not shimmy closer. ** reverse to assess the left arm • The shoulder mobility screen assesses shoulder range of motion, and requires normal scapular mobility and thoracic spine extension. ** You will need a partner to help you measure!
Shoulder Mobility Scoring Diagram • 3 Points = Fists are within one hand length • 2 Points= Fists are within one and a half hand lengths • 1 Point= Fists are not within one and a half hand length • 0 Points= Any pain associated with any portion of this test
Shoulder Mobility Clearing Test Scoring Diagram • The test is performed by having the individual remain in the same stance and place his or her hand on the opposite shoulder. • Lift up the elbow to be parallel to the ground. This clearing test should be repeated three times in a row, and then the opposite side should be performed. • This clearing exam is necessary because shoulder impingement sometimes can go undetected by shoulder mobility test alone.
Rotary Stability Purpose Testing Procedure Get on your hands and knees. Make sure your hands are under your shoulders and knees are under your hips. Keep your toes pulled toward your shins. See Next Slide for The Testing Procedure. Try testing procedure 3 first, if you fail, try for a 2! • The rotary stability pattern observes multi-plane pelvis, core and shoulder girdle stability during a combined upper and lower extremity movement.
Rotary Stability Testing Procedure Scoring a 2 TRY FOR A 3: At the same time, reach your right hand forward and right leg backward, like you are flying. Next touch your right elbow and right knee (in the middle) Repeat LEFT side ** Extend Touch Extend Rest Testing Procedure Scoring a 3 • TRY FOR A 2: At the same time, reach your right hand forward and left leg backward. • Next touch your right elbow and left knee (in the middle)- if you maintain balance and complete the task, you earn a 2. • Repeat LEFT side ** Extend Touch Extend Rest
Rotary Stability Scoring Diagram • 3 Points =Performs a correct unilateral repetition (right and right/ left and left) • 2 Points= Performs a correct diagonal repetition (right arm and left leg/left arm and right leg) • 1 Point= Inability to perform a diagonal repetition. (loose balance or can’t touch knee to elbow) • 0 Points= Any pain associated with any portion of this test
Rotary StabilityClearing Test Scoring Diagram This clearing exam is necessary because back pain can sometimes go undetected by movement screening. The instructions to perform the clearing exam are as follows: 1. Resume the starting position. 2. While maintaining contact with your hands on the floor, rock back to your heels. 3. Lower your chest to your knees, reaching your arms in front of you on the floor. ** If you have practiced yoga, this clearing test looks like a “Childs Pose”
Trunk Stability Push-Up Purpose Testing Procedure Lie face down with your arms extended overhead and your hands shoulder width apart. Pull your thumbs down in line with (forehead for men, chin for women) With your legs together, pull your toes toward your shine and lift your knees and elbows off the ground. While maintaining a rigid torso, push your body as one unit into a push-up position. If you can perform this movement, you earned a 3. • The Push-Up movement pattern tests the ability to stabilize the spine, and the upper-body symmetrical pushing movement.
Testing Procedure Scoring a 2 Trunk Stability Push-Up • If you are a male and can not perform a push-up while hands are align with the forehead, align your hands with your chin. Try again! • If you are a female and can not perform a push-up while hands are align with the chin, align your hands with your clavicle. Try again!
Trunk Stability Push-Up Scoring 3&2 Scoring 1&0 • 3 Points =Men perform a push-up with thumbs aligned with the top of the head (forehead). Women perform a push-up with thumbs aligned with the chin. • 2 Points=Men perform a push-up with thumbs aligned with the chin. Women perform a push-up with thumbs aligned with the clavicle. • 1 Point=Men are unable to perform a repetition with thumbs aligned with the chin. Women are unable to perform a repetition with thumbs aligned with the clavicle. • 0 Points= Any pain associated with any portion of this test
Diagram Trunk Stability Push-Up
Trunk Stability Push-UpClearing Test Scoring Diagram A clearing exam, a prone press-up, is performed at the end of the trunk stability push-up screen. This clearing exam is critically necessary because back pain may sometimes go undetected. Lie on your stomach to place both hands (palms down) beneath your shoulders and then press the chest off of the floor by extending the elbows, arching the back as much as possible and keeping the hips in contact with the floor. ** If you have practiced yoga, this clearing test looks like the “Cobra Pose”
PHASE 2Movement The focus of Phase 2 is on training movement patterns. Building on Phase 1 training, the goal is to help you develop good movement patterns and improved mobility within the kinetic chain without compromising stability. • The training focus is on the five primary movements: • Bend and lift (squatting) • Single leg movements (walking, stepping up and lunging) • Pushing • Pulling • Rotation
Making Improvements using Corrective Movements • You can improve your dynamic posture through a series of corrective exercises that strengthen the weak parts of your body and movement patterns, and improve range of motion in joints and muscles that are tight and stiff. • Corrective exercises are often low-impact exercises that address your body's posture and poor movement patterns. • If you have poor posture, perform corrective exercise twice a day. Try these simple exercises in front of a mirror to check your posture.
Corrective Exercises for Shoulder Mobility Corrective Exercises: If you scored a 2, one of the recommended exercises is the “core board squat and reach,” which can be viewed at http://www.youtube.com/watch?v=_WwAE-MpXhU. This exercise improves shoulder mobility and can assist with thoracic extension, which many times can be a limiting factor. If you scored a 1, you can perform the “wall sit with shoulder press.” This can be viewed at http://www.youtube.com/watch?v=HtaeEh59zAc or is the picture to the right.
Corrective Exercises for Rotary Stability If you scored a 2, the recommended corrective exercise would be a 90-degree hip flexed rotation without assistance. To see an example of the corrective exercise for a score of 2, go to http://www.youtube.com/watch?v=jL18vr44h0g If you scored a 1, the recommended corrective exercise would be a 90-degree hip flexed rotation with assistance (see picture) as well as general rolling on a foam roll.
Corrective Exercises for Trunk Stability Push-up If you scored a 2, the recommended corrective exercise would be a push-up walkout. To see an example of the push-up walkout, go to http://www.youtube.com/watch?v=x9vFi2sP6LE If you scored a 1, the recommended corrective exercise would be a progressive incline push-up (wall, then table with progressively lowering heights, then floor).See pictures to the right.
RUNNING • Most people who buy gym memberships quickly jump on a treadmill the first chance they get. Most injuries occur during of a movement (or impact with the ground), not the actual movement. This means that you are more likely to injure yourself landing from a jump rather than the actual jumping. • Running without proper posture and alignment can be an unproductive fitness strategy and lead to unwarranted injuries because of improper body mechanics. • Running is essentially hundreds of repetitions of mini-plyometric jumps per minute. If you have poor posture, this translates into hundreds of repetitions that are damaging joints, ligaments and muscles as a result of faulty movement patterns created by postural distortions. • Running is essentially the reward you gain after you establish proper posture. • Appropriate flexibility, strength and stretching protocols should be used to treat posture issues so efficient and effective movement (running, lifting, twisting) can be achieved.
CORE STRENGTH • Core is extremely important in maintaining a correct posture during movements. Training your core muscles will help stabilize your pelvis and supports spinal alignment. • Your core muscles, which include your rectus abdominals, erector spinae and gluteus maximus, are primary core muscles. • According to electromyography data published April 2010 by a strength and conditioning specialist Bret Contreras, bodyweight chin-ups and handing knees to chest may be the best exercises for strengthening your abdominals. • Kneeling cable lifts and reverse hyperextensions are top exercises for your erector spinae. • Glute bridges and hip thrusts are among the best exercises to strengthen your gluteus maximus.
Progression for Handing Knee To Chest Level 1 (easy) Level 2 (moderate) Level 3 (advance)
Progression For Reverse Hyperextension Level 1 (easy) Level 2 (moderate) Level 3 (advance)
Progression For Glute Bridge Level 1 (easy) Level 2 (moderate) Level 3 (advance)
Progression to Phase 3 Lesson 5: Phases 3 and 4 • Once you can perform movement patterns effectively while maintaining a proper stable posture, center of gravity and movement speed, you can progress to Phase 3.
Lesson 4 Activity Complete the 3 FMS (Functional Movement System) Screens: • Shoulder Mobility (and Clearing Test) • Rotary Stability • Trunk Stability Push-up (and Clearing Test) If you scored a 2 or 1, use the corrective exercises to improve your score and correct the movement.
Thank You!! Please take the Lesson Quiz. You have to pass the quiz with a 70% or greater to receive credit! Contact iaWellness if you have any further questions! Thank you, Your Wellness Team