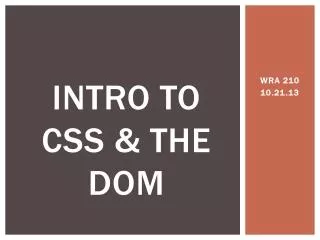
Introduction to CSS Workshop Slideshow Presentation
This presentation introduces Cascading Style Sheets (CSS) to help you separate presentation from markup for more control. Learn about selectors, anatomy of CSS rules, and how to apply CSS to enhance webpage styling. Discover the benefits of using CSS for lean and fast web content.

Introduction to CSS Workshop Slideshow Presentation
E N D
Presentation Transcript
Welcome This slideshow presentation is designed to introduce you to Cascading Style Sheets (CSS). It is the first of two CSS workshops available at www.tinyurl.com/rpi123. In addition to the two CSS workshops, there are also workshops on HTML, PHP, and MySQL. These slides are based on source material found at the w3schools.com website. You are encouraged to visit the site – it is a great resource.
Cascading Style Sheets are a means to separate the presentation from the structural markup (xhtml) of a web site. By applying a CSS style you have the ability to keep the structure of your document lean and fast, while controlling the appearance of content. Cascading Style Sheets
Look Ma, no formatting... <body> <div id="wrapper"> <div id="header"> <div id="site-meta"> <h1><a href="http://www.fineminddesign.com/sandbox/wordpress/" title="Fine Mind Design Sandbox">Fine Mind Design Sandbox</a></h1> <span class="description">Just another WordPress weblog</span> </div> <div id="topsearch"><form method="get" id="searchform" action="http://www.fineminddesign.com/sandbox/wordpress/"><input type="text" value="" name="s" id="s" /><button type="submit">Search</button></form></div> <!-- Menu Tabs --> <ul id="navigation"> <li class="current_page_item"><a href="http://www.fineminddesign.com/sandbox/wordpress">Home</a></li> <li class="page_item page-item-2"><a href="http://www.fineminddesign.com/sandbox/wordpress/?page_id=2" title="About"> About</a></li>... Notice that there is no markup that sets color, size, borders, decoration, etc. This markup is format-free.
Look Ma, no markup... body { margin: 6px 0 0; font: normal 80%/160% tahoma, arial, verdana, san-serif; background: #fff url(images/bg.png) repeat-x; } li { list-style: none; } hr { clear: both; height: 1px; line-height: 1px; font-size: 1px; visibility: hidden; margin: 0; padding: 0; } /* HEADINGS - - - - - - - - - - - - - - - - - - - - - - - - - - - - */ h1, h2, h3, h4, h5 { font-family: georgia, 'times new roman', times, serif; font-weight: normal; } h1 { font-size: 2.2em; } This CSS document contains all the formatting that was missing from the HTML document in the last slide.
As we mentioned, content (in the HTML document) is separated from the formatting (in the CSS document). Content is the collective term for all the text, images, videos, sounds, animations, and files (such as PDF documents) that you want to deliver to your audience. Content
XHTML enables you to define what each element of your content is (heading, paragraph, list of items, hyperlink, image) This is done with tags (enclosed in angle brackets <>) that identify each element of your content. Structure
Start with a blank page of content. Include your headers, navigation, a sample of the content and your footer. Next start adding your markup. Then start adding your CSS. Use HTML tables semantically – for tabular data, not layout. Process
A style sheet is a set of stylistic CSS rules that tell a browser how the different parts of a XHTML document are presented. A style sheet is simply a text file with the file name extension .css The Style Sheet - What
The Style Sheet - How • Linked / External <link href=“styles.css" rel="stylesheet" type="text/css" media=“screen" /> • Embedded / Internal <head> <style type=“text/css”> /* styles go here */ </style> </head> • Inline <p style=“/*styles go here */”>Text</p> The three ways to use CSS are external (stored in a separate document and linked to from an HTML document, embedded within the <head> tags at the top of an HTML document, and inline in an HTML document.
Anatomy... Oops! Wrong slide... move along.
A CSS rule is made up of the selector, which states which tag the rule selects (or targets), and the declaration, which states what happens when the rule is applied. The declaration itself is made up of a property, which states what is to be affected, and a value, which states what the property is set to. Anatomy of a CSS Rule
Anatomy of a CSS Rule h1 { color: #333; font-size: x-large; }
Selectors • 3 types of selectors • Tag selectors • ID selectors • Class selectors • Selectors should never start with a number, nor should they have spaces in them
Tag Selectors • Can be any type of HTML element • body • p • div p { background-color: red; }
ID Selectors • ID's vs. Classes... an epic battle. • >>See here<< for the differences. • You can not have two elements on one page with the same ID #sidebar { background-color: blue; }
Class Selectors • Can give multiple elements a class to style them differently p.semispecial { background-color: green; }
Descendant Selectors • You can chain selectors together! Just put a space between them: body #container p.warning a { color: red; } What will be affected by this style?
Grouping Selectors • You can group selectors together as well with commas p.warning, p.special { color: red; } Now both classes, warning and special, will have red text.
Writing CSS Rules • This basic structure of the selector and the declaration can be extended in three ways: • Multiple declarations within a rule. p { color:red; font-size:12px; line-height:15px;} • Note that each declaration ends with a semicolon.
Writing CSS Rules • Multiple selectors can be grouped. h1 {color:blue; font-weight:bold;} h2 {color:blue; font-weight:bold;} h3 {color:blue; font-weight:bold;} • Better to use shorthand: h1, h2, h3 {color:blue; font-weight:bold;} • Just be sure to put a comma after each selector except the last.
Writing CSS Rules • Multiple rules can be applied to the same selector. If you decide that you also want just the h3 tag to be italicized, you can write a second rule for h3, like this: h1, h2, h3 {color:blue; font-weight:bold;} h3 {font-style: italic;}
Reset the Styling • Since different browsers have their own styling defaults, you may choose to begin your CSS document by overriding all the browser styles. • Because of browser differences, it’s a good idea to “zero out” the formatting for commonly used tags. Set up some basic styles at the beginning of your style sheet that remove the “offensive” formatting.
Reset the Styling /* Normalizes margin, padding */ body, div, h1, h2, h3, h4, h5, h6, p, ol, ul, dt, dl, dd, form, blockquote, fieldset, input { padding: 0; margin: 0; } /* Normalizes font-size for headers */ h1, h2, h3, h4, h5, h6 { font-size: 1em; } /* Removes list-style from lists */ ol, ul { list-style: none; } /* Removes text-decoration from links */ a { text-decoration: none; } /* Removes border from img */ a img { border: none; }
Anchor Link Pseudo-Classes • Style for Links • Four pseudo-classes let you format links in four different states basedon how a visitor has interactedwith that link. They identifywhen a link is in one ofthe following fourstates:
Anchor Link Pseudo-Classes • a:linkdenotes any link that your guest hasn’t visited yet while the mouse isn’t hovering over or clicking it. Your regular, unused Web link. • a:visitedis a link that your visitor has clicked before, according to the web browser’s history. You can style this type of link differently than a regular link to tell your visitor, “Hey, you’ve been there already!”
Anchor Link Pseudo-Classes • a:hoverlets you change the look of a link as your visitor passes the mouse over it. The rollover effects you can create aren’t just for fun—they can provide useful visual feedback for buttons on a navigation bar. • a:activelets you determine how a link looks as your visitor clicks. It covers the brief moment when the mouse button is pressed.
Anchor Link Pseudo-Classes • In most cases, you’ll include at least :link, :visited, and :hover styles in your style sheets for maximum design control. But in order for that to work, you must specify the links in a particular order: link, visited, hover, and active.
Anchor Link Pseudo-Classes • Use this easy mnemonic:LOVE/HATE. So here’s the proper way to add all four link styles: a:link { color: #f60; } a:visited { color: #900; } a:hover { color: #f33; } a:active { color: #b2f511; }
Targeting Particular Links • The styles in the previous section are basic a tag styles. They target certain link states, but they style all links on a page. What if you want to style some links one way and some links another way? A simple solution is to apply a class to particular link tags.
Targeting Particular Links • <a href=“http://www.site.com/” class=“footer”>Site Link</a> • To style this link in it’s own way, you’d create styles like this: a.footer:link { color: #990000; } a.footer:visited { color: #000066; } a.footer:hover { color: #3F5876; } a.footer:active { color:#990000; }
Building Navigation Bars • Every site needs good navigation features to guide visitors to the information they’re after—and help them find their way back. CSS makes it easy to create a great looking navigation bar, rollover effects and all.
Building Navigation Bars • At heart, a navigation bar is nothing more than a bunch of links. More specifically, it’s actually a list of the different sections of a site. Lists provide us with a way of grouping related elements and, by doing so, we give them meaning and structure.
Building Navigation Bars • A navigation menu is based on a simple list inside a div, like this: • <div id=“NavBar"> • <ul> • <li><a href="#">Home</a></li> • <li><a href="#">About</a></li> • <li><a href="#">Events<a/></li> • <li><a href="#">Forum</a></li> • </ul> • </div>
<div class=”header”>Title</div> • Divs help add structure to a page. Div stands for division and marks a logical group of elements on a page. • Divs divide the page into rectangular, box-like areas. Invisible unless you turn on borders or color background. • Include <div> tags for all major regions of your page, such as header, main content, sidebar, etc.
Divs <div> • Once your <div> tags are in place, add either a class or ID for styling each <div> separately. • For parts of the page that appear only once and form the basic building blocks of the page, web designers usually use an ID. • ID selectors are identified using a hash character (#); class selectors are identified with a period(.).
Easy way to remember... Class Period ID number
Type of Web Page Layouts • Nearly every page design you see falls into one of three types of layouts: • fixed width • liquid • elastic
Web Page Layouts: Fixed • Fixed width offers consistency. In some cases, the design clings to the left edge of the browser window, or more commonly, it is centered. • Many fixed width designs are about 760px wide—a good size for 800 x 600 screens (leaves room for scroll bars). • However, more and more sites are about 950 pixels wide, on the assumption that visitors have at least 1024 x 768 monitors.
Web Page Layouts: Liquid • A liquid design adjusts to fit the browser’s width. Your page gets wider or narrower as your visitor resizes the window. Makes the best use of the available browser window real estate, but it’s more work to make sure your design looks good at different window sizes. • On very large monitors, these types of designs can look really wide.
Web Page Layouts: Elastic • An elastic design is a fixed-width design with a twist—type size flex-ibility. You define the page’s width using em values or percentages.>>More info here<< • Elastic designs keep everything on your page in the same relative proportions.
Two-Column Fixed Layout • Very common layout; it contains a narrow left column for navigation and a right column that houses the rest of the page’s content. In this example, the navigation column is a fixed width, but the content area is fluid—that is, it changes width depending on the width of the browser window.
Two-Column Fixed Layout <html> <head> <title>A Simple Two Column Layout Without CSS Applied</title> </head> <body> <div id="nav"> <ul> <li><a href="#">Link 1</a></li> <li><a href="#">Link 2</a></li> <li><a href="#">Link 3</a></li> </ul> </div> <div id="content"> <h1>A Simple Two column Layout</h1> <p><strong>Step X - bold text here... </strong>More text here...</p> <p>More text here</p> </div> </body> </html>
Two-Column Fixed Layout • CSS Applied: body { margin: 0px; padding: 0px; } div#nav { position:absolute; width:150px; left:0px; top:0px; border-right:2px solid red; }
Two-Column Fixed Layout Now that we have our two-column layout, we need to think about making it look more presentable. Let's take a look at adding padding,margins, and borders...
> Margin - Clears an area around the border. The margin does not have a background color, it is completely transparent > Border - A border that goes around the padding and content. The border is affected by the background color of the box > Padding - Clears an area around the content. The padding is affected by the background color of the box > Content - The content of the box, where text and images appear Margin, Padding, Border
This is commonly called the Box Model. In order to set the width and height of an element correctly in all browsers, you need to know how the box model works. Here is a way to visualize it... Margin, Padding, Border
Margin, Padding, Border • Box Model