Download
1 / 115
1.18k likes | 1.36k Vues
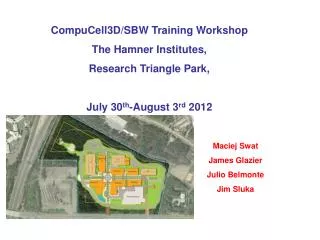
CompuCell3D/SBW Training Workshop The Hamner Institutes, Research Triangle Park, July 30 th -August 3 rd 2012. Maciej Swat James Glazier Julio Belmonte Jim Sluka. CC3D Team. Developers: Maciej Swat, IU – lead developer Randy Heiland , IU – developer Mitja Hmeljak , IU – developer

E N D
CompuCell3D/SBW Training Workshop The Hamner Institutes, Research Triangle Park, July 30th-August 3rd 2012 Maciej Swat James Glazier Julio Belmonte Jim Sluka
CC3D Team • Developers: • Maciej Swat, IU – lead developer • Randy Heiland, IU – developer • MitjaHmeljak, IU – developer • Ivan Komarov, U. Wisconsin Milwaukee - developer • PI-s: • James Glazier, IU – PI • Roshan D’Souza – coPI
What you will learn during the workshop? • What is CompuCell3D? • Why use CompuCell3D? • Demo simulations • Glazier-Graner-Hogeweg (GGH) model – an overview • CompuCell3D architecture and terminology • XML 101. CC3DML-intro • Building first CompuCell3D simulation • Visualization package – CompuCell Player • Python scripting inside CompuCell3D • Building C++ CompuCell3D extension modules – for interested participants
What Is CompuCell3D? • CompuCell3D is a modeling environment used to build, test, run and visualize GGH-based simulations • CompuCell3D has built-in scripting language (Python) that allows users to quite easily write extension modules that are essential for building sophisticated biological models. • CompuCell3D thus is NOT a specialized software • Running CompuCell3D simulations DOES NOT require recompilation • CompuCell3D model is described using CompuCell3D XML and Python script(s) • CompuCell3D platform is distributed with a GUI front end – CompuCell Player. The Player provides 2- and 3-D visualization and simulation replay capabilities. • CompuCell3D is a cross platform application that runs on Linux/Unix, Windows, Mac OSX. CompuCell3D simulations can be easily shared
Why Use CompuCell3D? What Are the Alternatives? • CompuCell3D allows users to set up and run their simulations within minutes, maybe hours. A typical development of a specialized GGH code takes orders of magnitudes longer time. • CompuCell3D simulations DO NOT need to be recompiled. If you want to change parameters (in XML or Python scripts) or logic (in Python scripts) you just make the changes and re-run the simulation. With hand-compiled simulations there is much more to do. Recompilation of every simulation is also error prone and often limits users to those who have significant programming background. • CompuCell3D is actively developed , maintained and supported. On www.compucell3d.org website users can download manuals, tutorials and developer documentation. CompuCell3D has approx. 4 releases each year – some of which are bug-fix releases and some are major • CompuCell3D has many users around the world. This makes it easier to collaborate or exchange modules and results saving time spent on developing new model. • The Biocomplexity Institute organizes training workshops and mentorship programs. Those are great opportunities to visit Bloomington and learn biological modeling using CompuCell3D. For more info see www.compucell3d.org
Why model sharing and standards are important? • 99% of modeling done with custom written code is very hard/impossible to reproduce or verify. Even in best quality publications authors may forget to describe small details which are actually essential to reproduce the described work. • Using standard modeling tools instead of writing your own code improves chances of your research being reused or improved by other scientists. Note: in certain situations people might be interested in, precisely, the opposite. • When people spend most of their time working on new ideas rather than struggling to reproduce old results it greatly improves research efficiency • Bug tracking/bug bug detection is much more efficient with shared tools than with custom written ones. Bugs are also better documented for shared software. • Developing and sharing modules with other researchers is best way of improving software modeling tools used by community of researchers
GGH(Glazier Graner Hogeweg) Modelalso known as CPM(Cellular Potts Model)
accept invalid attempt valid attempt GGH Algorithm Snapshots valid attempt accept valid attempt valid attempt reject accept
The GGH Model Formalism Overview • Energy minimization formalism • - extended by Graner and Glazier, 1992 • DAH: Contact energy depending on cell types (differentiated cells) • Metropolis-like algorithm: probability of configuration change
Brief Explanation of Equation Symbols s(x) –denotes id of the cell occupying position x. All pixels pointed by arrow have same cell id , thus they belong to the same cell t(s(x)) denotes cell type of cell with id s(x). In the picture above blue and yellow cells have different cell types and different cell id. Arrows mark different cell types Notice that in your model you may (will) have many cells of the same type but with different id. For example in a simple cellsorting simulation there will be many cells of type “Condensing” and many cells with type “NonCondensinig”
CompuCell3D terminology • Pixel-copy attempt is an event where program randomly picks a lattice site in an attempt to copy the pixel to a neighboring lattice site. • Monte Carlo Step (MCS) consists of series pixel-copy attempts. Usually the number of pixel copy-attempts in single MCS is equal to the number of lattice sites, but this is can be customized • CompuCell3D Pluginis a software module that either calculates an energy term in a Hamiltonian or implements action in response to pixel copy (lattice monitors). Note that not all spin-copy attempts will trigger lattice monitors to run. • Steppablesare CompuCell3D modules that are run every MCS after all pixel-copy attempts for a given MCS have been exhausted. Most of Steppables are implemented in Python. Most customizations of CompuCell3D simulations is done through Steppables • Steppersare modules that are run for those spin-copy attempts that actually resulted in energy calculation. They are run regardless whether actual pixel-copy occurred or not. For example cell mitosis is implemented in the form of stepper. • Fixed Steppers are modules that are run every pixel-copy attempt.
CompuCell3D Terminology – Visual Guide Change pixel During pixel copy “blue” pixel (newCell) replaces “yellow” pixel (oldCell) 100x100x1 square lattice = 10000 lattice sites (pixels) MCS 21 MCS 22 MCS 23 MCS 24 10000 pixel-copy attempts 10000 pixel-copy attempts 10000 pixel-copy attempts 10000 pixel-copy attempts Run Steppables Run Steppables Run Steppables
Nearest neighbors in 2D and their Euclidian distances from the central pixel 3 5 4 4 5 4 1 2 2 4 1 3 1 3 1 2 4 4 2 3 4 4 5 5 Pixel copy can take place between any order nearest neighbor (although in practice we limit ourselves to only few first oders). <NeighborOrder>2</NeighborOrder> 2nd nearest neighbor Contact energy calculation (see further slides) are also done up to certain order of nearest neighbors (default is 1) <NeighborOrder>2</NeighborOrder> Note: older tags still work but we encourage using new ones - they make more sense
4 4 4 4 3 2 2 4 3 4 3 3 1 1 1 4 4 2 4 1 4 2 2 2 1 1 4 4 1 3 3 1 3 1 3 2 2 2 2 4 4 1 4 4 3 4 4 4 3 4 Nearest neighbors in 2D and their Euclidian distances from the central pixel For more information on hex lattice in CC3D please go to: www.compucell3d.org/Manuals
CompuCell3D Architecture Object oriented implementation in C++ and Python Visualization, Steering, User Interface Plugins Calculate change in energy Python Interpreter Biologo Code Generator Kernel Runs Metropolis Algorithm PDE Solvers Lattice monitoring
Typical “Run-Time” Architecture of CompuCell • CompuCell can be run in a variety of ways: • Through the Player with or without Python interpreter • As a Python script • As a stand alone computational kernel+plugins CompuCellPlayer Python CompuCell3D Kernel Plugins
XML 101 XML stands for eXtensible Markup Language. It is NOT a programming language. Its main purpose is to standarize information exchange between different applications. XML Example: <Sentence> <Text>It is too early to be in class</Text> <FontType>TimesNewRoman</FontType> <FontSize>12</FontSize> <DisplayHint Hint=“AddFrameAround”/> </Sentence> def configureSimulation(sim): Snt=ElementCC3D(“Sentence”) Txt=Snt.ElementCC3D(“Text”,{},”It is to early”) Fnt=Snt.ElementCC3D(“FontType”,{},”TimesNewR”) fntSize=Snt.ElementCC3D(“FontSize”,{},12) Disp=Snt.ElementCC3D(“DisplayHint”, {“Hint”:”AddFrameAround”})
XML is essentially a definition of hierarchical (tree-like) data structure <Computer> <CPU>Pentium <Frequency Unit=“GHz”>2.4</Frequency> </CPU> <Memory>DDR-3 <Frequency Unit=“MHz”>800</Frequency> </Memory> … </Computer> Computer CPU Pentium Frequency Unit=“GHz” 2.4 Memory DDR-3 Frequency Unit=“MHz” 800
CompuCell Related Example Defining basic properties of the simulation like lattice dimension, number of Monte Carlo Steps, Temperature and ratio of pixel-copy attempts to number of lattice sites (Flip2DimRatio). <Potts> section has to be included in every CompuCell3D simulation <Potts> <Dimensionsx="71" y="36" z="211"/> <Steps>10</Steps> <Temperature>2</Temperature> <Flip2DimRatio>2</Flip2DimRatio> </Potts> Defining properties of Volume Energy term – cell target volume and lambda parameter: <PluginName=“Volume"> <TargetVolume>25</TargetVolume> <LambdaVolume>2.0</LambdaVolume> </Plugin> ...
Building Your First CompuCell3D Simulation Cell All simulation parameters are controlled by the config file. The config file allows you to only add those features needed for your current simulation, enabling better use of system resources. Note:Twedit++-CC3D provides the easiest way of building CC3D simulations Define Lattice and Simulation Parameters < CompuCell3D> <Potts> <Dimensionsx=“100" y=“100" z=“1"/> <Steps>10</Steps> <Temperature>2</Temperature> <Flip2DimRatio>1</Flip2DimRatio> </Potts> … </CompuCell3D>
Cell Define Cell Types Used in the Simulation Each CompuCell3D xml file must list all cell types that will used in the simulation <Plugin Name="CellType"> <CellType TypeName="Medium" TypeId="0"/> <CellType TypeName=“Light" TypeId="1"/> <CellType TypeName=“Dark" TypeId="2"/> </Plugin> Notice that Medium is listed with TypeId =0. This is both convention and a REQUIREMENT in CompuCell3D. Reassigning Medium to a different TypeId may give undefined results. This limitation will be fixed in one of the next CompuCell3D releases
Cell Define Energy Terms of the Hamiltonian and Their Parameters Volume volume volumeEnergy(cell) <Plugin Name="Volume"> <TargetVolume>25</TargetVolume> <LambdaVolume>1.0</LambdaVolume> </Plugin> <Plugin Name="Surface"> <TargetSurface>21</TargetSurface> <LambdaSurface>0.5</LambdaSurface> </Plugin> Surface area surfaceEnergy(cell) <Plugin Name="Contact"> <Energy Type1="Medium" Type2="Medium">0 </Energy> <Energy Type1="Light" Type2="Medium">16 </Energy> <Energy Type1="Dark" Type2="Medium">16 </Energy> <Energy Type1="Light" Type2="Light">16.0 </Energy> <Energy Type1="Dark" Type2="Dark">2.0 </Energy> <Energy Type1="Light" Type2="Dark">11.0 </Energy> </Plugin> Contact contactEnergy( cell1, cell2)
Plugin XML Syntax <Plugin Name="Volume"> <TargetVolume>25</TargetVolume> <LambdaVolume>1.0</LambdaVolume> </Plugin> <Plugin Name="Surface"> <TargetSurface>21</TargetSurface> <LambdaSurface>0.5</LambdaSurface> </Plugin>
Plugin XML Syntax – Contact Energy <Plugin Name="Contact"> <Energy Type1="Medium" Type2="Medium">0 </Energy> <Energy Type1="Light" Type2="Medium">16.0 </Energy> <Energy Type1="Dark" Type2="Medium">16.0 </Energy> <Energy Type1="Light" Type2="Light">16 </Energy> <Energy Type1="Dark" Type2="Dark">2.0 </Energy> <Energy Type1="Light" Type2="Dark">11.0 </Energy> </Plugin> 1-d term ensures that pixels belonging to the same cell do not contribute to contact energy
Laying Out Cells on the Lattice Using built-in cell field initializer: <Steppable Type="BlobInitializer"> <Region> <Radius>30</Radius> <Center x="40" y="40" z="0"/> <Gap>0</Gap> <Width>5</Width> <Types>Dark,Light</Types> </Region> </Steppable> This is just an example of cell field initializer. More general ways of cell field initialization will be discussed later. NOTE: In actual example Dark cells are called Condensingand Light cells NonCondensing
Putting It All Together - cellsort_2D.xml <CompuCell3D> <Potts> <Dimensions x="100" y="100" z="1"/> <Steps>10</Steps> <Temperature>2</Temperature> <Flip2DimRatio>1</Flip2DimRatio> </Potts> <Plugin Name="CellType"> <CellType TypeName="Medium" TypeId="0"/> <CellType TypeName=“Light" TypeId="1"/> <CellType TypeName=“Dark" ="2"/> </Plugin> <Plugin Name="Volume"> <TargetVolume>25</TargetVolume> <LambdaVolume>1.0</LambdaVolume> </Plugin> <Plugin Name="Surface"> <TargetSurface>21</TargetSurface> <LambdaSurface>0.5</LambdaSurface> </Plugin> <Plugin Name="Contact"> <Energy Type1="Medium" Type2="Medium">0 </Energy> <Energy Type1="Light" Type2="Medium">16 </Energy> <Energy Type1="Dark" Type2="Medium">16 </Energy> <Energy Type1="Light" Type2="Light">16 </Energy> <Energy Type1="Dark" Type2="Dark">2.0 </Energy> <Energy Type1="Light" Type2="Dark">11 </Energy> </Plugin> <Steppable Type="BlobInitializer"> <Region> <Radius>30</Radius> <Center x="40" y="40" z="0"/> <Gap>0</Gap> <Width>5</Width> <Types>Dark,Light</Types> </Region> </Steppable> </CompuCell3D> Coding the same simulation in C/C++/Java/Fortran would take you at least 1000 lines of code…
Putting It All Together - Avoiding Common Errors in XML code • Use Twedit++ every time, all the time. Remember, only Twedit++ guarantees safe CC3D experience. • First specify Potts section, then list all the plugins and finally list all the steppables. This is the correct order and if you mix e.g. plugins with steppables you will get an error. Remember the correct order is • Potts • Plugins • Steppables • 2. Remember to match every xml tag with a closing tag • <Plugin> • … • </Plugin> • 3. Watch for typos – if there is an error in the XML syntax CC3D will give you an error pointing to the location of an offending line • 4. Modify/reuse available examples rather than starting from scratch – saves a lot of time
Foam Coarsening simulation <CompuCell3D> <Potts> <Dimensions x="101" y="101" z="1"/> <Steps>1000</Steps> <Temperature>5</Temperature> <Flip2DimRatio>1.0</Flip2DimRatio> <Boundary_y>Periodic</Boundary_y> <Boundary_x>Periodic</Boundary_x> <NeighborOrder>2</NeighborOrder> </Potts> <Plugin Name="CellType"> <CellType TypeName="Medium" TypeId="0"/> <CellType TypeName="Foam" TypeId="1"/> </Plugin> <Plugin Name="Contact"> <Energy Type1="Foam" Type2="Foam">50</Energy> <NeighborOrder>2</NeighborOrder> </Plugin> <Steppable Type="PIFInitializer"> <PIFName>foaminit2D.pif</PIFName> </Steppable> </CompuCell3D>
CompuCellPlayer – the Best Way To Run Simulations Steering bar allows users to start or pause the simulation, zoom in , zoom out, to switch between 2D and 3D visualization, change view modes (cell field, pressure field , chemical concentration field, velocity field etc..) Player can output multiple views during single simulation run – Add Screenshot function Information bar
Opening a Simulation in the Player Go to File->Open Simulation File
Running Simulation From Command Line You can simply start the simulation with or without Player straight from command line Open up console (terminal) and type: ./compucell3d.command –i cellsort_2D.xml (on OSX) ./compucell3d.sh –i cellsort_2D.xml (on Linux) compucell3d.bat –i cellsort_2D.xml (on Windows) – or simply double click Desktop icon Running CompuCell3D from command line not only convenient, but sometimes (on clusters) the only option to run the simulation. For more information about command line options please see “Running CompuCell3D” manual available at www.compucell3d.org.
Running the Simulation • After typing the XML file in your favorite editor all you need to do to run the simulation is to open the XML file in the Player and hit “Play” button. • Screenshots from the simulations are automatically stored in the directory with name composed of simulation file name and a time at which simulation was started • As you can see, setting up CompuCell3D simulation was reasonably simple. • It is quite likely that if you were to code entire simulation in C/C++/Java etc. you would need much more time. • We hope that now you understand why using CompuCell3D saves you a lot of time and allows you to concentrate on biological modeling and not on writing low level computer code. • During last year we have improved CompuCell3D performance so that it is on par with hand-written code. Yet, if you really to have the fastest GGH code in the world you should write code your own simulation directly in C or even better in assembly language. Before you do it, make sure you want to spend time rewriting the code that already exist…
Choosing the Right Text Editor • Since developing CompuCell3D simulation requires typing some simple code it is important that you have the right tools to do that most effectively. • CompuCell3D comes with Twedit++ which is cross platform and has most of the functionality needed to develop CC3D simulations. • Alternatives: • On Windows systems we highly recommend Notepad++ editor: • http://notepad-plus.sourceforge.net/uk/site.htm • On Linux you have lots of choices: Kate (my favorite), gedit, mcedit etc. • On OSX situation gets a bit complicated, but there is one editor called Smultron which is good for programming http://sourceforge.net/projects/smultron/. Another good option is TextWrangler. • And as usual, if nothing else works there is always vi, and emacs
Configuring Notepad++ for use with Python Go to Settings->Preferences…
On the “Edit Components” tab change Tab Settings to : Tab size: 4 Replace by space: “checked” Click on the number to change it
Configuring Kate for use with Python Go to Settings->Configure Kate …
Click Editing and in the “General” Tab in “Tabulators” section set: Insert spaces instead of tabulators: “checked” Tab width: “4 characters”
On “Indentation” tab in “Indentation Properties” section set: Indentation width: 4 characters
Using Python to describe entire simulations • Starting with 3.2.0 versions you may get rid of XML file and use Python to describe entire simulation. • The advantage of doing so is that you have one less file to worry about but also you may more easily manipulate simulation parameters. For example if you want contact energy between two cell types be twice as big as between two other cell types you could easily implement it in Python. Doing the same exercise with CC3DML is a bit harder (but not impossible). • Python syntax used to describe simulation closely mimics CC3DML syntax. There are however certain differences and inconsistencies caused by the fact that we are using different languages to accomplish same task. Currently there is no documentation explaining in detail Python syntax that replaces CC3DML. It will be developed soon • The most important reason for defining entire simulation in Python is the possibility of simulation steering i.e. the ability to dynamically change simulation parameters while simulation is running (available in 3.2.1) • The way you replace XML in Python is purely mechanical and we will show it on a simple example
XML is essentially a definition of hierarchical (tree-like) data structure <Computer> <CPU>Pentium <Frequency Unit=“GHz”>2.4</Frequency> </CPU> <Memory>DDR-3 <Frequency Unit=“MHz”>800</Frequency> </Memory> … </Computer> Computer CPU Pentium Frequency Unit=“GHz” 2.4 Memory Frequency Unit=“MHz” 800
Building tree-like structure in a computer language (e.g. Python) root=createElement(…parameters…) child1=root.createElement(…parameters…) child1_of_child1=child1.createElement(…parameters…) child2=root.createElement(…parameters…) child1_of_child2=child2.createElement(…parameters…)
Replacing XML with Python syntax: import CompuCellSetup from XMLUtils import ElementCC3D cc3d=ElementCC3D("CompuCell3D") potts=cc3d.ElementCC3D("Potts") potts.ElementCC3D("Dimensions",{"x":100,"y":100,"z":1}) potts.ElementCC3D(“Anneal”,{},10) potts.ElementCC3D("Steps",{},1000) potts.ElementCC3D("Temperature",{},10) potts.ElementCC3D("NeighborOrder",{},2) <CompuCell3D> <Potts> <Dimensions x="100" y="100" z="1"/> <Anneal>10</Anneal> <Steps>10000</Steps> <Temperature>10</Temperature> <NeighborOrder>2</NeighborOrder> </Potts> </CompuCell3D> Notice , by using Python we have even saved few lines
Rules: • To open XML document, create parent ElementCC3D: • cc3d=ElementCC3D("CompuCell3D") • For nesting XML elements inside another XML element use the following: • potts=cc3d.ElementCC3D("Potts") • If the element has attribute use Python dictionary syntax to list the attributes: • potts.ElementCC3D("Dimensions",{"x":100,"y":100,"z":1}) • If the XML element has value but no attributes use the following: • potts.ElementCC3D("NeighborOrder",{},2) • If the XML element has both value and attributes combine two previous examples • potts.ElementCC3D("NeighborOrder",{“LatticeType”:”Hexagonal”},2)* • *for illustration purposes only
Python-based simulation – template script import sys from os import environ import string sys.path.append(environ["PYTHON_MODULE_PATH"]) import CompuCellSetup sim,simthread = CompuCellSetup.getCoreSimulationObjects() configureSimulation(sim) CompuCellSetup.initializeSimulationObjects(sim,simthread) from PySteppables import SteppableRegistry steppableRegistry=SteppableRegistry() CompuCellSetup.mainLoop(sim,simthread,steppableRegistry)
But you need to implement configureSimulation function: Python def configureSimulation(sim): import CompuCellSetup from XMLUtils import ElementCC3D cc3d=ElementCC3D("CompuCell3D") potts=cc3d.ElementCC3D("Potts") potts.ElementCC3D("Dimensions",{"x":100,"y":100,"z":1}) potts.ElementCC3D("Steps",{},1000) potts.ElementCC3D("Temperature",{},10) potts.ElementCC3D("NeighborOrder",{},2) cellType=cc3d.ElementCC3D("Plugin",{"Name":"CellType"}) cellType.ElementCC3D("CellType", {"TypeName":"Medium", "TypeId":"0"}) cellType.ElementCC3D("CellType", {"TypeName":"Condensing", "TypeId":"1"}) cellType.ElementCC3D("CellType", {"TypeName":"NonCondensing", "TypeId":"2"}) volume=cc3d.ElementCC3D("Plugin",{"Name":"Volume"}) volume.ElementCC3D("TargetVolume",{},25) volume.ElementCC3D("LambdaVolume",{},2.0)
Continued… contact=cc3d.ElementCC3D("Plugin",{"Name":"Contact"}) contact.ElementCC3D("Energy", {"Type1":"Medium", "Type2":"Medium"},0) contact.ElementCC3D("Energy", {"Type1":"NonCondensing", "Type2":"NonCondensing"},16) contact.ElementCC3D("Energy", {"Type1":"Condensing", "Type2":"Condensing"},2) contact.ElementCC3D("Energy",{"Type1":"NonCondensing", "Type2":"Condensing"},11) contact.ElementCC3D("Energy", {"Type1":"NonCondensing", "Type2":"Medium"},16) contact.ElementCC3D("Energy", {"Type1":"Condensing", "Type2":"Medium"},16) blobInitializer=cc3d.ElementCC3D("Steppable",{"Type":"BlobInitializer"}) blobInitializer.ElementCC3D("Gap",{},0) blobInitializer.ElementCC3D("Width",{},5) blobInitializer.ElementCC3D("CellSortInit",{},"yes") blobInitializer.ElementCC3D("Radius",{},40) # next line is very important and very easy to forget about. It registers XML description and points # CC3D to the right XML file (or XML tree data structure in this case) CompuCellSetup.setSimulationXMLDescription(cc3d) Full example: Demos/PythonOnlySimulationsExamples/cellsort-2D-player-new-syntax.py
Example: Scaling contact energies – advantage of using Python to configure entire simulation energyScale=10 def configureSimulation(sim): global energyScale . . contact=cc3d.ElementCC3D("Plugin",{"Name":"Contact"}) contact.ElementCC3D("Energy", {"Type1":"Medium", "Type2":"Medium"},0) contact.ElementCC3D("Energy", {"Type1":"NonCondensing", "Type2":"NonCondensing"},1.6*energyscale) contact.ElementCC3D("Energy", {"Type1":"Condensing", "Type2":"Condensing"},0.2*energyscale) contact.ElementCC3D("Energy",{"Type1":"NonCondensing", "Type2":"Condensing"},1.1*energyscale) contact.ElementCC3D("Energy", {"Type1":"NonCondensing", "Type2":"Medium"},1.6*energyscale) contact.ElementCC3D("Energy", {"Type1":"Condensing", "Type2":"Medium"},1.6*energyscale) It would be a bit awkward (but not impossible) to have same functionality in CC3DML…