Layout Managers
Learn about creating graphical user interfaces in this lecture focusing on the placement of components using different layout managers in Java applets. Understand the three crucial steps to develop an applet with a common appearance across various platforms. Discover the role of layout managers like FlowLayout, GridLayout, BorderLayout, BoxLayout, GridBagLayout, and CardLayout in organizing components. Dive into the essential Swing components, their functions, and how to implement Layout Managers effectively for optimal display.

Layout Managers
E N D
Presentation Transcript
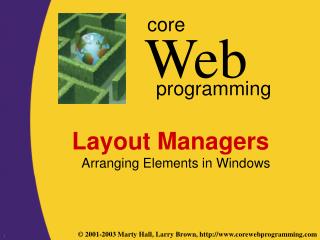
Layout Managers In this lecture we concentrate on the Placement of components on the viewing surface of the applet. We are still primarily concerned with the appearance of the applet and not its functionality. We will add event listeners to the GUI components in a later lecture to create a useful applet.
Creating an Applet with a Graphical User Interface There are three steps that a programmer must complete to create an applet with a graphical user interface: Step 1. Declare and define the components that will be placed on the applet. Step 2. Choose a Layout Manager and use this manager to direct the placement of the components on the applet. Step 3. Add appropriate event listeners to the components you have placed in the applet, and provide the appropriate (actionPerformed) instructions for each event listener In this lecture we focus on Step 2 – properties of Layout Managers.
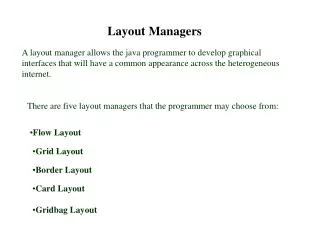
These three will NOT be studied in this course Layout Managers A layout manager allows the java programmer to develop graphical interfaces that will have a common appearance across the heterogeneous internet. There are six layout managers. • FlowLayout • GridLayout • BorderLayout • BoxLayout • GridBagLayout • CardLayout
Container Panel Window ScrollPane Applet Heavyweight Swing components Dialog Frame The “Swing Set” AWT classes Swing classes JComponent JApplet JDialog JFrame JWindow
Layout Managers A JComponent can be displayed on a screen and a user can interact with a JComponent. A Container is a Component that can hold other Components JComponentis a swing abstract class that inherits from Container – it is the base class for all “lightweight” swing components. Of this set only JPanel is a Container! A Layout Manager directs the placement of Components within a Container.
Containers A Container maintains a list of Components that it manipulates as well as a LayoutManager to determine how components are displayed. In Swing only JPanel can hold other Swing components. The “heavyweight” classes JApplet JWindow JFrame JDialog Must first get a ContentPane to hold other Swing components
Containers Method defined in class Container include: setLayoutManager (LayoutManager) add (JComponent) add Component to display remove(JComponent) remove Component from display These methods are inherited by the Swing classes
Containers JPanel A JPanel is generally used as a component in a JFrame or a JApplet. It cannot be displayed on the screen by itself but must be enclosed in a container. It is used to group components into a single unit. The JPanel with its set of components is displayed as a single unit. It represents a rectangular region of the display. A JPanel holds its own LayoutManager which may be different from the LayoutManager of the Frame or Applet in which it resides.
Layout Managers Flow Layout Lays out components row by row from left to right, top to bottom.. If there is insufficient space, any remaining components will be left out. It is very straightforward to use, but it affords the programmer the least ability to control the positioning of components. It is the default layout manager in a JPanel. As an example, consider a JApplet that displays a number of JButtons for selecting a language.
Layout Managers English French Greek Japanese German Spanish Portuguese Arabic Chinese Russian Applet Started
JButtons will be added to the viewing surface of the applet starting from the upper left hand corner from left to right then top to bottom in the order in which they are added. JButtons are added to a row as long as they fit within the dimensions of the applet. Layout Managers Constructing the previous display import java.awt.*; import javax.swing.*; publicclass SelectLang extends JApplet { JButton eng = new JButton(“English”); …. JButton rus = new JButton (“Russian”); FlowLayout flow = new FlowLayout(FlowLayout.LEFT); publicvoid init ( ) { Container cp = getContentPane( ); cp.setLayout(flow); cp.add(eng); …. cp.add(rus); } }
The default is CENTER adjusted Layout Managers FlowLayout is the most straightforward component placement manager to use, but it affords the least programmer control. The programmer can use the constructor to indicate whether the components should be left, right, or center adjusted. FlowLayout( ); FlowLayout(FlowLayout.LEFT); FlowLayout(FlowLayout.CENTER); FlowLayout(FlowLayout.RIGHT); In the JApplet referenced below, use your mouse to change the size of the applet and note what happens. Language Button Example
Center West East Layout Managers Border Layout North South
Layout Managers Properties of a Border Layout Manager More flexible in permitting programmer placement of components of different sizes (such as panels, scroll bars, and text areas. Border areas adjust to accommodate the placement of a component. The center consists of what’s left over. Constructor for BorderLayout public BorderLayout (int hGap, int vGap)
Layout Managers Example – A BorderLayout with a Label in North, a Scrollbar in South, a Panel containing a ButtonGroup in West, a JComboBox in East, and a JPanel in Center. Border Layout Example Rectangle Oval Line Fill Background o Red o Blue o Green o Black o White
vGap hGap Number of columns Number of rows Layout Managers Grid Layout Programmer specifies the number of rows columns pixels between rows, pixels between columns GridLayout myGrid = new GridLayout (3, 2, 10, 10);
Layout Managers Grid Layout Components expand or contract in size to fill a single grid cell. JPanels, JTextAreas, and JLists are resized to fit into a grid cell. Components are placed in the container in order from left to right and top to bottom.
name address e-mail Layout Managers Grid Layout 3 rows, 2 columns Order of component placement cp.add(nLabel); cp.add(nField); cp.add(aLabel); cp.add(aField); cp.add(mLabel); cp.add(mField);
Layout Managers Suppose we wish to construct the following layout Age 21-35 Over 65 Under 20 36-65 Name Street Address Zip City
Layout Managers FlowLayout (int alignment, int hGap, int vGap); hGap = distance in pixels between components in a row vGap = separation between rows (in pixels) In Example 1 – FlowLayout(FlowLayout.LEFT, 30, 10) Pure Flow Layout A more orderly organization is achieved by first putting components into panels and then placing panels in the applet using Flow Layout Flow Layout with JPanel components Flow Layout with mixed panels and discrete components
Layout Managers An Applet with multiple Layout Managers Read from form
Content Select Filll Oval Red Putting It All Together o Line o Oval o Rectangle
Area 4 JPanel 1 JPanel 2 JPanel 5 JPanel 6 Building the Graphical Interface Applet JPanel 3
add a JPanel to the “west” in a BorderLayout method makeScrollBars returns a JPanel Construct a new panel (to add to the ContnetPane) Set the layout and add the JScrollBar components return this JPanel to the calling method – and add it to the ContentPane Using Functions to Construct Each Panel Instead of writing one long init( ) method that is more difficult to read and to maintain, we will break the task of constructing each of the three main panels into separate procedures. The form of our code will look like this: public class DrawScreen extends JApplet { //declaration of instance variables public void init( ) { Container cp = getContentPane( ); cp.setLayout(new BorderLayout( ) ); cp.add(“West”, makeScrollBars( ) ); cp.add(“East”, makeSelectWindow( ) ); cp.add(“Center”, canvasPanel); } private JPanel makeScrollBars( ) { JPanel p = new JPanel( ); p.setLayout(new GridLayout(1, 3, 0, 2); p.add(redBar); …….. return p; }
Description for JPanel 1 Layout Manager: GridLayout 1 row, 3 columns, 2 pixels separating the columns Components: 3 JScrollBars – red, green, and blue Size: full height, less than1/4 width of applet Code: private JPanel makeScrollBars ( ) { JPanel p = new JPanel( ); p.setLayout (new GridLayout ( 1, 3, 0, 2)); p.add (redBar); p.add ( greenBar); p.add (blueBar); return p; }
Layout Manager: GridLayout – 3 rows, 1 column, 4 pixel separation between rows Description for JPanel 3 Components: 3 JPanels – In GridLayout, all Panels will be the same size Size: full height, about 1/4 width of applet Code: private JPanel makeSelectWindow ( ) { JPanel p = new JPanel( ); p.setLayout (new GridLayout (3, 1, 4, 0); p.add (p4); //Area 4 p.add (p5); //Panel 5 p.add (p6); //Panel 6 return p; }
Description of JPanel 2 Component: JPanel Layout Manager: None Contents: Graphics and Text Location: “Center” -- of BorderLayout
Construction of Applet Interface public class DrawScreen extends JApplet ( private BorderLayout myScreen = new BorderLayout( ); private JPanel cv = new JPanel( ); int up = JScrollBar.VERTICAL; private JScrollBar red = new JScrollBar(up, 40,0, 0, 255); private JScrollBar green = new JScrollBar(up, 40,0, 0, 255); private JScrollBar blue = new JScrollBar(up, 40,0, 0, 255); //declare remaining components publicvoid init ( ) ( Container cp = getContentPane( ); cp.setLayout (myScreen); cp.add (makeScrollBars(), BorderLayout.WEST); cp.add(makeSelectWindow( ), BorderLayout.EAST); cp.add(cv, BorderLayout.CENTER); //in whatever area is left } }
Putting It All Together Multi-paneled Applet