MagicInfo Pro Server: Creating a MagicInfo Pro Screen Template
MagicInfo Pro Server: Creating a MagicInfo Pro Screen Template. MagicInfo Pro Screen Templates. All content distribution in MagicInfo Pro is based around a screen template.

MagicInfo Pro Server: Creating a MagicInfo Pro Screen Template
E N D
Presentation Transcript
MagicInfo Pro Server: Creating a MagicInfo Pro Screen Template
MagicInfo Pro Screen Templates • All content distribution in MagicInfo Pro is based around a screen template. • Screen templates are files that the user creates, showing the MagicInfo Pro system what content should be displayed, in what configuration, and in what layout. • Any content to be distributed out to the MagicInfo Pro displays must be part of a screen template. • The MagicInfo Pro Server has a built in template creation system, that the user can utilize to make these files, save them, and then take them into the schedule creation system for distribution.
Creating a MagicInfo Pro Template • The template creator is accessible through the second button on the server software’s toolbar. • Clicking this button will display the Screen Template creator window.
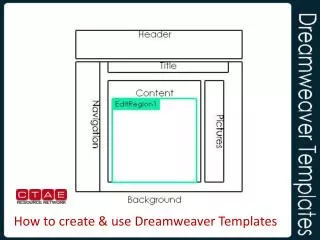
Creating a MagicInfo Pro Template • The Screen Template creator window is made up of three sections: • The left section displays the windows placed into the screen templates. These windows are called areas. • The right section shows the screen template. This will display all the various windows that have been created, and their layout. This can also display previews of these windows. • The lower section will display all relevant settings when a particular window is selected, and allow editing of these settings.
Screen Background • The first window that will be displayed, is the background. This is created by default when a new template is opened. • The default is a plain black field. However, many different options are available through the left hand section of the template creator. • Left clicking any of the categories under background will display those options in the lower section of the window.
Screen Background • Area: • Area is the first option under background. It controls the name of the object (By default called Background) and the background resolution. The resolution is used to select which model screen will be used, and whether it is portrait or landscape. • Note: Native mode for the display model being used must be selected. • To change settings, double click on the Value setting that corresponds to the Item the user wishes to change.
Screen Background • Screen • This option under Background allows the user to control the content of the background window. • The user can set the color of the background, or change it to a photo file or slideshow, an office file, or an external source. • There are browsers under Screen to allow the user to see all assigned photo or office files. They can be accessed by clicking the plus icon next to Screen.
Screen Background • Screen • The Type command on this screen is the only way to schedule an Office file type for playback. • The user must set the Type to Office File, and specify the desired file under Office File.
Screen Background • Screen • If the user wants to run a full screen external source, such as HDMI, the Type should be set to Source List, and under the Source List option, the appropriate source should be selected.
Screen Background • Screen • There is an additional option present as a source available only for the background. The option Panel Off is used to schedule the display to be off for a desired period of time. • For example, the user wishes the display to be off from 6PM to 10AM. The user would need to schedule a Panel Off template for that time period. • This Panel Off command is the only way to turn the panel off and on via the schedule system. • A unique template must be created containing the panel off function. • Note: This will not turn off the displays client PC. This merely shuts down the LCD panel and puts the display into a “sleep” mode. Sending it new content, or a text message will immediately bring the screen back into an on state.
Screen Background • Music: • This option allows the user to set background music from MP3 files within the library. • The sound can be turned on or off, music files chosen, and volume selected. More than one music file can be added at once. They can be set to repeat, or simply play once. • Music also has an expanded viewer, from clicking the plus icon, called Music File. This displays a list of all the currently added background music files.
Screen Background • Effect: • Effect is the final option under Background. This is used for assigning special effects to the background. • Effect type, speed, direction and size can be set here.
Adding Content to a Screen Layout • Now that the user has configured the template background, various content windowss can be defined. • This is where the creativity of the user comes into play. The initial impression may be to consider this window based system as confining, but the use of layering and different content types can provide many options to enhance the appearance of the digital signage content. • Also, embedding content within other types, such as adding items to a webpage for the system to display, or incorporating items into a video for full screen playback can be used.
Adding Content to a Screen Layout • To add content windows to the screen background, simply right click on the background window. This will bring up a menu. • Moving the cursor over the Area command, will bring up a menu of content choices.
Adding Content to a Screen Layout • Left clicking on one of the content choices will allow the user to “draw” a box for the content window. The cursor will become a cross shape, and by left clicking and dragging, the user can define the space the content window will take up.
Adding Content to a Screen Layout • Each type of content will have its own set of options, much like the background window does. • The following slides will highlight how these options function for the Photo window type. • However, all content types work in a similar manner, with menus laid out in the same way.
Content Area Options • To access a windows options, left click it in the left hand section of the screen template creator window.
Content Area Options • Area: • Area is the first option under Photo. It controls the Name of the window (By default called Photo and a number) the size (in Width and Height by pixels), and the position on screen (In numbers of pixels distance from the Left and Top of the screen). Duration can also be set here. This will control the length this photo is shown. • To change settings, double click on the Value setting that corresponds to the Item the user wishes to change.
Content Area Options • Screen • This option under Photo allows the user to control the content of the photo window. • The user can set the Photo File to be displayed. Multiple photos can be set to run as a slide show, and the Time Intervalat which they change can be set in seconds. • There is a browser under Screen to allow the user to see all assigned photo files. They can be accessed by clicking the plus icon next to Screen.
Content Area Options • Background • This option under Photo allows the user to set a background color or photo file, to be displayed if the actual photo file content is smaller in terms of pixel size than the window itself. • From here, the transparency of the photo can be controlled, as well as if the user wishes to define background music attached to this item. • There are browsers under Background to allow the user to see all assigned photo or office files. They can be accessed by clicking the plus icon next to Background.
Content Area Options • Background • On this screen, there is an option called Aspect Ratio. This allows the user to control how a picture is displayed. • Full will have the photo size to fit within the photo window • This will scale the photo to fit the window at all times, if it is larger, or smaller. • Original will keep the photo at it’s own native resolution displayed all, or in part, within the photo window. • If using Original, a background of some sort should be defined, as it will be seen if the photo is smaller than the photo window. • A larger photo than the photo window will only show a portion of the photo, from the top left corner, until it fills beyond the photo window.
Content Area Options • Effect: • Effect is the final option under Photo. This is used for assigning special effects to the photo. • Effect type, speed, direction and size can be set here. • Note: Effects will ONLY be seen in full screen preview mode of the whole template, not in the double click preview mode for that window.
Adding an External Source to a Template • The user may add an external source (HDMI, component video, etc.) within a window inside a template. There are several properties to note with the Source content type: • Only 1 source type can be displayed at once. The software allows for the user to add multiple source windows, but only the last added window will display it’s contents. The rest will remain black. • Source windows will not allow for any transparent items to be laid over them. If an item, such as a text scroll, is laid over a source window, and it has a transparent background, the background will appear as a solid color. • If the user wishes to schedule a full screen source, it is best to create a new template, and designate the background as that source, using the Background/Screen options.
Previewing a Template in Full Screen • The user can view individual content areas by double clicking on them. • However, a full screen preview mode is also available. This will display the template as the MagicInfo Pro display will see it, in the actual resolution used by the display. • Preview Screen mode can be activated by clicking the Preview Screen button icon in the server software toolbar.
Previewing a Template in Full Screen • Please note, that the preview display will show the template at the native resolution the template is designed for. • This means that the user needs to take the MagicInfo Pro screen resolution into account when selecting a desktop monitor to preview the templates on. • A 1920x1200 screen resolution is recommended to allow the entire preview to be seen at once for 1080 native MagicInfo Pro templates. • A lesser screen resolution will result in the preview mode being cut off.
Saving a Template • Now that the user has created a template for content, it must be saved, to make it available to the scheduling system. • The user can save templates by clicking the Save button icon in the server software toolbar. • Note: Templates must be saved before they can be published or edits sent !
Saving a Template • If the user wants to edit an existing template, a menu of previously saved templates can be accessed via the Open Screenbutton icon on the server software toolbar. • Before publishing this edited template, the user must save the changes and replace the template in the schedule if that template is not already scheduled .


![Creating a [legacy & EFI] PXE server using pxelinux](https://cdn3.slideserve.com/6765716/creating-a-legacy-efi-pxe-server-using-pxelinux-dt.jpg)