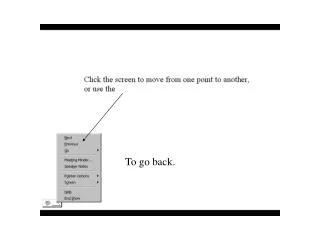
To go back.
To go back. At any time, you may press the “ Esc †button at the top upper left side of your keyboard to get out to move many slides backwards or forwards. Remember: keep pressing the screen to move forward a point at a time. PowerPoint Tutorial. Edward De Leon. Notes:.

To go back.
E N D
Presentation Transcript
At any time, you may press the “Esc” button at the top upper left side of your keyboard to get out to move many slides backwards or forwards. Remember: keep pressing the screen to move forward a point at a time.
PowerPoint Tutorial Edward De Leon
Notes: PowerPoint allows the instructor to bring in text in bullet forms or brief statements for those students, who cannot write as fast. It also allows the point to sit there, to ponder, if you will, for the student. The point/bullet can be introduced with fanfare or just presented, and the instructor goes from there.
Your PC should look some like this Go to the Start Button
Up to Programs then over to Microsoft PowerPoint
This first prompt slide asks you to select a preset Design Template, Or, if you prefer, Blank presentation
PowerPoint has many design templates to select from, plus a preview
This is just one of PowerPoint slides templates NOTE: If you select a template, it will be the same for your whole presentation.
Or select Blank presentation. The rest of this presentation is on blank slides I recommend this because I can choose backgrounds
You’ll get a screen like this: this is the working board This shows you which slide you’re in.
These pull down menus are important to insert objects and to add other neat things. So, I urge you to take five minutes to go to each menu.
Also, this task bar allows you to manipulate text—take five minutes here too.
These icons lets you manipulate the slides—take five here. This icon when clicked will start the slide show.
Let’s begin by adding a new slide You may hit the icon or the Insert pull down menu.
It’ll ask you for Autolayout. Always choose this one.
If you need more slide view area, move the bars over and down with with the mouse pointer
Or, use these icons to see the slides in various forms and layouts
Ok, a blank slide. Let’s start adding stuff.
Descriptive Essay click
When you select the object, this box appears to adjust it some more I did this writing with the Word Art icon.
You may want to insert clip art from your computer; Use this icon.
Let’s insert a picture go to the Insert menu you may have some objects in Clip Art … or From File … —like a CD of art works.
Chose file … I have a CD in the (D:)
You many go through the list of art objects—it gives a preview Then hit Insert
It’ll look like this on your slide, however, if you want it to be a background instead Descritive Essay you need to select it in the Format menu.
When you hit Background … You’ll get this option GO to the down arrow Then hit Fill Effects …
This is a neat place for backgrounds of all sorts and designs Gradient, Texture, and Pattern are fun if you don’t want a picture. But I want a picture-- I hit Picture.
Hit OK It wants to confirm your choice.
Do you want it on all your slides or just One? Now, this is important. I do them one at a time so I hit Apply. And viola!
Descritive Essay Hit screen to go on.
If you prefer to use text instead. . . Position the Text bar anywhere. Preferably in light spaces if you’re writing in black. Hit the Text Box to add text
You notice some problems in the dark portion. Use a different text color if it’ll help.
You may want the slide to come in a certain manner For this, use Slide Transition
Select one-- the Effect picture of the dog will show you how it will appear. Here, you are offered ways to slide your slide into the next position.
Let’s make the text animated High light it. …and select one of the options
You saw how I added pictures From a CD Guess what, you can add sound (wav files) and movies (very short ones work well).