Affordable RS232 Projector Controller: JED T440 with Versatile Keyboard Options
Introducing the JED T440 low-cost projector controller, a budget-friendly RS232 wired solution designed for ease of use. Featuring status LEDs for warm-up and cool-down indications, the T440 allows for a variety of keyboard configurations—up to 8 keys for controlling audio and video sources, channels, and more. With options for audio volume control and advanced functionality for dual-channel management, it ensures seamless operation in educational and professional settings. Experience reliable performance and intuitive design with the T440.

Affordable RS232 Projector Controller: JED T440 with Versatile Keyboard Options
E N D
Presentation Transcript
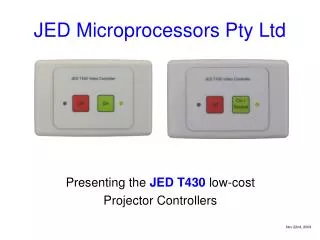
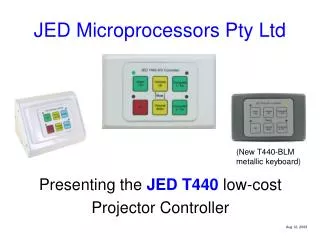
JED Microprocessors Pty Ltd Presenting the JED T440 low-cost Projector Controller (New T440-BLMmetallic keyboard) Aug 12, 2009
Demonstrating the JED T440 • T440 is a budget RS232 wired controller with status LEDs and a variety of keyboards; • LEDs flash during warm-up/cool-down lockout; • Communications status read by pressing OFF.
Choose your keyboard Code 2 Code 0 • These four are the initial release: there are now 9 in the family; • Four-key for simple ON plus volume, or ON with simple channel select; • Up to 8 keys, so can control screens, TV channels etc. Code A Code 9
Off key/LED: Quick system check Code 0 • The OFF LED shows in the “rest” state; • The OFF button can be pressed in the OFF state, and the T440 polls the projector. If the projector replies correctly, the OFF LED flashes once; • If NOT, it flashes three times.
ON key: System starts Code 9 Pressing the ON key starts the projector, and the ON LED flashes during warm-up. The last used channel LED also glows, showing where the system will start after warm-up (“Video” in photo.) (An alternate channel can be chosen during warm-up, and this LED now glows.)
System running Code 9 After warm-up is complete, the channel setting message is sent to the projector, as indicated by a lit channel LED. (At this time the channel LED flashes briefly.) Pressing another channel key changes to a new channel, and this channel LED now pulses, and then glows.
Audio control: The yellow keys Code 9 The yellow keys control the audio volume, either in the projector, or the external T461 audio controller (see later). If BOTH yellow keys are pressed together, the audio and picture mutes. Pressing a yellow key, the ON key or the active channel key restores both picture and sound.
Combined On/Channel key systems (Code 5 keyboard) (Code B-L “landscape”) (Code B-P “portrait”) Note how three keys have combined ON and channel functions. Use these if there are two computer/VGA channels in an install. An alternate channel can be chosen during warm-up, and this new LED now flashes during warm-up, and then remains lit after startup.
Double-function options on source keys by setting OPT4 switch ON Four key, code 0 Six key, code 9 Six key, code A Eight-key, Code E These (above) normally give two main channels, Computer:1 and Video:1.With OPT4 set, each button can be pressed again to select secondary channels, i.e. Computer:2 (eg Laptop) and Video:2 (eg S-Video) (Note: After changing between Computer/Video, the system defaults to the primary source for that key.) Four key, code 2 OPT4 gives toggle between two computer channels
Freeze-Mute keyboard When running, this option allows the user to freeze the display or mute the picture. (Assumes the audio is handled externally.) Code A keyboard Note the 45 degree metal case, (available in white or black.)
At the end of the show: Just press OFF Code 5 The red LED flashes for the length of the programmed cool-down period, and then goes into steady OFF state ready for the next cycle. (Warm-up and Cool-down time can be manually entered at setup.)
T440 back view: Switches Keyboard code switch (code A here) Reset switch. (Always press after changing any settings.) Options SW2 SW3 Option switches 1 to 8 for special functions, e.g. select S-Video, auto pixel align, PIR/Timer start, double-hit mode, reply mode, T441/T461 audio, etc Sw2 & 3 to set projector family codeMUST be set at install time by tech. (This unit set to 12 hex, i.e. NEC 9600 baud family. See part B of manual.)
T440 back view: Connections 1 9 to 20V power + striped wire - plain wire RS232 to projector GroundTX command to projectorRX reply from projectorCTS (option) to projector
T440 back view: Connections 2 Ground FET contact closure for Relay 3 system power control +12V Rel1. Rel2. GroundScreen control relay outRel1.= Screen DownRel2.= Screen Up
T440 back view: Connections 3 Passive Infra-Red (PIR) This sensor can reset an internal timer, so the projector keeps running while students are present, but it times out and turns off when everyone has gone home! The PIR can also start a projector when people enter a show-room or gallery. PIR inputGround
T440 back view: Connections 4 T441/T461 audio mixer / attenuator • Used if the projector: • Does not control audio; • Has not enough inputs; or • Has no audio output. • T441 2-channel audio system RS232 to T441/T461/439 GroundTX command to T461RX reply from T461(This port is also used for re-programming.) Four stereo lines in, one stereo line pair out to amp. T461 4-ch. audio system
T440 back view: Connections 5 JED 439 USB switcher Used to switch the USB ports from two computers in a classroom so that either can control an Electronic Whiteboard. RS232 to JED439 GroundTX command to JED 439RX reply from JED 439 The 439 switches USB Whiteboard control between a classroom PC and a teacher’s “guest” laptop, when the T440 selects Computer:1 or Computer:2. Control can be via RS232, via contacts or via auto-sensing of 5V on the line. It can disconnect control when Video is selected.
T440 back view: Connections 6 RF/swipe readerstarts projector(OFF stops) Ground Aux. In Key switch inputenables ON key(OFF stops) LCD timer startsand stops projector(can still havemanual ON/OFF) These three devices connect to the “Aux In” connector allow a variety of remotecontrol and security access of the T440 in classrooms, showrooms or galleries.
T440 back view: Connections 7 IR transmitter to non-RS232 projectors IR bug connects to this socket to signal to Epson X5 etc via IR. IR Tx This bug is stuck onto projector IR window: Cable shield (ground)Inner (LED drive)
T440 back view: Connections 8 Easy connection option: Plug in a CAT5 cable as the only connection from the T440 to the projector. Then run power, RS232, PIR all down the one cable from a plug pack up with the projector. Or use the new T447 (below left) to connect it all together up the top, including a signal tester. (See the LEDs which flash with communications.) CAT5 CAT5
JED T440 simple system block diagram #1: projector/no-audio control configuration PIR detector Power amp.+ speakers 12v ScreenUp/Down JED T440 OR Poweredspeakers Projector RS232/1 (or IR) video + audio control (Audio can bypass projectorand use just one channel,with manual control. Then can use a freeze/mute keyboard.) 12 volt plug pack VGA 1 (VGA 2) Blue: RS232Black: VGA/VideoRed: AudioGreen: PIR/Screen Comp./S-Video
JED T440 plus 439 simple system block diagram #2: projector/no-audio & USB IWB control configuration PIR detector Power amp.+ speakers 12v 439 USB switcher USB JED T440 A-B USB-in OR RS232/2 control Poweredspeakers Projector RS232/1 video + audio control USB-A USB-A USB-B (Audio can bypass projectorand use just one channel,with manual control. Then can use a freeze/mute keyboard.) 12 volt plug pack VGA 1 439 USB switcher doesA-B or OFF switching via RS232 from the second serial port to select which computer controls the EWB (VGA 2) Blue: RS232Black: VGA/Video/USBRed: AudioGreen: PIR/Screen Comp./S-Video
JED T440 system block diagram #3: with T441 audio control configuration PIR detector Power amp.+ speakers 12v OR JED T440 RS232/2 T441 audio control Poweredspeakers Projector RS232/1 (or IR) video control Audio JED T441 audio mixer (2 stereo or 2 mono + 1 stereo into mixer) 12 volt plug pack VGA 1 (VGA 2) Blue: RS232Black: VGA/VideoRed: AudioGreen: PIR/Screen Comp./S-Video
JED T440 full system block diagram #4: with T461 audio control configuration PIR detector Power amp.+ speakers ScreenUp/Down JED T461 audio mixer(4 stereo inputs to mixer) 12v OR JED T440 RS232/2 T461 audio control Poweredspeakers Projector RS232/1 (or IR) video control Timer,swipestart Audio + T465 microphone amplifier-mixer (option in path) VGA 1 Blue: RS232Black: VGA/VideoRed: AudioGreen: PIR/Screen/Easyswitch contacts (VGA 2) Easyswitch 240V power control of system with ON Comp./S-Video
How to choose a keyboard 1 Four key, code 0 Four key, code 5 Four key, code 2 Use this if only one channelwith audio control is needed. Choose from these two if no audio. Four key, code 1 (IR only.)The source key rolls throughavailable channels. Eight-key TV controller, Code EThis adds channel change for flat-panel TV displays, to control tuners.
How to choose a keyboard 2 Six key, code 9 Six key, code A These two give two channels, with either audio volume controlor freeze & mute if no audio (or external audio control.) Six key landscape, code B-L Six key portrait, code B-P Six key portrait, code BLM metallic finish These three give three channels, and have audio control
Software for the T440 The software for the T440 contains drivers for all covered projectors and flat panels, and the code set onto the two rotary switches selects a driver, with options for baud rate and minor code differences. There are no specific models selected by number, as in the T460, rather many models are covered by each setting. Typical models arenoted in the user’s manual and the “covered projector” lists by release. One big advantage of the T440 is that you never have load each controller at install time from a lap-top or by capture from a hand-held IR remote … just set the switches. As JED includes new drivers, these are made available to distributors, and an older T440 can be updated and a new driver then selected. The cable plugs into the T440’s second serial port.
JED controllers T460 and T440 The T460 is our high-end model, with a text LCD display, showing channel names for up to eight channels. Lamp hours are displayedat start-up, and warm-up and cool-down times are counted down. This unit can drive the T461 audio box, and a variety of mixers and relays for external signal control. Swipe card readers, PIR and timer inputs are also provided. The T464 network box allows remote monitoring from a tech centre.