Download
1 / 66
680 likes | 858 Vues
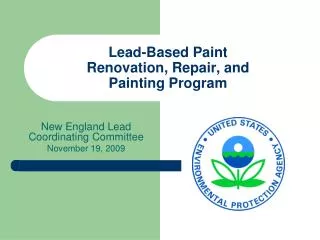
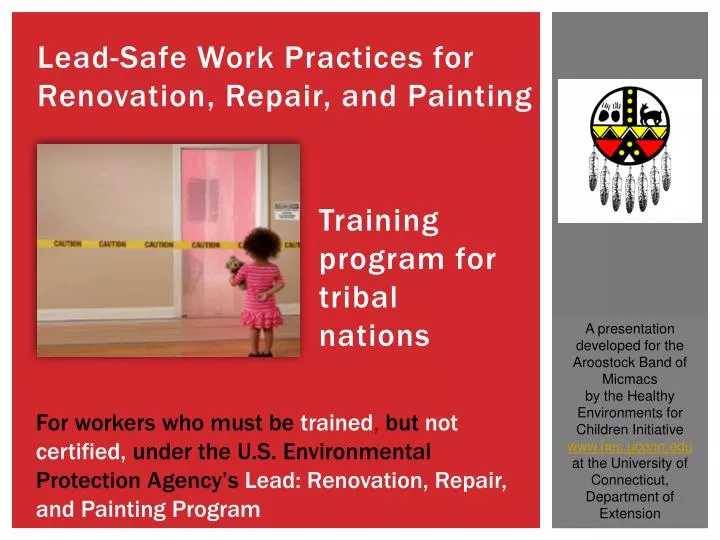
Lead-Safe Work Practices for Renovation , Repair, and Painting. Training program for tribal nations. A presentation developed for the Aroostock Band of Micmacs by the Healthy Environments for Children Initiative www.hec.uconn.edu at the University of Connecticut, Department of Extension.

E N D
Lead-Safe Work Practices for Renovation, Repair, and Painting Training program for tribal nations A presentation developed for the Aroostock Band of Micmacs by the Healthy Environments for Children Initiative www.hec.uconn.edu at the University of Connecticut, Department of Extension For workers who must be trained, butnot certified, under the U.S. Environmental Protection Agency’s Lead: Renovation, Repair, and Painting Program
Who should take this course? Take this course if you will (1) Work on renovation, repair, and painting jobs in homes, childcare facilities, and some schools built before 1978 (2) Work under the direction of a certifiedrenovator and
Certified? Non-certified? This course is for non-certified workers It explains the skills you need to work lead-safe (under the direction of a certified renovator) but It does not meet the training requirements to become an EPA-certified renovator A certified renovator is a person who has been certified in lead-safe work practices by the U.S. Environmental Protection Agency (EPA) Certified renovators must take a different course
Why should you take this course? • To meet the requirements of EPA’s Renovation, Repair, and Painting Rule (RRP) if you work on homes, child-care facilities, and many schools built before 1978 • To learn how to protect yourself, your family, and your community from lead poisoning
Why 1978? • Structures built before 1978 may contain lead paint • If you do not handle lead paint safely You, the residents, their neighbors, your co-workers, and your own family can become lead poisoned • This training will teach you how to work lead-safe
What’s the connection between lead poisoning and renovation?
What harm does lead poisoning do? In adults In young children Lead can cause serious problems with blood pressure, sexual function, digestion, and other illnesses Lead can cause serious, permanent problems with learning, behavior, and health
By the end of this training, you will know how to Prevent the spread of dangerous lead dust during renovation, repair, and painting by • Setting up the job properly to keep dust and debris from spreading • Working so that you create as little dust as possible • Cleaning up completely
You’ll work under direction of an EPA-certified renovator Certified renovators • Perform lead-safe workas described in the RRP Rule • Train all non-certified workersin lead-safe work practices • Direct all non-certified workers during setup and cleanup • Are available by phonewhen not physically present at the work site during work • Maintain proofof certification and training records for all non-certified workers
Your responsibilities as a non-certified worker • Cooperate with the certified renovator in working lead-safe • Use the lead-safe work practices that you are being taught ? • Ask questions if you do not understand how to work lead-safe • A certified renovator must be on-site while the work area is being set up, during cleaning, and during cleaning verification • During other steps, a certified renovator must be either on-site or available by telephone
EPA guidebook: Steps to Lead Safe Renovation, Repair and Painting www.epa.gov/lead/pubs/steps.pdf
Step 1 Does the job involve lead paint? The main idea Why? If you don’t work lead-safe • You, your family, or residents may become lead poisoned If lead paint is present • You must use lead-safe work practices If you don’t know whether lead paint is present • You must assume that it is present • You must use lead-safe work practices
Step 1 Does the job involve lead paint? Only these people can determine whether lead paint is present: • A certified renovator (but not non-certified workers, including those who have taken this course) • A certified lead inspector • A certified lead risk assessor How will you know? A certified renovator has been trained to • Use an EPA-approved lead test kit • Collect paint chip samples for lab analysis or
Step 1 Does the job involve lead paint? Workers are not required to use lead-safe work practices Workers must use lead-safe work practices How will you know? • If testing shows that no lead paint is present • Otherwise
Step 2 Set up safely:Contain (isolate) work area The main idea Why? Keep out • People who are not working on project • Pets that can track lead dust throughout the home Keep in • Dust and debris • To protect workers and residents • To prevent dust from spreading to rest of house • To make cleanup easier at end of job
Step 2 Set up safely:Contain (isolate) work area • Signs • Barrier tape, rope, or fencing • Cones • Heavy-duty plastic sheeting • Masking, duct, or painter’s tape • Stapler • Utility knife or scissors Supplies and tools you’ll need
Step 2 Set up safely: Keep people and pets out How • Put up signs, tape, cones, fencing, or other barriers • Use signs in residents’ own language • Ask owners to keep pets away from work area • Explain that keeping out of the work area protects everyone from lead poisoning Note: A certified renovator must be on-site while the work area is being set up
Step 2 Set up safely indoors: Keep dust and debris in Protect furniture and other belongings • Take all moveable items out of work area • Cover items that cannot be moved with heavy plastic sheeting, and tape securely • Cover floors with heavy plastic sheeting at least 6 feet in all directions from work that will be done
Step 2 Set up safely indoors: Keep dust and debris in • Close, cover with plastic sheeting, and seal • All windows • All doors (except for entry to work area) • All air vents Seal off work area If necessary, create airlock to enter and leave work area
Step 2 Set up safely indoors Put all tools and supplies on plastic sheeting before starting work
Step 2 Set up safely outdoors: General • Cover ground and plants with heavy-duty plastic sheeting • Extend sheeting at least 10 feet in all directions from work that will be done • Secure sheeting to building • Within 20 feet of work area • Close and seal windows and doors • Move or cover play areas Keep dust and debris out of home • Put tools and supplies on protective sheeting before starting work
Step 2 Set up safely outdoors: Vertical containment
Step 2 Set up safely outdoors: Special conditions
Step 2 Set up safely outdoors: Special conditions • If conditions are very windy Avoid working in high winds if possible • If you must work, be very careful to keep dust and debris inside work area • You may need to make windscreen at edge of ground-cover plastic
Step 2 Set up safely: Very dusty jobs • Usually require even more careful setup. All of the previous steps and
Step 2 Set up safely: Maintain containment
Step 2 Set up safely: Maintain containment
Step 3 Protect yourself The main idea
Step 3 Protect yourself:Personal protective equipment Disposable latex or rubber gloves Safety goggles or glasses to protect your eyes to keep your hands clean, especially when you eat Disposable coveralls to keep dust off your clothes
Step 3 Protect yourself:Personal protective equipment • Disposable N-100 respirator to keep you from breathing lead dust Disposable painter’s hat Disposable shoe covers to keep dust out of your hair to keep dust off your shoes and keep you from tracking dust out of the work area
Step 3 Protect yourself:At work • Wear personal protective equipment • In the work area, do not • Eat • Drink • Smoke • Wash your hands and face carefully • Each time you leave the work area • Before you eat or drink • At end of each work day
Step 3 Protect yourself:At work • At end of work day • Vacuum dust off clothes and shoes or put on clean clothes and shoes • Use HEPA vacuum to collect dust • Do not use compressed air to blow dust off clothing • Wash work clothes separately from household laundry • Do not hug anyone until you have • Changed out of your work clothes • Washed yourself thoroughly
Step 4 Control the spread of dust • Create as little dust as possible • If you do create dust, keep it from spreading The main idea
Step 4 Control the spread of dust Supplies and tools you’ll need • Wet-dry sandpaper, sanding sponge • Misting bottle or pump sprayer • Heavy-duty plastic sheeting and bags • Utility knife or scissors • Masking, duct, or painter’s tape • HEPA vacuum cleaner • Tack pads, paper towels, or disposable wipes For some jobs, you’ll also need • Low-temperature heat gun • Chemical strippers without methylene chloride • Power tools with HEPA attachments
Step 4 Control the spread of dust • Mist areas before sanding, scraping, drilling, and cutting (except near live electrical outlets) • Score paint with utility knife before separating components • Pry and pull apart components instead of pounding and hammering Create as little dust as possible
Step 4 Control the spread of dust • Keep work area closed off from rest of home • Stay in contained work area and on contained paths • Don’t track dust and debris out of work area • Remove disposable suit and shoe covers before you leave work area • Clean shoes on tack pads or use damp paper towels to wipe off shoes before you step off protective sheeting Keep dust within work area
Step 4 Control the spread of dust • Before removing • Wrap securely in heavy plastic sheeting or secure in heavy-duty plastic bags • HEPA vacuum outside of bag • After removing • Store in safe area away from residents To remove components from work area
Step 4 Control the spread of dust:Prohibited practices • Do not use open-flame burning • Do not remove paint with high heat (heat guns must operate under 1,100 degrees Fahrenheit) • Do not use power tools, such as sanders and grinders, unless they are shrouded and have HEPA attachments When working on lead paint No
Step 5 Leave work area clean Leave work area completely clean of dust and debris • At end of every day • At end of job Main idea Note: A certified renovator must be on-site while work area is being cleaned
Step 5 Leave work area completely clean of dust and debris • Heavy-duty plastic bags • Masking, duct, or painter’s tape • Misting bottle or pump sprayer • Disposable wet wipes or hand towels • HEPA vacuum with beater bar Supplies and tools you’ll need
Step 5 Leave work area completely clean of dust and debris • Detergent or general-purpose cleaner • Mop and disposable mop heads • Two buckets or a two-sided bucket with wringer • Shovel and rake • Wet mopping system • Swiffer®-type dry cloths Supplies and tools you’ll need
Step 5 Leave the work area clean:Every day • Clean and pick up as you work • Vacuum work area with HEPA vacuum cleaner often • Put trash in heavy-duty plastic bags • Wash your hands and face each time you leave work area Throughout each day
Step 5 Leave the work area clean:Every day • Clean entire work area and two feet beyond work area in all directions • Vacuum again with HEPA vacuum cleaner • Clean your tools • Wash well before you go home • Safely dispose of, or clean off, personal protective equipment At end of each day
Step 5 Leave the work area clean:At end of job • Keep sheeting that isolates work area in place until work area is completely clean • Remove plastic sheeting carefully • Spray with water • Fold with dirty side in • Tape it shut • Dispose of properly • Remove all dust, chips, trash, and debris, including building components, from work area • Vacuum all surfaces, including walls, with HEPA vacuum cleaner • Use beater bar on carpets
Step 5 Leave the work area clean:At end of job • Let surfaces dry, and vacuum again • Look around work area • Also look 2 feet beyond work area and paths where debris was carried • You should see no dust or debris • Clean area again thoroughly if you see any dust or debris Inspect Damp clean • Mist work area • Scrub with general-purpose cleaner on wet rag or mop until all dust and debris are gone • Change rinse water often HEPA vacuum again
Step 6 Collect and control waste Contain waste at all times • On-site • When it is being removed from the site The main idea
Step 6 Collect and control waste:What is included? • Waste from painted surfaces • Dust • Debris • Paint chips • Architectural components • Protective sheeting • Dirty water • Cleaning supplies • Mop heads • Wipes • HEPA filters • Protective gear • Disposable clothing • Gloves • Respirators • Any other waste
Step 6 Control waste:How to bag it Bag and seal all waste before removing it from work area • Put all waste in heavy plastic sheeting or bags • Gooseneck seal bag with duct tape • Double bag when necessary to prevent tears • Wrap large components in protective sheeting and seal with tape • HEPA vacuum outside of waste bags and bundles before removing them from the work area.
Step 6 Control waste: How to store it • Store all waste in secure container or dumpster until disposal • Dispose of waste as soon as possible • Do not carry waste in open truck or personal vehicle