Download
1 / 14
140 likes | 233 Vues
Learn how to design a house layout efficiently by setting up the foundation, planning room areas, defining walls, doors, and windows, and adding fixtures. Elevate your house design skills!

E N D
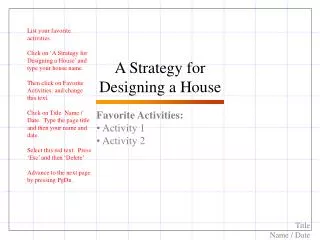
List your favorite activities. Click on ‘A Strategy for Designing a House’ and type your house name. Then click on Favorite Activities: and change this text. Click on Title Name / Date. Type the page title and then your name and date. Select this red text. Press ‘Esc’ and then ‘Delete’ Advance to the next page by pressing PgDn. A Strategy for Designing a House • Favorite Activities: • Activity 1 • Activity 2 Title Name / Date
Set up your basic house foundation. (24’x36’) Then roughly indicate where your favorite activities should be done using ellipses. Click on the ellipse icon and then define a rectangle with your cursor within which your ellipse will be drawn. To add text, make sure the ellipse is selected. Then click on the text icon and type your text. Click on ‘Format’ / ‘Colors and Lines’ and assign ‘no fill.’ Press ‘Esc’ to clear and go back to the previous state. Keep in mind traffic flow, conservation of plumbing lines and noise levels. A5 A2 A4 A1 24’ A3 34’ Title Name / Date
24’ 34’ Title Name / Date
A5 A3 A4 A1 A2 Room2 You are now ready to layout the floor plan. Go back to the page of ellipses. Group the ellipses by dragging your cursor from one corner of all the ellipses diagonally to the other corner, surrounding all ellipses. Click on ‘Draw’ and then Group. This makes it easier to manipulate all ellipses together. Copy and paste the group of ellipses to the layout page so you will know where to define your rooms. Start laying out the the room areas within your foundation. Click on the rectangle icon and define the rectangle corners by dragging your cursor. 24’ Room1 34’ Title Name / Date
Room 5 12 x 24 Room 4 8 x 12 Room 2 14 x 12 Click on ‘Format’ / ‘Colors and Lines’ and assign ‘no fill’ to all rectangles. Select and delete the group of ellipses. Make sure your rooms are big enough. The scale is one square ¼” grid equals one square foot. 24’ Rooms 1 and 3 24 x 12 34’ Title Name / Date
Define the walls, doors and windows. Click on the line icon to draw straight line segments. Hold the shift key down to ensure horizontal and vertical lines.. To change the thickness or color of a line, click on that line and then click on Format / Colors and Lines. To create multi-segment lines, click on AutoShapes / Lines / Multi-segment line icon. Room 5 12 x 24 Room 4 8 x 12 Room 2 14 x 12 24’ Room 1 and 3 24 x 12 34’ Title Name / Date
Add in bathroom and kitchen fixtures. Living and Garden Room 12 x 24 Bathroom 8 x 12 Bedroom 14 x 12 24’ Kitchen Work Room 24 x 12 34’ Title Name / Date
24’ 34’ Title Name / Date
Draw the elevations. It is useful to select all the lines of an outside wall from the floor layout. Then copy and paste them at the bottom of the elevation drawing. This will help you know exactly where the doors and windows are. 24’ Title Name / Date
24’ 34’ Title Name / Date
Title Name / Date
24’ 34’ Title Name / Date
24’ 34’ Title Name / Date
24’ 34’ Title Name / Date