Download
1 / 16
160 likes | 167 Vues
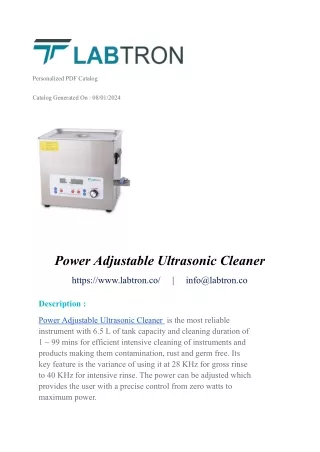
Ultrasonic jewelry cleaner is one of the best cleaning tools with high quality and efficiency. It will remove dirt deeply and perfect for all type of jewelry. For more detail visit our website and place an order with us.

E N D
Ultrasonic Cleaning Instruction Manual
CONTENTS: On Timer/Set O? Ultrasonic ransducer T Controller/ Power Supply 2 2 2 2
WARNINGS: Review your Sonic Soak Setup Guide before using to set up and tune your Sonic Soak before using. To reduce risk of electric shock or injury, read all instructions carefully and use Sonic Soak only for its intended purposes. Use of controls or adjustments or performance of procedures other than those specified may result in electric shock or injury. Always follow safety precautions when using electrical products with children present. Use Sonic Soak with extreme caution. Always keep controller and outlet dry and away from any moisture. Sonic Soak is available in three voltage configurations: 100V, 110V, or 220V. Only plug your Sonic Soak into the voltage it is specified for. NEVER plug a 100V or 110V rated Sonic Soak unit into a 210V-240V outlet or vice versa under any circumstances. Using your Sonic Soak with the incorrect voltage may cause burning, fire, or even explosion. You may use a 100V or 110V rated Sonic Soak unit with 100V-120V outlets. Never use Sonic Soak more than 15 minutes at a time, as it may overheat, potentially permanently damaging the device or causing bodily harm. Allow rest for at least 15 minutes between uses. 3
Quick Start 1 2 With Sonic Soak UNPLUGGED, placetransducer and objects to be cleanedinto container. Add appropriate cleaning solution (if needed). Warning: Set up and position the Sonic Soak, container, and objects in container BEFORE plugging in or starting the Sonic Soak.Never touch controller with any amount ofmoisture. Thoroughly dry off hands, wiring around controller, and controller. 3 4 After ensuring hands and controller are completely dry, plug in Sonic Soak. ON Warning: Double check your Sonic Soak and electrical outlet voltage prior to plugging in. NEVER plug a 100V or 110V rated Sonic Soak unit into a 210V-240V outlet or vice versa under any circumstances. Using your Sonic Soak with the incorrect voltage may cause burning, fire, or even explosion. You may use a 100V or 110V rated Sonic Soak unit with 100V-120V outlets. Throw in any cleaning solutions at this point (10 ml concentrate/per 1 L water). Click “ON” to start! 4
Cleaning Clothes 2 1 With Sonic Soak UNPLUGGED, place transducer and clothes to be cleaned into container. Add detergent (if needed) at a ratio of 10 ml of solution per 1L of water. Thoroughly dry hands and controller. 3 4 ON Plug in Sonic Soak and allow cycle to run for 5 – 15 minutes. After ensuring controller and hands are dry, unplug controller fully and remove transducer. 5 6 Gently swish and knead the garment through the water until the item is clean. Scrub dirtier clothes by rubbing the fabric against itself. After scrubbing, allow the clothes to soak. If the water looks dirty already, you can drain it and refill the sink with clean, soapy water and repeat the swishing and kneading motion. For dirtier loads, soak longer. Rinse clothes directly under the running tap to remove any remaining detergent until water runs clear without any soapy bubbles, kneading the clothes as necessary. 5
Cleaning Produce 2 1 With Sonic Soak UNPLUGGED, place transducer and produce to be cleaned into container. Add appropriate produce wash (if needed) at a ratio of 10 ml of solution per 1L of water. Thoroughly dry hands and controller. 3 4 ON Plug in Sonic Soak and allow cycle to run for 3 – 5 minutes. After ensuring controller and hands are dry, unplug controller fully and remove transducer. 5 6 Wash your hands for 20 seconds with soap and warm water before and after handling fresh produce. Gently rub surface of produce while swishing through the water for 15-30 seconds. Rinse produce with water to remove any leftover contaminants. 6
Cleaning Jewelry, Glasses, or Other Accessories 1 2 With Sonic Soak UNPLUGGED, place transducer and produce to be cleaned into container. Add appropriate ultrasonic jewelry cleaner or ultrasonic solution (if needed) at a ratio of 10 ml of solution per 1L of water. Thoroughly dry hands and controller. 3 4 ON Plug in Sonic Soak and allow cycle to run for 2 – 12 minutes depending on level of soiling. After ensuring controller and hands are dry, unplug controller fully and remove transducer. 5 6 Take your items out of the container and gently clean with a soft brush. Make sure that any residual dirt is removed, especially from the mountings of your rings. Rinse items and wash off any remaining cleaning solution. Dry jewelry or glasses with soft cloth after rinsing. 7
Wait! Your ultrasonic dreams are about to come true! But first, check out our Setup Guide to make sure your power settings are properly optimized! Step 1: Aluminum Foil Test 900 SET Step 2: Stain Removal Test Check out your “Sonic Soak Setup Guide” manual to see instructions – it is highly recommended to run both tests to ensure your Sonic Soak is properly set up and functioning! Visit www.sonicsoak.com/optimization for video instructoins! 8
WARNING: Set up and position the transducer, container, and objects in the container BEFORE plugging in or starting the Sonic Soak. Never expose the controller to any amount of moisture. Washing Instructions: Fill container with warm water (no warmer than 45°C). Submerge transducer into water and place in the center of a suitable container. Place object(s) to be cleaned around the transducer as close as possible without obstructing one another. Add a moderate amount of appropriate cleaning solution and mix in. Use 10 ml of cleaning solution per 1 L of water. Thoroughly dry hands, controller, and wires near the controller. 9
Operating Instructions: Operating the Sonic Soak: After ensuring controller and plug are completely dry, plug in controller. Adjust time by clicking SET. You can set timer to 3, 6, 12, and 15 minutes Once ready to turn on Sonic Soak, click ON to activate transducer. Note: Extend duration while Sonic Soak is running by clicking SET anytime. Stop operation by clicking OFF anytime. Adjusting Sonic Soak Intensity: Hold the ON button and tap the SET button to increase frequency. Hold the ON button and tap the OFF button to decrease frequency. Post-Operation: After wash duration finishes, ensure controller and hands are dry, and then unplug Sonic Soak. This should be done PRIOR to removing the transducer or objects. Carefully remove Sonic Soak from the container. 10
Detailed Cleaning Instructions: Use Sonic Soak to effectively and hygienically clean a wide range of items including: Watches Makeup Tools Lingerie / Lace Fruits / Vegetables Vinyl Glassware Hand-wash Only Fabrics Rusty Tools Personal Hygiene Tools And Razors Baby Items Jewelry Silverware Glasses Water Pipe Toys / Figurines Clothes: Use gentle movements to swish and knead the item through the water. Avoid scrubbing or twisting actions that can stretch or damage the fabric. Gently swish the garment through the water until the item is clean. Lift the garment from the sink and drain away the soapy water. DO NOT WRING the garment! Fill the sink with 11
clean, tepid water and put the garment back in the sink to rinse. Swish through the water. Repeat this step until no suds are seen. Hang-dry or run through dryer For produce Wash your hands for 20 seconds with soap and warm water before and after handling fresh produce. Gently rub surface of produce while swishing through the water for 15-30 seconds. For jewelry and accessories: Take your jewelry out and clean it briefly with a soft brush. Make sure that any residual dirt is removed, especially from the mountings of your rings. For additional tips or questions – please email us at team@sonicsoak.com! 12
Recommended cleaning times 5 – 15 Clothes min 3 – 6 Produce min Jewelry / Accessories 2 – 3 min Dishes /Glassware 3 – 12 min Tips for cleaning: WARNING: NEVER plug a 100V or 110V rated Sonic Soak unit into a 210V-240V outlet or vice versa under any circumstances. Using your Sonic Soak with the incorrect voltage may cause burning, fire, or even explosion. You may use a 100V or 110V rated Sonic Soak unit with 100V-120V outlets. Ultrasonic cleaning can be a bit tricky! Here are some tips that can help with the cleaning process if things aren't as clean as you're expecting: 13
Make sure to clean in warm water within a range of 35°C - 42°C. Allow object(s) to soak for 5-10 min prior to cleaning. Ensure you rinse items thoroughly after washing. Add in a sufficient amount of appropriate cleaning solutions. Sonic Soak is safe to use with most common produce washes, laundry detergents, and ultrasonic cleaning solutions. Increase duration of cleaning. Ensure object(s) to be cleaned and transducer are fully submerged. Ensure object(s) to be cleaned and transducer are close in proximity and have nothing in between the two of them – ultrasonic waves lose power quickly over distances and if blocked by other objects. Decrease volume of water used – remember that it should be no more than 1 gallon (4 liters) of water for a single Sonic Soak. Decrease the volume and number of object(s) to be cleaned. 14
FAQ: Q: What do I do if my Sonic Soak is too loud? A: The Sonic Soak is actually very quiet naturally (just try taking it out of the water and listening), but the vibration against the container can result in a lot of noise. You can do a few things: Lower Sonic Soak intensity Switch out to a container that can dampen vibrations – e.g. a rubber container Place a cloth/towel between the transducer and container to decrease contact between the transducer and container Place a cloth / towel underneath the container to decrease vibration between container and surface Q: Why is my Sonic Soak not turning on? A: Try troubleshooting with the following steps: Unplug and plug back in and ensure the timer is displayed on the controller If timer shows when plugged in, click ON and ensure timer is decreasing If timer is decreasing, increase intensity (hold theON button and tap the SET button to increase intensity), as sometimes the intensity is too low to be visible or audible Unplug Sonic Soak and leave at rest for 12 hours to allow to cool down Q: I love my Sonic Soak - where can I buy more? A: Thank you! You can buy directly at www.sonicsoak.com. Contact us at team@sonicsoak.com – we can offer a special coupon for existing customers! 15
Specifications: 100V, 110V, or 220V 50/60 Hz Voltage Operating Ultrasonic Frequency Operating Frequency 50 Watts Power 15 Oz. Weight 3, 6, 12 or 15 Minutes Timer Settings Warranty: The manufacturer warrants this product to be free from defects in workmanship and materials, under normal use and conditions, for a period of one (1) year from the original invoice date. Shipping and handling fees are to be paid for by the customer. The manufacturer agrees, at its option during the warranty period, to repair any defect in materials or workmanship, or to furnish a repaired or refurbished product of equal value, in exchange without charge (except for shipping, handling, packing, return postage and insurance fees; which will be incurred by the customer). Such repair or replacement is subject to the verification of the defect or malfunction, and proof of purchase as confirmed by showing the model number on an original dated sales receipt. This warranty is only valid for products purchased from a qualified distributor. Question? Contact us at: team@sonicsoak.com 16