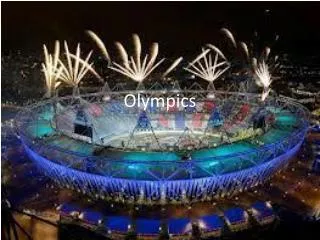
Disney Olympics
Disney Olympics. Rakim Cox Elka Peterson Horner Dan Shirey Ryan Smart. AQUATIC SPORTS…. NEMO & DORY.

Disney Olympics
E N D
Presentation Transcript
Disney Olympics Rakim Cox Elka Peterson Horner Dan Shirey Ryan Smart
The first thing I did for this picture was look around for pictures to put together. I knew that the concept I wanted to build on was Michael Phelps and characters from Finding Nemo. So I browsed the web to find pictures that would fit together in a way I found appealing. Once I found the picture of Michael Phelps, I opened it in Photoshop. I then found a picture of Marlon from. I opened that picture in photoshop, and then I cut him out using the magnetic lasso and the eraser. I made a new layer with the image of JUST him, and moved it into the Michael Phelps picture. I then did the same thing with a picture of Dory. Once the two of them were in the Phelps photo, I used free-transform to make them smaller and put them on an angle that seemed appropriate. I used the eraser tool to cut off the bottom half of their bodies so that they looked like they were in the water.(I also blurred the bottom of their bodies to make them blend more into the water). I then darkened them so their colors matched the original photo better; I used the burn tool for this. I found a Disney Logo, and I cut it out. I moved this into the main picture, and used Free-Transform to resize it, and put it on an angle. I then moved it onto his swim cap, to make it seem as if he were training for the Olympics with Disney. I darkened that image, and blurred the edges also. The other sources are on a layer that is hidden in the image. http://www.slashgear.com/wp-content/uploads/2009/01/disney-logo-blue_w3001.jpg
This image, like the first two, was created by combining more than one image. For this image, I wanted to put Pocahantas in a rowing competition. I found a jpeg image of a crew race, and a picture of Pocahantas in a boat. I cut out her image, and placed her in the boat. I then was able to resize her, and change the color slightly so that she did not stand out as much. Then, I used the clone stamp to remove the rower that was behind her in the original image. Once that was done, it looked more realistic that she was in the boat. I decided to keep the racoon in the boat with her, to make it more noticable that she was a Disney character. I blurred the end of the oar so that it appeared that her oar was actually in the water. I also used another clone stamp to make more foam around her paddle. This made her look more like she was moving.
URSULA WATERPOLOhttp://www.youtube.com/watch?v=LG8qwzUE1jE (print screen to replicate image from 4:15 in video)Water polo backgroundhttp://home.aptoshs.net/~ddemuth/waterpolo/goalie.jpgBegan with water polo background, then copied Ursula over from the new Ursula print screen image. Deleted the red sky and dark blue water from the Ursula image using polygonal lasso and magic wand tool.Smudged the edges of the Ursula picture to remove pixelated edges and mix the water splashes with the background.Used dodge/burn tool to adjust lighting for Ursula.Spilled soup on my laptop; brought the laptop the the tech center. Laptop returned the next day.Started over, reached dodge/burn step again.Copied the water polo ball from the background into the foreground; burned & dodged as neededUsed eraser with flow of about 24% to make portions of Ursula/water polo ball partially transparent.
Dash and Usain Bolt For this picture I: Copied and paste Dash onto the track used the transition tool to stand Dash up, he originally was horizontal to the ground and then I used black paint to make the shadow underneath Dash.
HERCULES JAVELIN Images used:http://i15.tinypic.com/63wopvk.jpghttp://disney-clipart.com/Hercules/characters/Hercules-Phil1.jpghttp://www.msubobcats.com/images/2009/10/14/rp_primary_Suek-javelin.jpghttp://www.asianathletics.org/images/Zhu-Jingya-javelin-china.jpgThe first image (of Hercules with the Sword) was the starting point. Hercules, without the sword, was copied into a new document. The pointing finger was created by copying another finger, and with the aid of the paintbrush, blur, smudge & sharpen tools.The second image of Hercules was used for the legs. The legs were copied, distorted using free transform, and the colors were adjusted using the eyedropper & paintbucket, as well as the burn tool, with a bit of smudging, blurring and sharpening.The third image was used simply as a backdrop. the shadow was burned, while the rest of the image was cut out.The fourth image was used for the javelin. The javelin was cut out and rotated, with the top half put behind Hercules' head and the bottom in front of the cape. Hercules' hand was rotated. The javelin was slightly smudged and burned to make it fit in with the rest of the picture.Finally, all images were merged and given a slight outer glow dull the contrast between the cartoon and the background.
First I erased the guy in the original picture Then I used the heal brush tool to make the crown. I did this because tigger was not going to be the same size. I keep touching up the background with that tool. Next I made tigger a layer so I can put him in the picture. Then I used the magic wond to erase the background of Tigger. Then I used Free Transform to make him the right size. That's what I did you make this picture of Tigger long jumping.
Hercules throwing the shot put For this picture I: copied and paste Hercules into the shot put ring as well as the shot put and anvil in his hand, I put the anvil in his hand to show the strength that he has. Then I transitioned him to make him a little bit bigger then he originally was.
SULLY WRESTLINGhttp://herokids.files.wordpress.com/2007/12/sully.jpghttp://www.olympics.org.uk/images/sports/Wrestling-GR300x4001.jpgI first copied Sully into the wrestlers image. I copied the foreground wrestler in from of Sully, and painted over the parts of the background wrestler using the eyedropper and select tools. The shadows on Sully seemed somewhat correct, however I did burn shadows by the foreground wrestler's arm and under Sully on the mat.
I made the second image in a similar way as the first. I wanted to put Tinkerbell, from Peter Pan, on a balance beam with Olympic gold-medalist, Shawn Johnson. I found a large jpeg image of Shawn, and then a picture of Tinkerbell. I cut out the image of Tinkerbell and put it into the image of Shawn. I then resized Tinkerbell and placed her on the balance beam, sort of mimiking the action of Shawn. I used the eraser tool to make sure that Tinkerbell was clean around the edges, and blurred a little bit around her wings to make her look more magical. I think found another image of Tinkerbells wings to put on Shawn, because I thought it would tie the picture together more. I resized the wings, cut them out, and erased them so that they looked appropriate on Shawn. I lessed their opacity so that they had more of an interesting look to them. I then used the pain tool, in the shape for a star and in a pale yellow color. These were placed around the hands of Shawn, the feet of Shawn, and Tinkerbell. I thought that they were asthetically pleasing and also made a commonality between the two ladies. I then blurred the endges of Shawns new wings. Then, I was done with my image.
This picture is Jasmine from Aladdin. Jasmine is one of our women basketball player for the Disney Olympic team. This picture took a lot of layering. I had to layer the shirt and I had to layer the Nike signs on the basketball. I also put a Nike sign on her pants. I used the liquefier to make it look like her jersey fit her body. That is what I did to make Jasmine part of the women Olympic basketball team.
Peter Pan Fencing For this picture I: Originally there were two fencers in this image, I blacked one out and replaced with Peter Pan, I then transition Peter Pan’s opponent to make his sword pointing at Peter Pan as well as putting the sword in his hand, because the original one wasn’t very long. I then used the copy eraser method to make Peter Pans skin brighter than it originally was.
First I took the Toy story picture and erased everything but Buzz. I used the magic wond, then made it into a layer. I took the background image of the Olympic image. I erased the girl, and then painted it a light pink. I used healing brush tool. Then I put Buzz into the picture. I just slid him over from my layers. I had to use the magic wond to get the white from off the sides of him. After everything was set I put a ping pong paddle in. I just made it a layer then put it in the picture. Then I use free transform to move it. I made it smaller. Last to finish the picture I put a white ball in the middle of the table to look like it is a ball bouncing. I just painted it on there.