Download
1 / 32
490 likes | 739 Vues
Laboratory Equipment. An Introduction. What is your glassware?. Each table has a piece of laboratory equipment on it. As a group, answer the following questions? What is it? What do you use it for? Why would you choose it over another? How would you use it? When would you use it?.

E N D
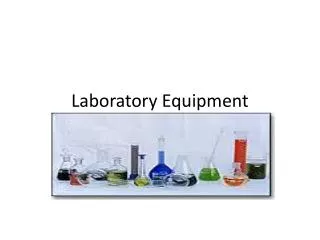
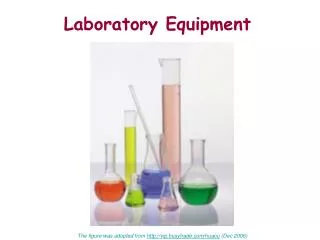
Laboratory Equipment An Introduction
What is your glassware? • Each table has a piece of laboratory equipment on it. • As a group, answer the following questions? • What is it? • What do you use it for? • Why would you choose it over another? • How would you use it? • When would you use it?
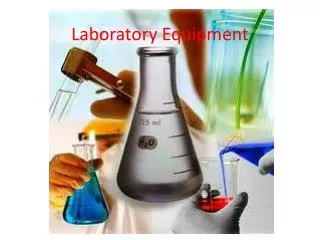
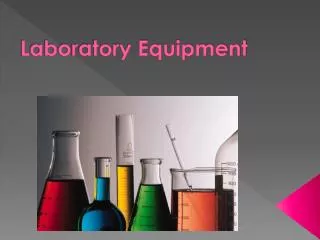
Glassware • Beaker • Erlenmeyer Flask • Graduated Cylinder • Volumetric Flask • Buret • Pipette
Glassware • Only use glassware that had been thoroughly and properly cleaned and dried • Glassware that has been cracked or etched should be discarded - glassware abnormalities can lead to inaccurate measurements • Use the appropriate size of glassware to ensure accuracy
Beakers • Beakers are used to collect a sample, to mix chemicals and to hold chemicals • A beaker has measurements, but is not used to measure exact amounts of a chemical • Beakers come in various sizes
Erlenmeyer Flask • Erlenmeyer Flasks are used to collect the titrant during titrations • The narrow neck prevents excess splashing • Cannot be used to measure exact amounts of a chemical
Graduated Cylinder • Graduated cylinders are used to measure sample, standard, reagents, etc. • Measurements are only as accurate as the cylinder is marked
Reading a Volume • Always read the volume of a liquid at the bottom of the meniscus 50 40 30 20 10
Volumetric Flask • Volumetric Flasks are used to measure a specific volume of sample or to prepare solutions; it is a more accurate method than either pipetting or using a graduated cylinder for large volumes
Burets • Burets are used to deliver larger volumes of reagent in smaller quantities. • Do not use a stopcock that leaks or is damaged in any way • Make sure that the seal on the stopcock is tight
Pipettes • Etched rings on pipettes are “blowout”; if the measurement ring is not etched into the glass, then it is “to deliver” • If a reagent or solvent is accidentally sucked into the bulb or pipette pump, thoroughly clean the apparatus and re-measure the reagent or solvent
Pipette Bulbs and Pumps • Bulbs and pumps are used to draw up the liquid and then to deliver the liquid
Using Pipettes and Burets • Choose the appropriate piece and size of equipment • When measuring volume, always read the measurement at the bottom of the meniscus • Hold the pipette or buret straight vertically and read the volume at eye level • Always use clean pipettes and/or burets
Accessories • Crucible and Evaporating Dish • Tongs • Crucible Tongs • Beaker Tongs • Test Tube Tongs • Clay Triangle • Wire Gauze • Watch Glass • Ring Stand
Crucible and Evaporating Dish • Porcelain cups that can withstand high heat • Used with a bunsen burner to heat sample
Tongs • Tongs are used to handle specific equipment that is hot, going to get hot or has the potential to splash • Crucible Tongs • Beaker Tongs • Test Tube Tongs
Clay Triangle and Wire Gauze • Used when heating equipment with a bunsen burner or cooling hot glassware
Watch Glass • Allows you to observe a chemical reaction in a beaker or flask without the hazard of splashing or sputtering
Ring Stand • Used to clamp a buret, test tube or other glassware
Equipment • pH Meters and probes • Stir Bars/Stir Plates • Hot Plate • Bunsen Burner
pH Meter • pH probes are very sensitive to change • Always keep the probe in a solution when not in use • Calibrate the meter according to the manufacturers recommendations • Allow the meter to stabilize before taking a measurement
Stir Plate • Stir plates are used to mechanically agitate the sample to assure a homogenous mixture • Stir plates must be used during a titration to assure the proper chemical reaction with the entire solute • Do not reuse a stir bar until it has been cleaned
Hot Plate • Hot plates are used to heat chemicals instead of a bunsen burner • Remember that a hot plate is a source of ignition; therefore, do not use any flammable materials around the hot plate • Samples may contain contaminants that cause popping or splattering of the sample; to avoid this, use a boiling stone or an appropriately sized beaker
Stir/Hot Plate • Stir Plates and Hot Plates are often combined into one apparatus
Bunsen Burner • A bunsen burner is used for heating samples. • The fuel is natural gas.
Parts of a Bunsen Burner • The parts of the burner include: • gas inlet • burner tube (adjustable) • air control vent • gas control valve
Lighting a Bunsen Burner • To light the burner, • step 1: turn on the gas • step 2: open the gas control valve 1/4 to 1/2 turn • step 3: hold the striker at a 45o angle and ignite the flame
Adjusting the Flame • Air adds Oxygen which is necessary for combustion • To make the flame burn hotter and larger, open the air mixture valve accordingly • To make the flame burn cooler and smaller, close the air mixture valve accordingly • Opening the gas valve will add more fuel to the mixture but not more Oxygen, and cause incomplete combustion
Color Indicators • Different flame types of a Bunsen burner depend on oxygen supply. • What does the flame on the left tell you? • A rich fuel mixture with no premixed oxygen, incomplete combustion produces a yellow sooty flame. • What does the flame on the right tell you? • A fuel and oxygen mixture allows for complete combustion and a hot, blue flame.
Color Indicates Temperature • Yellow flame (also called a safety flame) at around 1,000°C. • Increasing oxygen supply creates a blue appearance • The coolest part of a flame will be red, then progress to orange, yellow, and white as the temperature increases