Download
1 / 28
280 likes | 457 Vues
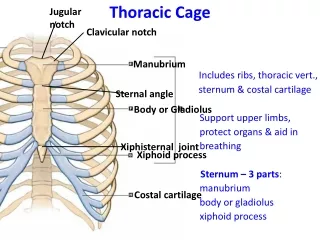
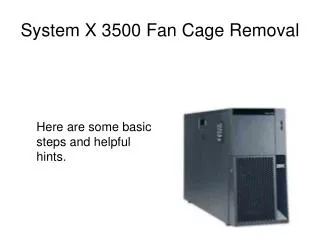
System X 3500 Fan Cage Removal. Here are some basic steps and helpful hints. System X 3500 Fan Cage Removal. System X 3500 Fan Cage Removal. Rear fan air duct. System X 3500 Fan Cage Removal. Place thumb on left and index and middle on right of air duct and squeeze for release of latches.

E N D
System X 3500 Fan Cage Removal Here are some basic steps and helpful hints.
System X 3500 Fan Cage Removal Rear fan air duct
System X 3500 Fan Cage Removal Place thumb on left and index and middle on right of air duct and squeeze for release of latches.
System X 3500 Fan Cage Removal The x3500 offers hot-swap redundant power with an optional second power supply on all models.
System X 3500 Fan Cage Removal • With dual Hot swap Power supplies • Release Tabs for removal
System X 3500 Fan Cage Removal Power supply 1 removal • One 835W power supply (standard) • Second 835W power supply provides redundancy and helps reduce downtime
System X 3500 Fan Cage Removal • After the power supplies are removed the power cage can be lifted. • Two holes are for power supply locking latches
System X 3500 Fan Cage Removal • Upper release button for fan cage • Be sure to press firmly and release top and bottom one at a time. • You may need to slightly lift cage after depressing. • When installing make sure clicks on top and bottom
System X 3500 Fan Cage Removal Top release Bottom release
System X 3500 Fan Cage Removal Latch will not lift until both power supplies are removed. Full insertion of one or both power supplies lock the latch into position.
System X 3500 Fan Cage Removal • Fan Cage removal • The x3500 comes standard with 3 hot swap fans. Three more fans are added with the optional second power supply.
System X 3500 Fan Cage Removal Fan cage must be fully seated or power connectors may not have good connection. Possible cause of fans ramping after BMC Version v1.33, SPBT33A update.
System X 3500 Fan Cage Removal These slides are the main fastening structure for the fan cage to the chassis. They bend very easily.
System X 3500 Fan Cage Removal Power connectors to fan cage
System X 3500 Fan Cage Removal SAS Power 1 and SAS Power 2 connectors
System X 3500 Fan Cage Removal Make sure the SAS and SATA cables are routed correctly. This is a possible cause of fan cage not properly seating and high ramping fans after BMC Version v1.33, SPBT33A update.
System X 3500 Fan Cage Removal Slot for 8k Adapter
System X 3500 Fan Cage Removal For additional information check the following link:http://xsnsftp.raleigh.ibm.com/materials/CD/XW2024/XW2024.html Search for 3500