Download
1 / 33
330 likes | 348 Vues
Explore the history and evolution of Flash, from its origins as FutureSplash Animator to its current version as Adobe Flash CS5.5. Learn about the Flash player and authoring environment, and discover how to create static graphics using tools like rectangles, ovals, lines, and text.

E N D
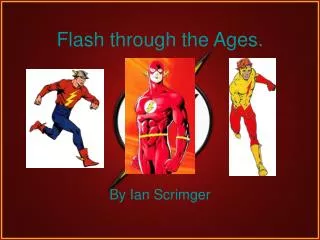
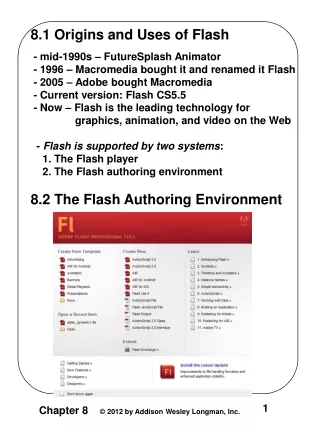
8.1 Origins and Uses of Flash - mid-1990s – FutureSplash Animator - 1996 – Macromedia bought it and renamed it Flash - 2005 – Adobe bought Macromedia - Current version: Flash CS5.5 - Now – Flash is the leading technology for graphics, animation, and video on the Web - Flash is supported by two systems: 1. The Flash player 2. The Flash authoring environment 8.2 The Flash Authoring Environment
8.2 The Flash Authoring Environment (continued) - Three kinds of files: Movies - .swf Documents - .fla Files with ActionScript - .as - Selecting Create New opens the workspace
8.2 The Flash Authoring Environment (continued) - The tools panel: - The COLOR panel: - Drawing Tools - Predefined Figures - Rectangles Tool
8.2 The Flash Authoring Environment (continued) - To draw a rectangle: - Select stroke style, stroke color, and fill color - Place cursor on the stage, hold down left button and drag - Drawing an oval is just like drawing a rectangle - Polystar Tool - Use Options button of the properties panel to choose between a polygon or a star - The number of points is then chosen - For stars, the point size can be chosen
8.2 The Flash Authoring Environment (continued) - Modifying a drawn figure: - The Select tool: - A single click on a stroke selects that stroke - A double click on a stroke selects the whole stroke - A single click inside the figure selects the fill - A double click inside the figure selects the whole figure - Strokes can be bent by dragging them
8.2 The Flash Authoring Environment (continued) - Primitive Rectangles and Ovals - Difference: non-primitive figures are disconnected from their master templates - Effects: 1. Disconnected figures can be modified 2. The master template parameters of a disconnected figure cannot be modified - These parameters control the radius of the corners
8.2 The Flash Authoring Environment (continued) - Positive values round the corner in the usual way - Negative values round the corner to the inside - Primitive Ovals- Start angle,End angle, and Inner Radius
8.2 The Flash Authoring Environment (continued) - When a figure is placed on the stage, a black dot appears in the first frame of the time line – it is now a populated frame - The first frame is a keyframe by default
8.2 The Flash Authoring Environment (continued) - Lines – drawn with the Line Tool - Freehand drawing – Pencil Tool, Pen Tool, and Brush Tool - Pencil Tool – When it is selected, two small icons appear at the bottom of the tools panel - The right icon is a squiggly line – click it and three labeled icons, Straighten, Smooth, and Ink (the default) - Text (we discuss classic text only) - Selecting the Text Tool and clicking the left mouse button places a narrow box on the stage (similar to that for PowerPoint) - As text is typed in the box, it stretches in width - Each corner of the box can be dragged to lengthen the box – when it is lengthened, it switches to wrap mode and the upper right corner changes from a small circle to a small square - If the upper right corner is double-clicked, the box reverts to its original size
8.2 The Flash Authoring Environment (continued) - Text (continued) - The properties panel for text: - The most commonly used part is the upper menu (Static Text) - Other options are Dynamic and Input
8.2 The Flash Authoring Environment (continued) - Flash supports both bitmap and vector figures - Vector figures can be created and modified - Bitmap figures are imported and cannot be modified - Libraries and Symbols - Every Flash document has a library, which stores the things that could be part of the movie - Graphic figures can be stored as symbols - Symbols in the library can be dragged to the stage - Library contents are shown in the Library panel - Figures created on the stage are vector graphic figures - Can be converted to symbols and placed in the library with Modify/Convert to Symbol - This opens a dialog box - Usually rename the symbol and select a type
8.2 The Flash Authoring Environment (continued) - Libraries and Symbols (continued) 8.4 An example – Static Graphics - A banner for an ad for used airplanes - Because it is static, it occupies a single frame - Also, we’ll use a single layer - Steps: 1. Open a new Flash document and resize the stage to 700 by 350 pixels 2. Create the text box with the company’s name and slogan
8.4 An example – Static Graphics (continued) 3. Add two small airplane figures - Select File/Import and browse for the figure - For bitmap graphic figures, import to the stage, which also puts it in the library - For vector graphic figures (including WMF), import to the library and drag an instance to the stage
8.4 An example –Static Graphics (continued) Step 4. Add a star with the word “Sale” inside - Draw an 8-point star and stretch the four side points - Convert it to a symbol - Use the Text Tool to put “Sale” inside the star
8.4 An example –Static Graphics (continued) Step 5. Test the movie with Control/Test Movie Step 6. Publish the movie - Select File/Publish/Settings
8.4 An example –Static Graphics (continued) - Can publish the movie as an SWF file and insert it into an HTML document - The HTML file produced by Flash uses UNIX eolns, so on Windows it is hard to read or edit - We added the following to the HTML document: <style type = "text/css"> p.special {text-indent: "2.5in"; font-family: 'Times New Roman'; font-size: 24pt; font-style: italic; color: "red"; text-decoration: "underline";} p.list {text-indent: "1in"; font-family: 'Times New Roman'; font-size: 16pt; color: "blue";} </style>
8.4 An example –Static Graphics • (continued) • <!-- Content added to the Flash-produced file • for the aidan_static3 movie --> • <p></p><p></p> • <p class = "special"> • Specials of the Week • </p> • <p></p> • <p class = "list"> • 1960 Cessna 210 • <span style = "position: absolute; left: 3in"> • $49,000 </span> • </p> • <p class = "list"> • 2. 1977 Piper Commanche • <span style = "position: absolute; left: 3in"> • $72,000 </span> • </p> • <p class = "list"> • 3. 1980 Cessna 182RG • <span style = "position: absolute; left: 3in"> • $81,000 </span> • </p>
8.4 An example –Static Graphics (continued) 8.5 An Example – Animation and Sound - Introduction to Animation - Same approach as a film movie - Create a sequence of pictures with small changes and view them in rapid succession
8.5 An Example – Animation and Sound (continued) - Introduction to Animation (continued) - Developer builds a few of the frames - Flash builds the rest, using either classic tweening or motion tweening – we’ll only do classic tweening - Different assets of most movies occupy their own layers, some static and some animated - An example – moving a figure with classic tweening - Simple animation – just move a figure across the stage 1. Create a new Flash document (aidan_dynamic1) and resize the stage to 700 by 400 pixels 2. Change the name of the initial layer to name 3. Select frame 1 and create the text for the company’s name and slogan; lock the layer 4. Create a new layer with Insert/Timeline/Layer and name it animation1 (layers are displayed bottom first)
8.5 An Example – Animation and Sound (continued) - Layers can be dragged with the cursor 5. Import a vector graphic figure of an airplane to the library 6. Select frame 1 of the animation1 layer and drag an instance of the figure onto the stage – place it in the upper left corner 7. Convert the figure to a symbol with Modify/ Convert to Symbol – select type Movie clip and name the figure airplane 8. Create a new keyframe in frame 100 by right- clicking in frame 100 of the animation1 layer and selecting Insert Keyframefrom the menu that appears 9. With frame 100 and the animation1 layer selected, drag the airplane figure from the upper left corner to the upper right corner 10. Select frame 50 of the animation1 layer and then select Insert/Classic Tween - This creates the in between frames - Indicated with a long arrow from frame 1 to 100 and the purple color
8.5 An Example – Animation and Sound (continued) 11. The text in the movie must be copied into frames 2 to 100 Click frame 100 in the name layer and select Insert/Timeline/Frame 12. Test the movie (aidan_dynamic1) - More Animation - Add the star with “SALE” in it and make it grow and shrink as the airplane moves across the stage Steps: 1. Add a new layer to aidan_dynamic1 and name it animation2 (Insert/Timeline/Layer or click Insert Layer (bottom left of the layers panel) 2. Select frame1 and the new layer and create a 12-point star with dark blue stroke and white fill and stretch the points on left and right 3. Convert the star to a symbol named star and set its type to Movie clip 4. Put the text in the star in red bold 18 pt (in the name layer)
8.5 An Example – Animation and Sound (continued) 5. Create two new keyframes in animation2, one in 50 and one in 100 (Insert/Timeline/Keyframe) 6. Select frame 50 and the animation2 layer and the star. Select the Free Transform Tool – this puts a rectangle with black squares on the corners around the star. Drag a corner square with Shift held down to make the star smaller. 7. Select frame 25 in the animation2 layer and select Insert/Classic Tween. Repeat in frame 75. (Symbols cannot be shape tweened) 8. Test the movie
8.5 An Example – Animation and Sound (continued) SHOW aidan_dynamic1 - Shape animation - Only vector figures can be shape tweened - Example - red circle to blue square to green triangle Steps: 1. Create a new movie named shape_morph and rename the initial layer morph 2. Draw a circle in frame 1 with a dark red stroke and a light red fill 3. Create a blank keyframe in 50 by right clicking frame 50 and selecting Insert Blank Keyframe from the menu that appears 4. Draw in frame 50 a square with dark blue stroke and light blue fill 5. Select frame 25 and select Insert/ShapeTween
8.5 An Example – Animation and Sound (continued) 6. Create a blank keyframe in frame 100 7. Draw in frame 100 a triangle with dark green stroke and light green fill. 8. Select frame 75 and select Insert/ShapeTween 9. To align the figures on the stage: Click Edit Multiple Frames button (this places square brackets on the timeline). Drag the right bracket to frame 100; drag the left bracket to frame 1. Click Control-A to select all elements. Select Modify/Align and Vertical Center from the resulting menu. Then do the same with Horizontal Center 10. Turn off the Edit Multiple Frames 11. Test the movie SHOW shape_morph
8.5 An Example – Animation and Sound (continued) - Frame Rates - Animation can be made smoother by placing the assets farther apart on the timeline - More frames means a larger file means slower download - The frame rate is the speed at which the frames are displayed - Too fast creates blur - Too slow creates jerky motion - Film frame rate is 24fps; the Flash default rate is 12 - If the frame rate is high and the Internet connection is slow, the movie cannot be displayed properly
8.5 An Example – Animation and Sound (continued) - Sound - Sound clips can be added to Flash movies - As an example, we’ll add a sound clip to aidan_dynamic1 and name it aidan_dynamic2 - Add a new layer and name it sound - Download a sound clip to the library and edit it - Properties panel for a sound clip:
8.5 An Example – Animation and Sound (continued) - Click the edit button (the pencil icon) to get: - Either the left end, right end, or both ends can be removed by sliding the small rectangle at the center left or right - We shortened the sound clip to better match the length of the movie - The waveform of the clip is shown in the timeline
8.5 An Example – Animation and Sound (continued) - Sound clips can be compressed - Select the library entry for the sound clip - Click the third icon from the left at the bottom of the library panel (button is named Properties)
8.5 An Example – Animation and Sound (continued) - Select MP3 in the Compression menu - Adjust the Bit rate – set it to the slowest bit rate that results in acceptable sound - Set Quality to Best SHOW aidan_dynamic2
8.5 User Interactions - Flash documents can be designed to allow users to control the content of the movies - Control is provided through graphical components - ActionScript is used to program the control - Actions - ActionScript can reside in an external file or be associated with frames - User interactions raise events and the event handlers implement the movie controls - Event handlers are registered with addEventListener - Player control methods: nextFrame() gotoAndPlay(frame number) play() stop() - Actions are added to a new layer, often named actions
8.5 User Interactions (continued) - ActionScript is written in a window that appears when Window/Actions is selected - Script Assist helps one create ActionScript - Usual components are prebuilt - An Example - Use an airplane ad with a title and an animated airplane (aidan_dynamic1), add start and stop buttons for the animation - Add two new layers, buttons and actions - Create the two buttons from the window opened by selecting Window/Components/User Interface
8.5 User Interactions (continued) - Change the labels of the buttons by selecting the button and selecting Window/Component Inspector - Then type the new label in Value -Next, give instance names to the buttons (stopButton and startButton) in their property panels
8.5 User Interactions (continued) - Code is placed in the Window/Actions window - The code for our project: - In frame 1 enter the handler function handleClick(bEvent: MouseEvent) { if (bEvent.target == stopButton) stop(); if (bEvent.target == startButton) play(); } - Finally, add the code to register the handler: stopbutton.addEventListener( MouseEvent.CLICK, handleClick); startbutton. addEventListener( MouseEvent.CLICK, handleClick); SHOW interact