Download
1 / 21
220 likes | 406 Vues
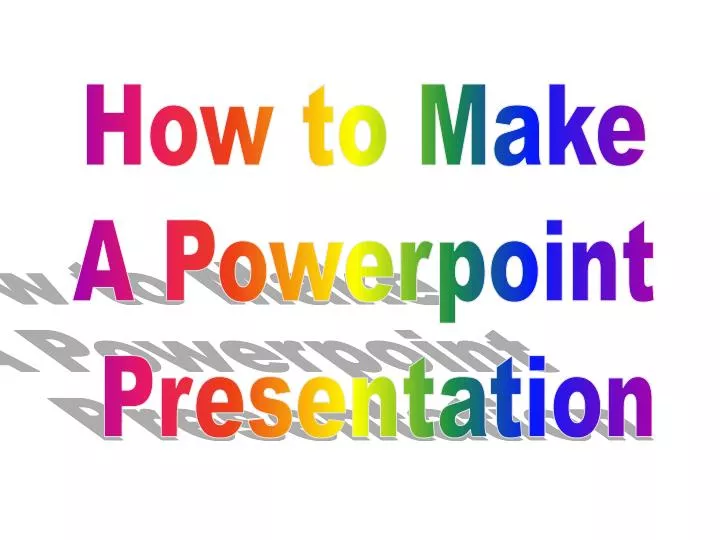
How to Make A Powerpoint Presentation. What do you need in a slide show Presentation?. A Main idea or topic Written information Clipart pictures or photos WordArt writing Contrasting colors Diagrams or Charts Animation (moving pictures) Sound Organization Creativity Eye Catchers.

E N D
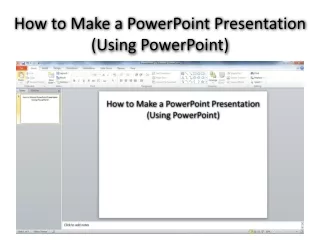
How to Make A Powerpoint Presentation
What do you need in a slide show Presentation? • A Main idea or topic • Written information • Clipart pictures or photos • WordArt writing • Contrasting colors • Diagrams or Charts • Animation (moving pictures) • Sound • Organization • Creativity • Eye Catchers
Where Do You Start? • You need to start with your topic • Gather information on topic • Add text box/es • Type in written information • Make sure it makes sense • Remember you can always add or change information as needed. Just get started!
Tools you will need Top Tool bar Bottom Tool bar
Use Your Mouse Left side – Select Side Right side – More Choices Cut\ Copy\ Paste Slide design Background Design
insert TIP When wanting to add more than one blank slide at a time. Select slide-hold shift key down and continue to select slides with shift key held down. Select duplicate. All slides will duplicate. This is great for many picture slides. Insert is a drop down tab located in top tool bar You will use insert to put in more slides, or duplicate a slide, put in pictures, a text box, chart, or movie or clips. When you click insert and get a few choices with a double arrow then click arrow to open full tab. All options will now display.
Insert a text box so you can write. Text Box Click insert, select text box. Remember that a double arrow down needs to be clicked to open full tab. After selecting text box, click and drag across slide. Box will get larger as you type in box.
Remember that you just need to get written information in first before you worry about font style or size, or anything else. Written information is the most important part of presentation. Whatever you type in can always be changed. Don’t worry about your mistakes. You can go back and fix them later.
Insert Clipart or Photos There are many ways to find pictures of what you are looking for on presentation. CLIPART Easiest way is to click insert- picture- clipart. A box will open to right side. Type in name of what you are wanting as a picture. Click Open. Once open, click pick. It should insert after clicking. Photos Go to insert- picture - from file. A box will open. Go to drop down box by (look in). Look for name of folder. Open folder- click picture twice.
Insert Clipart or Photos An easy way to insert clipart pictures or photos is to use bottom tool bar and click on icons. Once used it will automatically link you back to area. Clipart or photos
Insert WordArt Writing Insert WordArt Writing Insert WordArt Writing Insert WordArt Writing Insert WordArt Writing Word art allows you to be creative by making words different shapes, sizes, and colors. This is how to spice up your project. WordArt can also be animated by having it fly in or move different ways. Insert WordArt Writing
Insert WordArt Use insert at top tool bar or Large blue A at bottom tool bar to open WordArt. Select a style (keep it simple) Now type in your word or words. You don’t need to delete (Your Text Here) will disappear once you type words in.
WordArt Style Choices Make sure to keep it simple with WordArt. If you make it hard to read then it is not worth reading. Sometimes using the first two choices and changing color will catch one’s eye. Easy to Read Not Easy Not Easy to Read
Color Use mouse and right click blank slide area. Select background. Click drop down arrow. Select color or fill effects.
Color Remember to use colors that will make your presentation make sense. Use contrasting colors.
Diagrams and Charts Click insert and find diagrams or charts. Select one and follow directions for each. Fill in information for each.
Animation (moving pictures)SoundOrganizationCreativity Eye Catcherswill all come later in separate lessons
If you make a mistake Don’t worry you can fix it. Use blue back arrow titled undo typing to go back to correct any mistake
Saving your work When it comes time to save your work go to save as – Use drop box to save in – save it in your school shared folder. It should be in S: drive Look for your file name. Put a name for title with simple form of date (11-03-09) so you know when you worked on it. If you want to save it on a flash drive do that second after it is saved in your shared folder. This is the same procedure except save in needs to be your flash drive.