Back Office Tutorial
Back Office Tutorial. Basic Navigation New Consultant Sign Up Shopping. Please type directly into the address bar ‘zeropointglobal.com’. Do NOT include “www” in the address bar. Step One: Accessing your website. This is the home website. You will have a replicated website.

Back Office Tutorial
E N D
Presentation Transcript
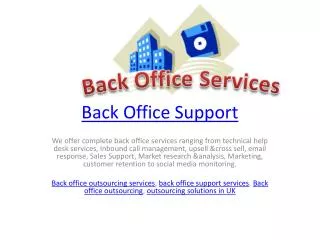
Back Office Tutorial Basic Navigation New Consultant Sign Up Shopping
Please type directly into the address bar ‘zeropointglobal.com’. Do NOT include “www” in the address bar. Step One: Accessing your website • This is the home website. • You will have a replicated website. • For Example: If your name is John Smith your website would be • There will be an option to personalize your website in your back office. jsmith.zeropointglobal.com • If there is someone else using jsmith, then you would have a digit after your name, i.e., jsmith8.zeropointglobal.com
Step Two: Open back office • There are 3 areas on the page for Consultant Login • Choose whichever one you like • Click ‘Consultant Login’ to proceed to step 3. These are entrances to your back office
Step Three: Initial Sign In Your Username is first initial and last name. For Example John Smith would be jsmith unless there is more than one jsmith… then it could be jsmith8 • When signing up, the initial username and password are emailed to you. • This password will only work one time. • Press ‘Login’ to continue to Step 4. Initial Password is emailed during sign up
Step Four: New Password • Create a password that you can remember and enter it in the first box • Enter the same password in the second box. • It must be a minimum of 8 characters. • Click ‘Login’ to continue to Step 5. Create your own Password. Confirm your password here.
Step Five: Account Details You are here. • Ensure your personal information is accurate or make changes as necessary. • Please also send an email to info@zeropointglobal.com if you change email or mailing information. • Always ‘Save’ before moving on! • Click on ‘Default Placement’ to continue to Step 6.
Step Six: Default Placement • Default placement is set to ‘Power Team Auto’(strongly suggested) • ‘Power Team Auto’ keeps both of your teams balanced to your advantage. • The other options are Left Team and Right Team and will add new consultants accordingly, regardless of volume. • Click on ‘Replicated Site’ to continue to Step 7.
Step Seven:Replicated Site • The ‘Replicated Site’ tab allows you to name your personal website. • The name that you enter here becomes your unique ZPG website. • Example: if you want the site name “John”, then enter “John” in the field. Pleasenote spaces and & signsare not recognized characters. • Be sure to hit ‘save’ • Your ZPG website would be john.zeropointglobal.com. • Type your website directly into the address bar (no www). john
Step One: New Consultant Account Details • You can add new Consultants in your Back Office. • Click on ‘Sign Up’ • The first page is for your new Consultant’s Account Details • Enter as much information as possible on this page. • Social Security or EIN Numbers are required in order to receive commissions! • Click on ‘Package’ to continue to Step 2.
Step Two :Package Selection • Click the down arrow next to the word ‘select’. • You will see several packages: • $49 Wellness Consultant Kit • $199 Basic Starter • $199 Wellness Solutions • $499 Personal Starter • $999 Team Starter • $1899 Diamond Complete • Select one. • Click on ‘Select Products’ to continue to the next step.
Step Three:Product Selection • The Product Selection Page allows you to customize the products in your chosen startup package. • The products offered are the only choices available. • Hover over the products with your mouse to see additional details. • Click on ‘Placement’ to continue to the next step.
j Step Four: Placement • If you don’t change anything, the new Consultant will be placed using the default placement setting in your Account Settings. • You can override your default settings by choosing one of the options in the drop down list. • If you choose ‘Manual,’ you will indicate placement on the next screen. • If you choose the default setting or a setting from the dropdown list, then click on ‘Billing Information’ to continue to the next step.
j j j j j j Step Four (con’t):Manual Placement • Your new Consultant’s name will appear in the box at the top left. • Drag and drop it to any ‘OPEN’ spot in your Binary. • After manual placement, you will automatically return to the Signup Page to complete the Signup. j
Please keep in mind All placements are FINAL!!!!!
Step Five: Billing Information • Enter the credit card billing information. • If it is the same as consultant address click here. • Security Code or CVV is the 3 digit code on the back (4 for AMEX) • Click on ‘Shipping Information’ to continue.
Step Six: Shipping Information • Choose shipping method from the drop down list. • Enter shipping information. • If shipping information is the same as the new Consultant’s address, simply check the “Copy Consultant Address” box. • If shipping information is the same as their Billing Address, then click the “Copy Billing Address” Box • If it’s different from either address, then type in the information needed • Click on “Terms and Conditions” to continue
Step Seven:Terms and Conditions • Ensure the new Consultant has read the Terms and Conditions found on the back of the Independent Consultant Application. • Click “I Agree” • It is mandatory to agree to abide by the Terms and Conditions. • Click “Payment Confirmation” to continue
Step Eight: Payment Confirmation • Your previous choices will be reflected in the amounts on the ‘Payment Confirmation’ page. • You may return to the previous pages to review your entries. • Click ‘Sign Up’ if you want to complete this form. • On the following page, you will get a confirmation number.
Step Nine: Sign Up or Clear Form Congratulations, we made it!!!! Applicant sign up is almost complete. At this point, you can go back and check your entries (you may end up reentering some things) or Click on “Sign Up”(go ahead, click it) As you see, you aren’t locked in yet. You can always clear everything out too!!
$999.00 $39.95 $1038.95 Final Step: Order Confirmation • When you are finished you will have a Confirmation page • If you do not see this screen please check for an email receipt or call to confirm your order.
Step One : Shopping Shopping • Click on the ‘shopping’ tab • Products will be displayed with and without pictures. • Please be sure to read the description to ensure you choose the right product. • To see a complete description click .
Step Two : Scrolling • There are scroll bars on the right and possibly the bottom. • If you can not see all the products then you may need to adjust your screen resolution.
Step Three : Screen Resolution Part 2 Part 1 • If you can not see your entire back office please follow these steps. • If you can see everything please skip this slide. • Click on the ‘Start’ button in the lower left hand corner of the screen. • Choose Control Panel. • Click on ‘Adjust screen resolution’. • Slide the toggle switch all the way to ‘High’. • Click ‘Apply’. • You may need to log out of your back office to let these settings take effect. Part 3
Step Four : Choosing Items • Click on the • next to the item to make it appear in your cart on the left. • Add or remove this item from your cart by changing the quantity. • Choose Billing Info to continue to step 5.
Step Five : Billing Info • Fill in each block completely with the billing information related to your credit card. • Security Code or CVV is the 3 digit code on the back (4 for AMEX) • Choose ‘Shipping Info’ to continue to step 6.
Step Six : Shipping Info • Choose Shipping Method • Ground • 2 Day Air • Overnight • International for the appropriate amount • If the information is the same as your billing info check the box. • If not please fill in the information completely. • Choose ‘Complete Order’ to continue to step 7.
Step Seven : Complete Order • Verify your Subtotal. • Verify your shipping and handling. • Click ‘Submit Order’.
Final Step: Order Confirmation • When you are finished you will have a Confirmation page • If you do not see that screen please check for an email reciept or call to confirm your order.