Guitar Instruction
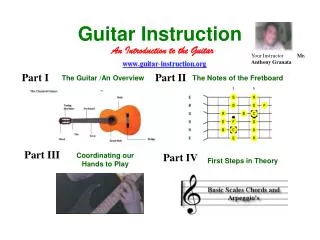
Guitar Instruction . An Introduction to the Guitar. Your Instructor Mr. Anthony Granata. Part I. Part II. The Guitar /An Overview. The Notes of the Fretboard. Part III. Coordinating our Hands to Play. Part IV. First Steps in Theory. About This Book.

Guitar Instruction
E N D
Presentation Transcript
Guitar Instruction An Introduction to the Guitar Your Instructor Mr. Anthony Granata Part I Part II The Guitar /An Overview The Notes of the Fretboard Part III Coordinating our Hands to Play Part IV First Steps in Theory
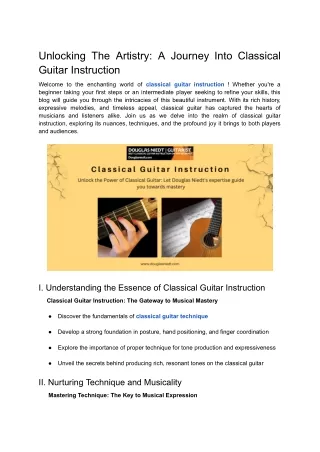
About This Book This book was written as an introduction to the Guitar, It proceeds from the paradigm (belief) that the reader knows nothing about the instrument. It is a practical hands on guide, in which various types of Guitars are identified, individual parts of these guitars are named, similarities of the types are compared, and differences are noted. The book covers various tuning methods as well as the proper holding of the instrument as well as the hand position of the left and right hands. The book presents music-theory in a visual graphical-representation as much as possible. With the belief that a picture is indeed worth a thousand words. One such example of this is the Keyboard pattern depicting the twelve tone music system. Learning where the notes fall on the Fretboard has traditionally been a daunting task for new guitar players. We believe by presenting these notes on the keyboard first, where they have been quickly-identified, this task is daunting no longer. One of the biggest hurdles for new guitar players is hand coordination,. We believe it makes no-sense to start learning how to read music while at the same time, not being able to physically play the notes on the Fretboard, .With this belief we have compiled many different finger exercises in this book, to help strengthen and coordinate the hands to play. Intervals, are the building blocks of scales and chord construction. With this fact being the case, a considerable amount of time has been spent on discussing them within this book. If you are a new guitar player or you where thinking about learning and never put your thought into action, This book is for you! I hope you enjoy this book as much as I enjoyed putting it together. Sincerely,Anthony Granata
The Right Forearm and Hand Position The right forearm rests on the top of the Guitar, and is set at a 45 degree angle with the right hand over the strings – for support-if needed, you may place your right pinky on the guitar an inch below the first string which is the E. The pick is the only thing that should be touching/hitting the string/strings. Lets take a close look at the illustrations below. Pay particular attention to the position of the elbow/forearm as well as the right hand position in the illustrations.
The Notes of the Fretboard Part II What I believe to be the best and easiest way to learn the notes of the Fretboard and how they are position on the Guitar–is not to start with the Fretboard at all, but the Keyboard / Piano. Western Music 12 tone System In western music we use a 12 tone music system, lets identify these tones as they appear on the Piano first and then on the Guitar. If you look at the image of the keyboard closely , you will see that the keyboard has a certain organization of black and white keys. In fact, in each repeating unit of keys their are 5 black keys and 7 white keys. (7+5) = 12 Yes? Yes!
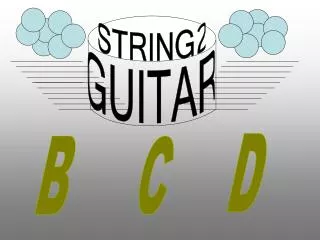
The Guitar Fretboard a Closer Look Open Strings
Before we go into the other basic finger exercises, I would like to spend a couple of minutes speaking about where your fingers should be landing when they come in contact with the strings. For these finger exercises in this section, the area in between the black bars (left slide) is where your fingers should be making contact with the strings. There will be times particularly with bar chords and certain types of arpeggio’s when we will use, the flat area of our fingers as shown on the (right slide) between the red bars. But for right now all the finger exercises that I am about to present to include the one we just covered, --the area between the black bars is where your fingers should be coming in contact with the strings. Ok, Moving Forward
The next finger exercise is called 2-4, here we will use our middle finger and pinky Here we are going to start on the first string , first fret with our middle finger; and then suppress the first string 3rd fret with your pinky. Then you will go to the second string, and do the same thing, you will do this for the 3rd 4th and 5th strings until, you have reached the 6th string third fret with your pinky finger. – At that point the pinky finger is then lifted up, and your middle finger will slide to the 6th string second fret, - we then will work our way down, Until we reach the First String – 3rd fret with our pinky finger , then our pinky finger is raised up and our middle finger will slide to the 3 fret and we will work or way up. This exercise is also repeated to the 12th fret.
C D E F G A B C 1st 2nd 3rd 4th 5th 6th 7th 8 Degrees C major scale C major scale harmonized CMajor Dminor Eminor FMajor GMajor Aminor Bdim-5 I ii iii IV V vi vii Tonic supertonic mediant Subdominant Dominant submediant leading tone
B diminished vii chord The Arpeggio ‘s The word arpeggio is an Italian word which meansthe production of tones of a chord in succession. So in other words an arpeggio is the notes of the chord played one at a time. In the previous pages we have been given the diatonic chords of the key of C major. What we are going to do now is to learn the basic arpeggios for each of them. The patterns we are about to learn should be practice with the respective chord first and then if you like, you may try different arpeggios with different chords. (The fingers you use is indicated in the diagrams)