Download

1 / 31
310 likes | 326 Vues
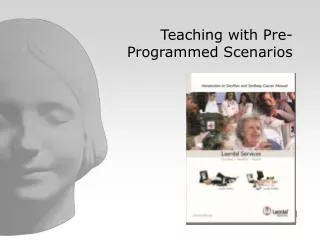
Learn how to use pre-programmed scenarios with VitalSim for effective teaching and simulation sessions. Dive into scenario materials, preparation, facilitation, and debriefing to elevate learning outcomes.

E N D
Welcome Teaching with Scenarios Using VitalSim Rob Rupert Educational Services Specialist
Statement of Disclosure Participants must attend the entire session in order to earn contact hour credit. Verification of participation will be noted by learner initial/signature on the roster.Planners and presenters have declared the absence or presence of any real or perceived conflict of interest which might influence the planning of this activity. “Speaker name goes here” has identified the following real or perceived conflicts of interest: Laerdal is covering travel and expenses for this program. No commercial support has influenced the planning of the educational objectives or the content of this activity. If there were any commercial support provided for this activity, it would be used for events that are not related to continuing education. There is no endorsement of any product by the provider or NCNA associated with this activity. It is expected that no presentation will relate to products governed by the Food and Drug Administration. But, during the course of this activity, if there is discussion related to such products, FDA-approved and non-approved uses will be disclosed to participants.
Welcome and Introductions Discuss Teaching with Pre-Programmed Scenarios Review Scenario Materials/Contents Preparations for Simulation Sessions Scenario session, facilitation, & debriefing Wrap-up Next Actions Resources Evaluation Course Agenda
Course Objectives • Identify components of Pre-programmed Scenarios • Discuss preparation requirements for a simulation to increase the simulation's psychological fidelity. • Using a Pre-programmed scenario handout, locate and review the scenario's learning objectives, proposed correct treatment and debriefing content. • Discuss the instructor’s role in planning, facilitating, and debriefing simulations. • Demonstrate planning, facilitation, and debriefing of a clinical simulation.
Purchased Scenario Packages So where do I get a pre-programmed scenario? From your colleague or through networking
Review learning Objectives • Verify that objectives match the program’s learning goals and the learner’s current skill level. • When learning objectives are revised, update the content areas that are inter-dependent such the scenario file, props and other cues, and debriefing points
Review Correct Treatment • Review the correct treatment guidelines – determine what behavior the learner should demonstrate during the simulation. • Remember, any changes made to this area must also be addressed in the learning objectives and other interdependent content areas.
Review Debriefing Points • Debriefing topics are usually anchored to the scenario’s learning objectives and educational content. • Instructors are encouraged to remain flexible when formulating debriefing topics. Unexpected events may occur during a case that warrants exploration during the debriefing.
Anatomy of a Scenario File • Actions: control simulator. • Event Output: trigger movement between frames.
Review Event Menu • Electronic checklist of customizable events. • Events appear in Event Log when clicked by operator.
Upload Files • Connect computer via USB to VS unit • Open Log and Scenario • Click Add • Choose scenario • Exit
Prepare the Environment and Simulator • According to evidence within the simulation literature, the psychological fidelity (realism) of a simulation is important to learners. • Learner prefer cases that feel real
Patient Identification Bracelet Provider Orders Use Realistic Materials
Prepare Environment & Simulator • Assemble Equipment and Medications • ECG monitor • Stethoscope and BP cuff • Crash cart • Chart • Medications • Prepare the Environment • Examination room • Sounds (phones ringing, etc.) • People (assistants, physician, and technicians) • Prepare the Simulator • Dress appropriately • Moulage as needed (blood, emesis, etc.) • Provide Props (pill bottles, inhaler, prayer beads, etc.)
Prepare the Learners • Learners are more likely to succeed when they know what is expected of them. This section provides tips on how to prepare learners for a simulation. • Examine the simulator prior to the simulation. Review features and capabilities (voice, pulse points, drug administration, etc.) • Permit the learners to acclimate to the new learning environment. • Review learning objectives. • Report to Student • Discuss roles.
Guidelines for the Lab • Confidentiality is critical. • Set Expectations. • Treat the simulator as you would treat a real patient. • Act like you would in a real clinical situation. • No food and drinks • No cell phones or text messaging • Dress appropriately • Most labs require students to sign confidentiality agreements. • Develop Fiction Contract
Instructor’s Role during Simulation • Behavioral guidelines for facilitating a healthcare simulation • Welcome the learners and communicate your expectations about their clinical performance, affective behavior and professionalism. For example: • “Welcome – You are about to participate in a simulated patient case. The patient has a chief complaint – I expect you to assess the patient and manage her to the best of your ability. Treat the simulated patient as an actual human patient. This case lasts approximately 10 minutes. We’ll debrief as a team following the case.” • Emphasize the simulator’s features. For example: • “I expect that you will ask the patient questions and actually assess their vital signs – please do not ask me for this information.” • Permit the learners to ask questions prior to the simulation.
Instructor’s Role during Simulation • Begin the case when the learners are ready • Observe the learners performance • Register events using the Graphic User Interface (optional) • The instructor must decide under what conditions they would interrupt the simulation. • For example, safety-related violations that may injure a learner warrant intervention while a learner’s deviation from the learning objectives is an opportunity for all parties to learn and may not warrant interruption. Typically, when in a testing situation, the instruction would not offer cues and advice to the learner. When teaching, it is not uncommon to pause a simulation to offer assistance to the learner.
Suggested Roles & Responsibilities • Remember, every lab is different but roles remain consistent • Below are roles based a typical scenario • Primary Instructor (Position 1) • Secondary/Assistant Instructor (Position 2) • Lab Technician (Position 3) • Primary Learner “Hot Seat” (Position 4) • Secondary Learner (Position 5) • Assistant Learner/aid (Position 6) • Assistant Learner/family (Position 7) • Observer (Position 8)
Let’s simulate! • Central Simulation, need volunteers to role play • Primary Instructor (work with students) • Secondary Instructor/Tech (work with computer) • Primary Student Nurse • Secondary Student Nurse • Crowd: Observers • Divide into groups and replicate same central simulation • Laerdal Representative at each table • Prep/Run session ~10-15 min • Debrief as a group to share learning/discovery
Next Steps • Practice…. • Set realistic goals • Develop an action plan • Faculty enrichment/Continuing Education/Staff Development • Budget for formal training • Time: Hands-on time with Simulator • Financially: Custom training with Simulation Experts • Networking • Set time lines and realistic goals
Simulation User Network http://simulation.laerdal.com
Laerdal Services Sales and Support customerservice@laerdal.com Monday – Friday, 8:00am - 8:00pm EST Saturday & Sunday, 10am - 6pm EST 877-LAERDAL (523-7325) Fax: 1-800-227-1143
Statement of Disclosure Participants must attend the entire session in order to earn contact hour credit. Verification of participation will be noted by learner initial/signature on the roster.Planners and presenters have declared the absence or presence of any real or perceived conflict of interest which might influence the planning of this activity. “Speaker name goes here” has identified the following real or perceived conflicts of interest: Laerdal is covering travel and expenses for this program. No commercial support has influenced the planning of the educational objectives or the content of this activity. If there were any commercial support provided for this activity, it would be used for events that are not related to continuing education. There is no endorsement of any product by the provider or NCNA associated with this activity. It is expected that no presentation will relate to products governed by the Food and Drug Administration. But, during the course of this activity, if there is discussion related to such products, FDA-approved and non-approved uses will be disclosed to participants.