A Complete Guide to Create Ripple View Effect in Android App
170 likes | 439 Vues
Google is continuously updating its most popular Android Operating systems every year with a bucket of new and exciting features. In the last update, Android was released with a new feature called “material design”. After the release of material design, developers have started to put various material design effects in Android apps. One of the effect that developers are frequently using in Android apps is “ripple view effect”. Here, Nine Hertz has created a complete guide on how to create ripple view effect with all the necessary steps and code. Original Source to download the guide : http://goo.gl/SRAH6f

A Complete Guide to Create Ripple View Effect in Android App
E N D
Presentation Transcript
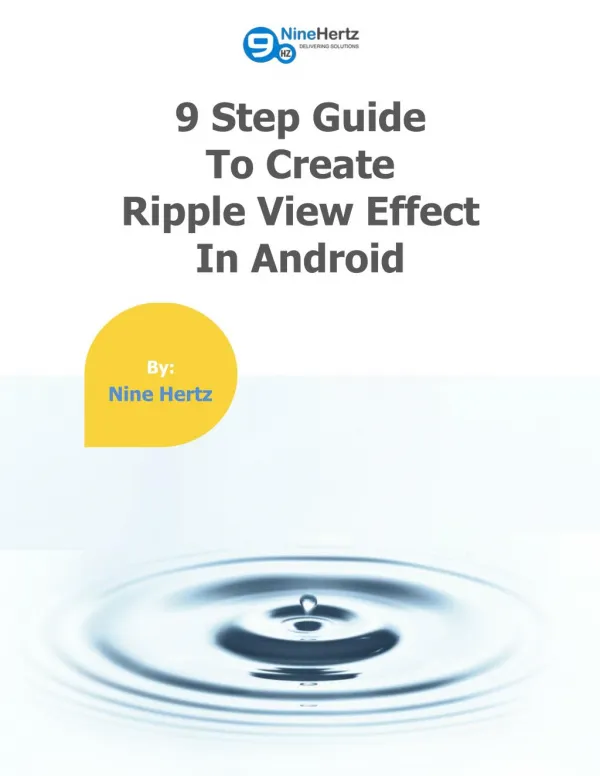
9 Step Guide To Create Ripple View Effect In Android By: Nine Hertz
9 Step Guide To Create Ripple View Effect In Android Google is regularly updating its most popular mobile operating system Android. Last year, it released Android Lollipop version with lots of new features and tons of APIs. One of the primary changes in Lollipop is the material design which has completely changed the look of android. This type of design has given an entire new design interface to Android 5.0 and introduced the new techniques of customizing the applications. Introduction However, each version of Android is born with some new and unique features, but Lollipop came up with some major advancements which were never seen in Android’s earlier versions (Gingerbread, Froyo, Jelly Bean, KitKat). 1
9 Step Guide To Create Ripple View Effect In Android Goal Of Material Design These effects not only provide the attractive look to applications, but also creates a better user experience. The primary goal of material design is to create an interface that works on all mobile devices and platforms. Material design also allows the third party app developers to develop their own custom application with elegant design effects. Material Design Example Material design includes various visual effects such as shrinking, rolling or expanding of UI elements on touch, 3D appearance of buttons, animated buttons, shadow effects, etc. 2
9 Step Guide To Create Ripple View Effect In Android Ripple Effect If you are using Lollipop version in your smartphone, then you must have seen expanding or rolling effects in buttons on touch events. These effects are called Ripple Effects. It is the type of transition that happens when a user interacts with buttons. Ripple View Effect - Demo Link: https://www.youtube.com/watch?v=LlKISmPbmgw 3
9 Step Guide To Create Ripple View Effect In Android How to create Ripple View Effect As the emergence of material design in Android Lollipop, app developers have started to implement the various design effects in their Android applications. Among all the design effects ripple view effect gives the most elegant and exclusive look to an application. If you are also a mobile app developer and want to make your Android application more attractive by using ripple effect, then follow these 9 steps. 4
9 Step Guide To Create Ripple View Effect In Android In this tutorial you will learn how ripple effect can make your application attractive and how to develop it. Let’s get started 1 Step Create a new Android project in Eclipse by clicking on File > New > Android Application Project. 5
9 Step Guide To Create Ripple View Effect In Android 2 Step Set the below string values to file string.xml placed under res > values. strings.xml <?xml version="1.0" encoding="utf-8"?> <resources> <string name="app_name">RippleViewExample</string> <string name="hello_world">Hello world!</string> <string name="action_settings">Settings</string> <string name="click_me">Click Me</string> </resources> This file is used to save your time that could be consumed in hardcoded values. For example, let’s assume that a title string is used in every file of the application and after creating half of the files you want to make a slight change in title. Now, it will be very typical to make changes in all the files, but with String.xml file, the change needs to be done only at one place and that is in the xml file. 6
9 Step Guide To Create Ripple View Effect In Android 3 Step Now find the dimense.xml file located under res > values, add the below values. dimens.xml <resources> <!-- Default screen margins, per the Android Design guidelines.--> <dimen name="activity_horizontal_margin">16dp</dimen> <dimen name="activity_vertical_margin">16dp</dimen> </resources> This file is used to set the values of dimensions so that the application layout is adjusted automatically on each screen size. In this file you can specify various dimensions like padding, radius, width, text size etc. To set the dimensions, there are many units available such as pt (point), in (inches), px (pixels) but the preferred unit is dp (density independent pixels) because dp adjust the layout of the application on the screen size of all densities. 7
9 Step Guide To Create Ripple View Effect In Android 4 Step To set the color and shape of buttons, set the below values in card_bk.xml file located under res > drawable.cards_bk.xml <?xml version="1.0" encoding="utf-8"?> <layer-list xmlns:android="http://schemas.android.com/apk/res/android"> <item android:left="1.2dp"> <shape android:shape="rectangle" android:dither="true"> <corners android:radius="2.9dp"/> <solid android:color="#ccc" /> </shape> </item> <item android:bottom="1.6dp"> <shape android:shape="rectangle" android:dither="true"> <corners android:radius="3dp" /> <solid android:color="@android:color/white" /> </shape> </item> </layer-list> You can also choose different colors and shapes for buttons according to the background of your Android application. 8
9 Step Guide To Create Ripple View Effect In Android 5 Step Import the library RippleView in eclipse, which is located in the source code. It provides all the APIs that are necessary to create ripple effects in buttons. 6 Step Add this Ripple view library to your Android application by navigating Properties > Android > Add > RippleView. Click apply and then OK. 9
9 Step Guide To Create Ripple View Effect In Android 7 Step Now open the layout file (ripple_view.xml) & write the below code. This will create a simple layout with RippleViewButton. <RelativeLayoutxmlns:android="http://schemas.android.com/apk/res/android" xmlns:tools="http://schemas.android.com/tools" xmlns:ripple="http://schemas.android.com/apk/res/org.ninehertz.rippleview.sample" android:layout_width="match_parent" android:layout_height="match_parent" android:background="#d2d2d2" android:paddingBottom="@dimen/activity_vertical_margin" android:paddingLeft="@dimen/activity_horizontal_margin" android:paddingRight="@dimen/activity_horizontal_margin" android:paddingTop="@dimen/activity_vertical_margin" tools:context="org.ninehertz.rippleview.sample.RippleViewActivity" > <org.ninehertz.rippleviewlib.RippleView android:id="@+id/btn" android:layout_width="match_parent" android:layout_height="wrap_content" android:layout_centerInParent="true" android:background="@drawable/card_bk" android:gravity="center" android:padding="35dp" android:text="@string/click_me" android:textAppearance="?android:attr/textAppearanceMedium" ripple:alphaFactor="0.7" ripple:hover="true" ripple:rippleColor="#58FAAC" /> </RelativeLayout> 10
9 Step Guide To Create Ripple View Effect In Android 8 Step Make some changes in main activity class (RippleViewActivity.java) package org.ninehertz.rippleview.sample; import android.app.Activity; import android.os.Bundle; import android.view.Menu; import android.view.MenuItem; import android.view.View; import android.widget.Toast; import org.ninehertz.rippleviewlib.RippleView; public class RippleViewActivity extends Activity { RippleViewmButton; @Override protected void onCreate(Bundle savedInstanceState) { super.onCreate(savedInstanceState); setContentView(R.layout.ripple_view); mButton = (RippleView) findViewById(R.id.btn); mButton.setOnClickListener(new View.OnClickListener() { @Override public void onClick(View v) { Toast.makeText(getApplicationContext(), "Ripples", Toast.LENGTH_LONG).show(); } }); } } 11
9 Step Guide To Create Ripple View Effect In Android 9 Step Run the project to see the ripple effect in button & you are good to go. Now you will be able to see a button with ripple view effect. 12
9 Step Guide To Create Ripple View Effect In Android Benefits of using Ripple Effects in your Android application • Gives the better usability and accessibility option • Provide new ways of user interaction that was not possible in older Android versions • Gives the opportunities to customize the applications • Can be easily created by any third party app developer • Compatible with multiple screen sizes • Give a realistic and practical look to the buttons 13
9 Step Guide To Create Ripple View Effect In Android Conclusion This was a very simple example of creating a button with ripple view effect. You can create any kind of ripple effect in your application by making some slight changes in the code. Ripple View Effect Example It is not a very typical task as you may think, just a little study and efforts can open the doors of success for creating smartphone apps with amazing ripple view effects. We believe this tutorial will help you to successfully create ripple effect in Android. If you have any query then feel free to contact us on info@theninehertz.com 14
Did you like the tutorial ? Share it on social media. Click on the social media buttons to share the guide. 15
This tutorial is brought to you by: Nine Hertz Website http://theninehertz.com Skype : ninehertz Email : info@theninehertz.com Our Offices USA 7278, East Galbraith Raod, Cincinnati, 45243, Ohio, United States Call us: +1-315-381-4100 Dubai Apartment 1009, Yacht bay, Behind JLT metro station, Dubai India44/8, Mansarovar, Jaipur.302020 Call us: +91-0141-2786973 © Nine Hertz 2015, A Mobile App development Company