Download

1 / 14
140 likes | 290 Vues
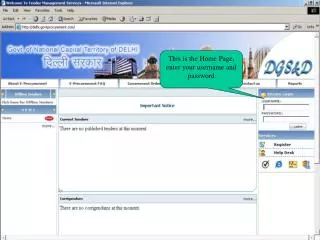
Sign onto https://critilink.com for accessing MASweb. Log in using the Username & Password assigned to you by Criticom. Login with the Username & Password assigned you by Criticom. Here are some specific formats to follow when entering account information in MASweb.

E N D
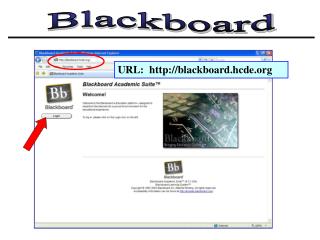
Sign onto https://critilink.com for accessing MASweb.Log in using the Username & Password assigned to you by Criticom Login with the Username & Password assigned you by Criticom
Here are some specific formats to follow when entering account information in MASweb Name Field Residential Accounts should be entered ( Last Name, First Name) Address should be entered completely without using abbreviations (ie. We do not use ST. BLVD., N, S, ect.) XST: Cross street in Address 2 *If a suite exists, then use Instruction page 0 for XST: (cross street) Phone Numbers should be entered with a dash (-) in between the Area code and the exchange (ie. 123-456-7890) X is for an extension (if applicable) PD, FD, MD, PT are all used for authorities phone numbers. These Phone numbers/Agencies can be found in a drop down menu. (P) ATI and (S) ATI are used if the account has a timer test (P) is a timer test on the primary account (S) is a timer test on the secondary GO feature is added for automation purposes Time Zone is a field used to specify which time zone the account is located in (-1)=Central (-2)=Mountain (-3)=Pacific Time DST is used only when the account is located in a region that does not Observe Daylight Savings Time (-1) would be entered if applicable Account Type is used to determine weather account is Residential (R) or Commercial (C) Global/Default and Special Fields are used if Criticom has created Generic templates specifically assigned to your dealer number
Contacts Page – will display pass codes and responsible parties listed on the account. To access any of them click on their associated link on the left in blue underlined. Click on Snowboard on the far left to access the Pass code set up as Snowboard
Contacts – The Passcode on this account is listed in the Contact window- Snowboard. Start with Sequence1 (Sequences increase in increments of 1 - ie. 1,2,3,etc) Passcode is Snowboard PCV- indicates Passcode Verified Please do not use these fields
For Fire Accounts ONLY – instead of having a Passcode ** For Fire Accounts Only Enter Sequence 1 Then ACCEPT ANY POSITIVE RESPONSE
Contacts – By clicking on RP100 brings up the information for Responsible Party Sequence 100 and Contact RP100 Start with Sequence 100 and use RP100, 105, etc. If no list on the account then enter No Call List in Contact Call List 1 is an automatic default here X is used for an extension if applicable Optional time frames for contacting RP Add Cell, Home etc. in Note 2 field Please do not use these fields
Contacts- By clicking on User1 brings up a User ID which is also the password for this user. This format is as follows- Start with Sequence 500, enter the Name and User ID of the person in the following fields Enter a Pin Number or Password here . . only if they are assigned one. If they do not have either enter USER1, USER2, ect. Enter the persons Name here (Name should be entered as First Name (space) Last Name) Enter the UserID assigned to that person Please do not use this area
Instruction/Dispatch Screen Enter the number 0 PASSCARDS ISSUED is automatically entered ** For Fire Accounts Only . . . in line 1enter ACCEPT ANY POSSITIVE RESPONSE
Zone Page – Each Event Code signifies how the alarm is to be handled, i.e.; VDNI- indicating in order; Verify, Dispatch, Notify RP’s and Installer To select a Zone click on the Zone number on the far left – that will bring up the zone which then can be viewed, edited or deleted.
After clicking on the Zone the information for that Zone will appear This event code 1975 is for Burglary (Commercial) Comment field describes as Front Dr Leave the fields (S?, R?, R/S?) defaulted to N You may Update, Add or Delete this zone information from here or use the Zone Page Edit Mode. The next slide will show you how to use Zone Page Edit Mode which is back on the Zone Page
Zones- When adding a NEW zone it is easiest to click on Zone Page Edit Mode Once back on the Zone Page, Click on Zone Page Edit Mode
Zones – Now Select Line# 8 to add a new zone Click on Line# 10 to add a new zone and description
Zone Page Edit Mode - A Template now opens on the RightSide for adding a new zone, this allows you to view all zones on one page while adding a new zone Zone Page Edit Mode allows for open Template format Enter Zone Event Code Zone Description Leave fields S? R? R/S? Blank
Zones – You may also edit or delete a zone using this same template. Criticom would always like a Cancel/Abort code listed on all accounts Use Zone 1000 for all formats unless Contact ID format use E406 Please use 2079event code for Cancel /Abort -which auto will appear on the right Once you click Save Changes your zone will appear on the Zone Page