Download
1 / 30
300 likes | 458 Vues
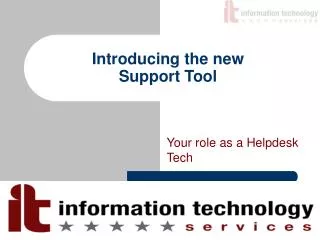
Introducing the new Support Tool. Your role as a Helpdesk Tech. Logging into the system. https://webapps.ou.edu/supporttool. Initial Search. You can modify the color scheme to fit your personality. You can search by any of these fields EXCEPT email address. Do not search by this field.

E N D
Introducing the newSupport Tool Your role as a Helpdesk Tech
Logging into the system • https://webapps.ou.edu/supporttool
Initial Search You can modify the color scheme to fit your personality. You can search by any of these fields EXCEPT email address. Do not search by this field.
Creating a Case Click this button to expand the “Create Case” section. Include the problem in “subject” and all the details in “description”, including everything you’ve tried Click this button to Create the Case
Changing the Email alias • To change an Alias • Enter the new alias and click “Change Alias” • To reset an Alias • Click the “Reset Alias” button. This resets it to their dotted.name@ou.edu
Deleting an Alias • After clicking on the “Alias Info” button, the tool will return a list of all the current aliases. • Check the box(es) next to the alias you are wanting to immediately remove and click the “Remove Alias” button.
Resetting a Password • Only a Helpdesk Lead or Site Lead has the ability to manually change a person’s password. • Everyone else must use the “Reset Account” button. • This button clears the person’s password and allows them to log into http://account.ou.edu as a new user. They are essentially reactivating their account. • The Password info button is only available to Site and Helpdesk Leads and allows the Lead to determine whether the customer has answered the questions on account.ou.edu. • It also lets the lead clear out the customer’s questions.
Unlocked an AD account • If a customer is locked out of their Active Directory account, you can click the “Unlock AD” button to unlock this account.
Sending a Test Email • Below is the screenshot of a sample test email. The next slide has more information about test emails.
Sending a Test Email (continued) • If the email is just to sending something to them, you will need to send it from support@ou.edu • If you are needing to check to see if their account is bouncing email, use your email alias.
What about Private Notes • You cannot include passwords and other confidential information anywhere in the Description or Subject fields. • If this information needs to be included in the case, you must take an extra step to modify the case using the Management Console. • This is described in detail later in the presentation
Attaching an Article • The Attenza system has the option to attach an article from the knowledgebase to a case and email the article to a customer. • To use this feature, you must first create the case in the Support Tool and then log into the Management Console to update the case. • This is covered later in the presentation
The Management Console This can be opened by clicking on the link in the support tool.
Mgt Console (continued) You MUST used your dotted name email address to login. No exceptions. If you have forgotten your password or need access to the console, please see a Team Leader.
Opening a Created Case Click on the Case Management link to make any changes to an existing case; this includes closing cases.
Opening Cases (continued) To open a case, simply click on the case number. Clicking on the magnifying glass will preview the case in the window on the bottom of the screen.
Adding Comments If you need to add a comment (e.g. a customer’s password), simply click on this plus symbol ( + ).
Comments (continued) Simply type out any comments you need to make. If you are including a password follow this format: Password = examplepassword To save the comments to the case, you MUST click the save button in the lower right corner of the window.
Changing the Case Details • If ever you need to alter the subject or description of the case, just click on the “Edit Case” button at the bottom of the screen.
The Customer Calls Back • If the customer calls back before their case has been solved (e.g. they want to check on the status of their case) • You will need to speak with your Helpdesk Lead
Computer Profile • If you want to view the profile of a person’s computer • Look up the person in the Customers section of the Mgmt Console • Click on the Computer Profile Tab (the follow screen demos what this looks like) • If they have not yet profiled their computer, you may ask them to log into support.ou.edu and profile their computer when they have a chance. This will aide us in the amount of support we are able to provide.
Finding a Solution Click the Find Solution button on the bottom of the screen to begin navigating through the knowledgebase. Even if you do not plan on attaching an article (although it is always recommended), clicking on this button will allow you to view the entire knowledgebase. Odds are that your question can be answered from somewhere in the knowledgebase. Use this BEFORE you try and Google it.
Finding a Solution (continued) You have the option of either searching or browsing through the knowledgebase.
Attaching the Solution • You can return to the Case to make any changes or updates if needed. • If you found the article that contains the solution you used, click the “Use This Solution” button at the bottom of the screen.
Sending an Email • Like everything else, you must click the button at the bottom of the screen. • If you want to send an article to a customer, this must be done through the email feature • You must first go through the process of selecting the article from the knowledgebase (the previous slides describe this process)
Sending an Email (continued) Check this box to attach a solution to the email. You are free to use one of the template emails provided by IT if you would rather not write out your own email.
Sending an Email (continued) • Before you send any email that is not a template, you must run the spell checker. • This is an email from a professional organization and spelling mistakes are not acceptable. • If you need to attach a file, you can click the Add/Edit Attachments button to send the customer a file.
Closing a Case • After you have selected a case, you must click the “Send Email” button at the bottom of the bottom of the screen. • No case is to be ever closed without first sending an email. This is extremely important. • After sending an email, you are free to click the “Close Case” button at the bottom of the screen.
Take the Next Call • Do it all over again! If you have any questions, please don’t hesitate to talk to a Team Lead.