Web Foundations
Web Foundations. Tuesday, November 19, 2013 LECTURE 31 : Dreamweaver: Modify Menu and Property Panel. Modifying Page Properties and CSS Styles. Modify Menu > Page Properties or Button from the Properties Panel.

Web Foundations
E N D
Presentation Transcript
Web Foundations Tuesday, November 19, 2013 LECTURE 31: Dreamweaver: Modify Menu and Property Panel
Modify Menu > Page Properties or Button from the Properties Panel For each page you create in Dreamweaver, you can specify layout and formatting properties using the Page Properties dialog box (Modify > Page Properties or by invoking the Page Properties button from the Propertiespanel, or Ctrl + J from the keyboard). The Page Properties dialog box lets you specify the default font family and font size, background color, margins, link styles, and many other aspects of page design. You can assign new page properties for each new page you create, and modify those for existing pages. Changes you make in the Page Properties dialog box apply to the entire page. Dreamweaver gives you two methods for modifying page properties: CSSor HTML.
Non-CSS Page To Work With: http://faculty.cascadia.edu/cduckett/foundations/test/modify00.html
In the provided sample page, you'll notice that the original DOCTYPE is XHTML 1.0 Transitional. This can be easily changed to the HTML5 DOCTYPE using Dreamweaver.
In the menu bar, select Modify > Page Properties or the Page Properties button from the Properties panelto bring up the Page Properties popup box.
In the Document Type dropdown menu, select HTML 5, then Apply
You'll notice the DOCTYPE has now been effortlessly changed to HTML 5 You may have to do a bit of tweaking (like add lang="en" to the html tag if you like) but for the most part everything is in working order.
Invoke Page Properties again. On the left of the Page Properties panel is a list of categories. When it opens, the first one, Appearance (CSS) is selected (Appearance (HTML) is "old school"). This sets the font, text color, background, and margins for the page. Choose a set of fonts in the Page font pop-up, and click the Apply button. You should see an instant transformation in the look of the page text.
It's not a good idea to specify a size for the font here, as it affects the entire page, although it can be a start for tweaking. Font sizes are better specified later in your style sheet. However, you should always set the text and background colors, even if you want to use the default black and white. Click inside the color picker for each one, or type the hexadecimal value for the color in the text field alongside. If you enter the hexadecimal value yourself, don't forget that it must begin with a hash sign (#). Forgetting to include the hash sign is a common cause of CSS mistakes. Note: Dreamweaver uses 3-digit hexadecimal values whenever possible, or else 6-digit hex.
An internal style sheet is added to the page. Later I will show how to export this internal style to create an external style sheet.
If you want your page to have a background image, click the Browse button, and select the image. Set the Repeat pop-up to indicate how you want the image to be displayed. If you leave this blank or select repeat, the image will automatically tile across and down the page. Selecting repeat-x tiles the image across the page; repeat-y tiles it down the page; and no-repeat prevents it from tiling.
Browsers add a small margin all around the page, so it's often a good idea to remove it by entering 0 in each of the margin text fields. The settings in the Appearance (CSS) category of the Page Properties dialog box should look similar to this: (the margins can be tweaked later to conform to your specific page design)
Next, select Links (CSS) from the Category list on the left of the Page Properties panel. This is where you set the basic styles for your links. You can change the font and size of your links, but I think it looks better if they are left the same. If you prefer, you can make your links bold by clicking the B button alongside the Link font text box. Choose the colors you want your links to be in the four main states. Link color is the normal color of the links; Visited links is how you want to indicate links that have already been visited; Rollover links is the color when the mouse pointer is directly over the link; and Active links is the color of the link at the moment of being clicked. You can also choose whether you want your links to be underlined.
The final set of styles to create in the Page Properties dialog box are in the Headings (CSS)category. This section lets you choose the font, font size, and color for the various levels of headings. It's a good idea to choose a different set of fonts for your headings to make them stand out from the rest of the text. Also choose a size and color for the first three levels of headings. Because CSS lets you choose font sizes, there is rarely any need to use the other levels. The days of choosing Heading 6 to get small, bold text are virtually over. When you have made your choices, click Apply to make sure the settings are what you want.
Adding Other Useful Styles The Page Properties dialog box lays the basic foundation for a style sheet, but you need a few more styles to make your pages look good. There are several ways to add new styles. At this stage, it's a good idea to save your work so far. After saving the file, open Code view or Split view, and scroll to the top of the page in Code view. Directly below the <title> tag, you should see that Dreamweaver has created a <style> block. These are the style rules that control the look of your page. Each style rule consists of a selector, which tells the browser where to apply the rules. This is followed by one or more style declarations between a pair of curly braces. Each style declaration begins the CSS property you want to use, followed by a colon (:) and the value you want the property to have. Each declaration ends with a semicolon (;). Most CSS properties have intuitive names, so it's not difficult to follow what each rule is for once you learn the names of the properties.
Scroll down to the last style rule (h3), position your cursor after the closing curly brace (}), and press Enter/Return to insert a new line. Type .floatleftfollowed by a space and an opening curly brace. Then press Enter/Return. Dreamweaver displays CSS code hints. Start typing the word float. As soon as the code hint displays float, press Enter/Return. Dreamweaver finishes the word, inserts a colon, and displays the next set of code hints.
This time, start typing margin, and select margin-right from the code hints. After the colon, type 8px followed by a semicolon. There should be no space between the number and px. The style rule you have just created should look like this: .floatleft { float: left; margin-right: 8px; } The dot (period) at the beginning of .floatleft indicates this is a CSS class. The two rules in this class float an element to the left, and add a right margin of 8 pixels. You can apply this class to images to align them to the left and flow text around the right side. The 8-pixel margin on the right prevents the text from sitting right up against the image.
Create another class called .floatright, setting float to right, and margin-left to 8px like this: .floatright { float: right; margin-left: 8px; } This aligns images to the right, and leaves an 8-pixel margin for the text flowing around on the left. Add one other rule to automatically remove the border from images used as links, using the following code: a img { border: none; }
Exporting the Styles to an External Style Sheet You have now created a very basic set of style rules for a page, but you don't want to go through the same process for every page in your site. The answer is to export the style rules in the <head> of the page to an external style sheet. Dreamweaver make this a simple operation.
Open the CSS Styles panel by double-clicking its tab, or by selecting Window > CSS Styles. On Windows, you can also use the keyboard shortcut Shift+F11. Select the All button at the top left of the CSS Styles panel. If necessary, expand the <style> tree menu, and Shift-click to select all items, as shown.
Right-click the selected styles and select Move CSS Rules from the context menu. This opens the Move To External Style Sheet dialog box.
In the dialog box, select the radio button labeled A new style sheet… and click OK. This opens the Save Style Sheet File As dialog box.
It's normal practice to save style sheets in a separate folder, so create a new folder called styles, and save the style sheet as basic.css. When you click OK, Dreamweaver exports the styles from the <head> of the page to basic.css, and links the two files. Select File > Save All to save both the original page and the new style sheet.
To tidy everything up, select <style> in the CSS Styles panel as shown. Right-click on it and select Delete to remove the empty <style> block in the <head>.
You'll end up with a clean link to the external style sheet, and nothing of the internal style sheet remaining in the <head>.
Sample Images for Download http://faculty.cascadia.edu/cduckett/foundations/test/dude1.jpg http://faculty.cascadia.edu/cduckett/foundations/test/dude2.jpg
In Design mode, place your cursor where you would like to insert your image and then select Insert from them menu bar, and then Image
From the Select Image Source popup, browse to and select your image, then OK
The image is inserted, but it needs to be aligned using the CSS.
Switch to Code mode, and enter class="floadleft" in the img attributes.
Repeat the process to add the second image, but this time align it to the right, then Save. http://faculty.cascadia.edu/cduckett/foundations/test/modify01.html
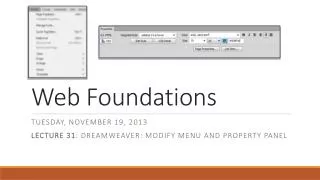
The Properties Panel The Propertiespanel is the 'work horse' of Dreamweaver and is usually found below the open document. If it is closed, you can open it by selecting Window from the menu bar, then Properties. http://faculty.cascadia.edu/cduckett/foundations/test/modify02.html
The Properties Panel The properties window changes depending upon which tag or element is highlighted. This allows you to change the properties of the exact element you're working on at that moment. For example, if you've highlighted an image, the properties panel will have fields for the alt text, height and width, the source of the image, and where it should link to. You can even turn the image into an image map right in the properties panel. If the current focus of the document is text, the properties panel will allow you to set things like the style, font size, and alignment.
The Properties Panel: HTML Mode and CSS Mode DEMO: Toggling and Using the Features between HTML Mode and CSS Mode
Coming Up Tomorrow: Dreamweaver Tips & Tricks • Inserting a Simple Slide Show • Inserting a Google Map