Cardio-Pulmonary Resuscitation (CPR)
270 likes | 645 Vues
Cardio-Pulmonary Resuscitation (CPR). Instructor Guide Linda Wiggins, M.Ed.- CHES. TABLE OF CONTENTS. Section 1: PREPARATION Introduction ..........................................................................................................................

Cardio-Pulmonary Resuscitation (CPR)
E N D
Presentation Transcript
Cardio-Pulmonary Resuscitation (CPR) Instructor Guide Linda Wiggins, M.Ed.- CHES
TABLE OF CONTENTS • Section 1: PREPARATION • Introduction .......................................................................................................................... • CPR Overview……………………………………………………………………….......... • Health and Safety Precautions for the Course………………………………………….. • Materials, Equipment, and Supplies .................................................................................... • Lesson Objective……………………………………………………………….................... • 8 Steps of CPR ………………………………………………………………………..…… • Practice-Teaching Assignments ........................................................................................... • Course Objectives ................................................................................................................ • Section 2: COURSE OUTLINE • Lesson Objective…………………………………………........................................................................ • 8 Steps of CPR PowerPoint Presentations ............................................................................ • Course Objectives.................................................................................................................. • Checking an Unconscious Person ......................................................................................... • Skill Assessment Practice…………………………………………………………………………………………………. • Section 3: Assessment and Answer Key • Assessment…………………………………………………………………………………………………………………… • Skill Assessment…………………………………………………………………………………………………………… • CPR Skill Assessment……………………………………………………………………………………………………. • Assessment Exam • Answer Key………………………………………………………………………………………………………………….. • References……………………………………………………………………………………………………………………
CPR Overview • BEFORE GIVING CARE AND CHECKING AN INJURED OR ILL PERSON Lesson Length: 49 minutes _______________________________________________________________________________ • GUIDANCE FOR THE INSTRUCTOR • To complete this lesson and meet the lesson objectives, you must: • ■ Discuss all points in the Introduction. • ■ Conduct the Icebreaker activity. • ■ Show the video segment, “Introduction” (2:13). • ■ Show the video segment, “What Would You Do?” (1:36). • ■ Lead the guided discussion for Overcoming Barriers to Act. • ■ Conduct the At the Scene activity. • ■ Show the appropriate video segment for the course(s) being taught: • “Checking an Unconscious Adult ” (4:87) • ■ Conduct the appropriate checking an unconscious person and/or • infant skill session for the course(s) being taught. • ■ Show the video segment, “Shock” (1:52). • ■ Conduct the Lesson Wrap-Up
MATERIALS, EQUIPMENT AND SUPPLIES • ■ CPR Video and PowerPoint presentation. • ■ Student Training Kits to perform the correct order of steps and practice for each group. • ■ Non-latex gloves and mouth disposable gloves.
LESSON OBJECTIVES After completing this lesson, students will learn and perform the following: ■ Define the components of cardiopulmonary and resuscitation. ■ Explain the check for responsiveness and call 9-1-1. ■ Explain how to open the airway check for breathing. ■ Demonstrate the proper technique of chest compressions on an adult. ■ Explain when to move an injured or ill person from a dangerous scene. ■ Explain how to check a conscious person for life-threatening and non-life- threatening conditions. ■ Explain and perform CPR
COURSE OBJECTIVES • Objective 1.0 – 1.4 Given a scenario, students will be able to check for danger from starting and ending • arriving on the scene of accident. • Objective 2.0 – 2.5 Given a check for response examples, student will identify them correctly as a call- • response or touch response. • Objective 3.0 – 3.1 Given a scenario, student will be able to call for help. • Objective 4.0 – 4.4 Given a mannequin students will be able to clear airway for breathing. • Objective 5.0 – 5.2 Given a mannequin students will be able to check for breathing. • Objective 6.0 -6.2 Given a mannequin student will be able to start CPR and perform chest compressions. • Objective 7.0 Given a mannequin, the student will be able to perform rescue breaths. • Objective 7.1 Given a mannequin, the student will be able to perform support head jaw. • Objective 7.2 Given a mannequin, the student will be able to perform tilt head to open the air way. • Objective 7.3 Given a mannequin the student will be able to perform 2 breaths allowing 1 second per • inhalation.
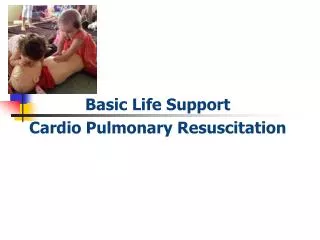
CHECKING ANUNCONSCIOUS PERSON • INSTRUCTION: Watch then Practice VISUAL AID: Video or Presentation Slides A.15–A.17 1. Show the video segment, “Checking an Unconscious Adult and Child” (3:36). 2. Ask participants to find a partner. One person will be the responder while the other person will be the injured or ill person, and then they will switch roles. 3. Guide participants through the steps of the skill. Then have them practice independently.
Skill Assessment Practice • Skill Chart and Skill Assessment Tool • In addition to performing the steps listed in the skill chart in the correct order, participants must meet the criterion below at the proficient level to be checked off for this skill. • 1. Check the scene for safety. • 2. Check the person for consciousness (tap on the shoulder and shout, “Are you okay?”). • 3. If no response, call or have someone call 9-1-1 or the local emergency number. • If the person is lying face-down, gently roll the person face-up, keeping the head, • neck and back in a straight line. • 4. Open the airway. • 5. Quickly check for breathing. • 6. Quickly scan for severe bleeding. • 7. Give care as needed.
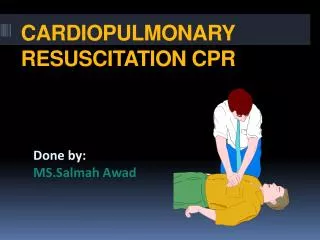
CPR SKILL ASSESSMENT • Setup: Imagine that you are in an emergency situation involving an adult victim who needs CPR. Demonstrate how two responders who know CPR can work together to provide effective compressions and rescue breaths. EMS has been activated and CPR by one responder has been in progress, when a second responder who is trained, arrives and offers his or her assistance. • Responder 1 will give chest compressions, Responder 2 • will give rescue breaths. The responders should be • positioned on opposite sides of the manikin. Responders • will perform the same technique (depth, speed, hand • position, etc.) and compression/breath ratios as with • single-rescuer CPR (Adult: 15:2). • Candidates’ Action: Responders 1 and 2 get in position to begin CPR. • Responder 2, check for signs of circulation. • Candidates’ Action: Responder 2 checks for signs of circulation for 10 seconds while Responder 1 is ready to begin chest compressions if needed. • Responder 1, The victim shows no signs of circulation. • Candidates’ Action: Responder 2 says “No signs of circulation, begin CPR.” • Responder 1 begins CPR by giving a cycle of chest • compressions (15 for adult), then pauses while • Responder 2 gives the rescue breath(s) (2 for adult. • Continue for several more cycles to improve • coordination of chest compressions and rescue breaths.
Assessment • Students will read the scenario below and put the following steps in the correct order: Scenario • You are at a local health club when you overhear someone in the weight room shouting for help. You enter the room and see a person lying motionless on the floor . You quickly confirm that she is unresponsive: 1) Check for Casualty 2) Check for Self 3) Remove hazards 4) Check for By Standers A. 4,1,3,4 B. 3,2,4,1 C. 2,4,1,3 D. 1,4,3,2
Assessment • Determine the correct answer for each question from the word bank below as examples of call-response or touch- response. Word Bank what's your name squeeze hand open your eyes let go hand can you hear me 2.1 Write the first check for response, before calling for help ______________. 2.2 Write the second check for response, before calling for help ____________. 2.3 Write the third check for response, before calling for help _____________. 2.4 Write the fourth check for response, before calling for help____________. 2.5 Write the fifth check for response, before calling for help ______________.
Assessment • Students will read the scenario below and fill in the blanks. Scenario 3.0 The scene is safe, you determine that an adult victim is unresponsive, the next step is to call _______. If you are not alone with an adult and no phone is nearby, ________.
Examinations and Answer Key • Students will read the examples below and perform or select the correct answer to the questions. 4.1 Students will perform on the mannequin and example of clearing the airway? (See skill assessment) 4.2 Which of the following is an example of placing the mannequin on the back? A. pull and then roll B. roll over C. slide the victim D. pull the head 4.3 Which of the following is an example of tilting the mannequin head slightly? A. chin lift -lip lift B. head tilt- lip lift C. head tilt-chin lift D. chin lift- head tilt 4.4 Which of the following is an example of clearing the mannequin mouth? A. sweep mouth on both sides B. move tongue C. push object to side D. tongue away from the back of throat
Examinations and Answer Key • Students will read the examples below and select the correct answer to the questions. 5.1 Which of the following is an example of recovery position? A. grab far leg and pull to you B. grab arm close to you C. grab head and lift D. grad hip area close to you 5.2 Which of the following is an example of the first CPR procedure? A. two rescue breath (1 second each) B. one rescue breath (1 second each) C. two rescue breath (2 second each) D. one rescue breath (2 second each)
Assessment • Students will read the examples below and select the correct answer to the questions. 6.1 Which of the following is an example of the depth of chest compressions? A. Depress the chest 1.5 to 2 inches B. Depress 1/3 of depth of the chest C. Depress the chest 1.5 inches of depth D. Depress the chest 1.5 to 1.5 inches 6.2 The students will perform 30 chest compression on the mannequin? Skill assessment
Skill Assessment • Students will read the examples below and perform or select the correct answer to the questions. 7.1 The students will perform support head and jaw on the mannequin? (See skill assessment) 7.2 The students will perform support tilt head to open the airway on the mannequin? (See skill assessment) 7.3 The students will perform _____breaths and allowing ______second per inhalation on the mannequin? (See skill assessment)
Answer Key 1.1. C. 2,4,1,3 2.1 can you hear me 2.2 open your eyes 2.3 what your name 2.4 squeeze my hand 2.5 let’s go 3.0 911 and 911 4.0 See skill assessment
Answer Key 4.1 See skill assessment 4.2 B. roll over 4.3 C. head tilt-chin lift 4.4 A. sweep mouth on both sides 5.1 D. grad hip area close to you 5.2 A. two rescue breath (1 second each) 6.0 A. Depress the chest 1.5 to 2 inches 6.1 Skill Assessment
Answer Key 7.1 Skill assessment 7.2 Skill Assessment 7.3 Skill Assessment