Maximizing Your Experience with Discovery Education: A Comprehensive Guide
Discover everything you need to know about navigating Discovery Education, from logging in for the first time to utilizing advanced search features and managing your content. Learn how to add resources, organize folders, share videos, and access a vast library of images and educational materials. This guide covers streaming versus downloading videos, setting up classes, assigning content to students, and exploring The Discovery Educator Network (DEN) for collaboration with fellow educators. Make the most of your educational experience today!


Maximizing Your Experience with Discovery Education: A Comprehensive Guide
E N D
Presentation Transcript
Discovery Education JSD No. 2 January 5, 2012
Discovery Education Login • Login with your Username and Password • First time login, select the Passcode/New User tab and enter the School Passcodethat was provided to your school • Change your password, etc. under Profile
Home Page • Tool bar • On This Day • Making the Most of DE • Upcoming Webinars • My Content Quicklinks • Teacher Center • DE Help • My Builder Tools • Discovery Education Network • Classroom Resources • Personalize Page
Searching: Basic Search • Enter topic in the Search field • More Options box appears • Refine Search: Services, Media, Grade • Click Search
Searching: Advanced Search • Click Advanced Search • Select various options • Click Search
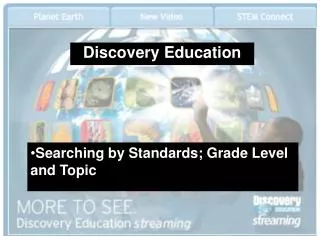
Searching: Curriculum Standards • Click Curriculum Standards Search • Select from options • Curriculum Standards will be displayed • Click the + or – to expand or close sections
My Content: Adding Resources • Perform a search • Hover over the item to be added to My Content > click Add to My Content • Create a folder: click Create New Folder > Name it > click Create • Select the folder and click Add to Selected Folder • Click Close
My Content: Viewing & Using • Click My Content on the Toolbar • Access the saved content • Create new folders • Delete • Share • Open
Download a Video • Search for a video; click to open it • Click the Filmstripicon for the full video or a segment of the video • In the district, a window will pop up for you to Open, Save, Cancel—select Save As • Locate the directory where you want to save it, name it, Save
For best quality: Under download type choose Windows Media 700 Kbps Right click on film strip……………………………………………………. Click on Save target as………………………………………………………. Save to your device
Streaming a Video • Search for a video; click to open it • Click on the picture to run the entire video or click on the picture in the Segments section to run a specific section of it
Downloading versus Streaming • Streaming works well for previewing or occasional use of a video, but it may be choppy depending on the speed of the connection • Downloading takes up computer resources but allows the video to be used in other ways such as in PowerPoints and other content. It also runs more reliably.
Image Library • Over 23,000 images available • Sizes: • Small—use in Word Documents • Medium—use for multi-media such as PowerPoints • Large—high resolution when opening in a web browser that will be projected onto a screen or for print media
Image Library (cont.) • Search for an image • Click on image to open and select size • Right click on image and select Save Picture As… • Locate where you want to save it, name it and save • Save in My Content • Click Go and Add to Selected Folder
Related Resources • Search for a video • Open the video by clicking on it • Related Materials tab—Teacher Guides, Student Activities, etc. • Citations tab—MLA, APA, Chicago Manual of Style • More in this Series tab—view related videos
The Streaming Calendar • Click View Full Calendar on Home page or Click Teacher Center link • Defaults to current day • Red Star indicates commemorative day—click to view information and resources for that day • Use arrows to change months • Use subject links to locate information by subject
Teacher Center Resources to help make the most of DE Tabs: • My Content—content you have organized and saved • My Builder Tools—Build Assignments, Quizzes, Writing prompts • Assignment Manager—My Classes, My Students
Teacher Center (cont.) • Curriculum Resources • Ready Zone • STEM Connect • Calendar • Lesson Plan Library • Thematic Focus • COPPA • Atlas Interactive Map • Teacher Community • Discovery Education Streaming Network
Set Up Class(es) • Classroom Manager tab > My Classes • Name the class and give description (optional) • Click Add New Students • Search for a student—type in name and click GO • Select individual students—check box next to name • Select all students—check box next to All • Click Save • Successful message will display—create another class, return to previous page, or close with X
Adding an Assignment to a Class Once items have been added to My Content, they can be assigned to a class or individual students: • Open My Content • Select the item to be assigned • Click Choose > Assign • Select student(s) to assign item and click Assign • Successfully assigned message will be displayed • Click Close
The DEN: Discovery Educator Network • Click DEN or go to www.dencommunity.com • A worldwide community to see how educators are using DE, to download resources and share your ideas. • Tabs: • Educator Resources • Blogs • Forums • About the DEN