Active Images
Learn how to use active images in PanelPro to control your layout with animation. Create animated turnouts and track images to easily follow routes on your panel. Simulate layout connections without any hardware using the Layout Simulator in JMRI.


Active Images
E N D
Presentation Transcript
Active images Direct layout control (PP-clinic-2) Active Images • Dick Bronson - RR-CirKits, Inc.
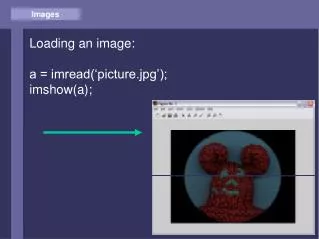
Active Images Let the magic begin! Up until this point we have just created a fixed image with a little bit of text. We could have done the same thing with a simple paint program. The real power of PanelPro lies in the concept of active images. These images get layered on top of the fixed image that we have already created as our background. These active images are under control of the computer, your mouse, and the layout itself. This control is two way. Your mouse clicks can control not only the images, but the layout items that are represented by the images. Likewise, any changes on your layout can be used to change the images here on the screen. Not only can the mouse, screen, and layout interact directly with each other, but the computer can run simple or even complex logic and scripts in the background to connect and control them in complex ways that allow us to control signals, interlocking, and routes. Some folks are even running their trains automatically. (not my style <g>) We will see how some of that works in later presentations. For now we will start out by simply controlling four turnouts on two passing sidings.
Active Images • Animation Animation Instead of simply selecting a single icon for our 'Active' images we will select between multiple icon images, each representative of a different state of the layout. The switching between these images creates a simple animation of the panel. To start out we will 'animate' the turnout levers and the turnout images themselves. Obviously the latter was not something that the classic 1940's CTC panel could to for the track layout diagram, but beginning users seem to appreciate being able to follow the routes easily on the panel. After all most users of our panel will not get days or weeks of orientation like the actual operators would have. We will forgo the animated track images when we get into more prototypical operations, so enjoy it while you may.
Active Images • Layout Simulator Layout Simulator To simulate a layout connection without any actual hardware JMRI has a selection called 'LocoNet Simulator' To make it easy for users of all system to follow these clinics, first change the 'Layout connection:' in 'Preferences...' to LocoNet Simulator.
Active Images • Layout Simulator Layout Simulator To simulate a layout connection without any actual hardware JMRI has a selection called 'LocoNet Simulator' To make it easy for users of all system to follow these clinics, first change the 'Layout connection:' in 'Preferences...' to LocoNet Simulator. Then save the changes and restart the system.
Active Images • Lever Animation Animation • Open our panel from the first clinic and re-save it with a new name. This will allow us to back track easily to the original image when we want to do something differently.
Active Images • Lever Animation Animation • Open our panel from the first clinic and re-save it with a new name. This will allow us to back track easily to the original image when we want to do something differently. • The first animation we will add will be some levers for controlling our turnouts.
Active Images • Lever Animation Animation • Open our panel from the first clinic and re-save it with a new name. This will allow us to back track easily to the original image when we want to do something differently. • The first animation we will add will be some levers for controlling our turnouts. • Bring up the editor window and select 'Change icon...' next to one of the 'Add ... turnout' selections.
Active Images • Lever Animation Animation • Note: There is actually no difference between the 'Add right-hand turnout' and 'Add left-hand turnout' entries. They were both included in the earliest versions of PanelPro in order to make it quicker to select between images. Now that many new functions have been added into the editor we may see one of these disappear to make room for something new. I will only use the first selection for each entry to reinforce the concept that they are equal.
Active Images • Lever Animation Animation • This brings up a similar window to the one for single icons that we saw in the first clinic. Note however that there are now 4 icons shown. These are the four images used to animate a turnout. 'Closed' (normal) and 'Thrown' (reverse) are the usual two images. 'Inconsistent' is used when a turnout is moving between positions, and 'Unknown' is used when the program has not yet determined any status.
Active Images • Selecting the images Animation • We see default images that look like simplified turnouts. However, these images may be anything that is in a bit mapped image format. (.gif, .jpg, .png)
Active Images • Selecting the images Animation • We see default images that look like simplified turnouts. However, these images may be anything that is in a bit mapped image format. (.gif, .jpg, .png) • Drill down through 'resources' -- 'icons' – 'USS' – 'plate'.
Active Images • Selecting the images Animation • We see default images that look like simplified turnouts. However, these images may be anything that is in a bit mapped image format. (.gif, .jpg, .png) • Drill down through 'resources' -- 'icons' – 'USS' – 'plate'. • -- 'levers'. Here we find all of our images for animating a lever.
Active Images • Selecting the images Animation • We see default images that look like simplified turnouts. However, these images may be anything that is in a bit mapped image format. (.gif, .jpg, .png) • Drill down through 'resources' -- 'icons' – 'USS' – 'plate'. • -- 'levers'. Here we find all of our images for animating a lever. • Highlight 'l-left.gif'
Active Images • Selecting the images Animation • We see default images that look like simplified turnouts. However, these images may be anything that is in a bit mapped image format. (.gif, .jpg, .png) • Drill down through 'resources' -- 'icons' – 'USS' – 'plate'. • -- 'levers'. Here we find all of our images for animating a lever. • Highlight 'l-left.gif' • Note: preview image appears at the bottom of the window.
Active Images • Selecting the images Animation • Click on the desired icon to change its default image. 'Closed:' is 'Normal' (N on the plate) so we chose the 'l' (left) image.
Active Images • Selecting the images Animation • Click on the desired icon to change its default image. 'Closed:' is 'Normal' (N on the plate) so we chose the 'l' (left) image. • 'Thrown:' is 'Reverse' (R on the plate) so we chose the 'r' (right) image.
Active Images • Selecting the images Animation • Click on the desired icon to change its default image. 'Closed:' is 'Normal' (N on the plate) so we chose the 'l' (left) image. • 'Thrown:' is 'Reverse' (R on the plate) so we chose the 'r' (right) image. • 'Inconsistent:' means that a command has been sent, but the turnout has not yet responded with a new position, thus the 'X'.
Active Images • Selecting the images Animation • Click on the desired icon to change its default image. 'Closed:' is 'Normal' (N on the plate) so we chose the 'l' (left) image. • 'Thrown:' is 'Reverse' (R on the plate) so we chose the 'r' (right) image. • 'Inconsistent:' means that a command has been sent, but the turnout has not yet responded with a new position, thus the 'X'. • 'Unknown:' means that as yet PanelPro has no information.
Active Images • Selecting the hardware Control • Now that we have our lever animation images selected we need to enter the correct hardware information for our system.
Active Images • Naming conventions Naming conventions • There are many systems supported by JMRI. • C C/MRI serial • Internal, e.g. objects with no associated hardware • L LocoNet • N NCE (also Wangrow currently) • R RPS system • X XpressNet • There are many others not listed here. We have selected LocoNet Simulator so we will use the 'L' for LocoNet.
Active Images • Naming conventions Naming conventions • There are lots of things that might need names: • BBlocks (track segments) • H signal Heads • L Lights (a type of output) • M Memories • S input Sensors • T Turnouts • X logiX • There are others not listed here. At this point in the clinics we are using our levers directly connected to turnouts, so we will use “T” for the item type.
Active Images • Naming conventions System Name Format • A system name is formed from a single letter representing the hardware system, followed by a single letter indicating the item type, followed by a system and type specific string. The string is meant to be related to the hardware addressing, but is otherwise unconstrained. • Examples: • LT23 - LocoNet Turnout number 23. • CS12 - The 12th C/MRI Sensor (input line). • Note that there is no assumption of any pattern to the names; they don't have to be assigned in any given order, nor are they restricted to a single system. However they may not be assigned arbitrarily; they do need to match up with the actual hardware connected to your system. Each system name is used to establish the hardware connection from an item to your layout. (except for items that only exist internally to PanelPro, such as 'I' or 'M'.)
Active Images • Selecting the hardware Control • Now that we have our lever animation images selected we need to enter the correct hardware information for our system.
Active Images • Selecting the hardware Control • Now that we have our lever animation images selected we need to enter the correct hardware information for our system. • Using the information we just covered, we will assign the first lever to LT1. (LocoNet Turnout #1) By using the LocoNet Simulator we can assign any numbers we wish.
Active Images • Selecting the hardware Control • Now that we have our lever animation images selected we need to enter the correct hardware information for our system. • Using the information we just covered, we will assign the first lever to LT1. (LocoNet Turnout #1) By using the LocoNet Simulator we can assign any numbers we wish. • Click 'Add right-hand turnout'
Active Images • Selecting the hardware Control • Now that we have our lever animation images selected we need to enter the correct hardware information for our system. • Using the information we just covered, we will assign the first lever to LT1. (LocoNet Turnout #1) By using the LocoNet Simulator we can assign any numbers we wish. • Click 'Add right-hand turnout' • The new animated icon for LT1 appears at (0, 0)
Active Images • Positioning the icons Control • Click and drag the new item down onto the panel.
Active Images • Positioning the icons Control • Click and drag the new item down onto the panel. • The new lever position.
Active Images • Positioning the icons Control • Click and drag the new item down onto the panel. • The new lever position. • Click on the image to send out a command to the layout and tell PanelPro which image to use. The '?' is now replaced with a lever because it is no longer 'unknown'.
Active Images • Controlling the layout Control • Click and drag the new item down onto the panel. • The new lever position. • Click on the image to send out a command to the layout and tell PanelPro which image to use. The '?' is now replaced with a lever because it is no longer 'unknown'. • As soon as the item was added it was live. If you had a layout connection with LT1 it would now respond to mouse clicks.
Active Images • Positioning the icons Control • Click and drag the new item down onto the panel. • The new lever position. • Click on the image to send out a command to the layout and tell PanelPro which image to use. The '?' is now replaced with a lever because it is no longer 'unknown'. • As soon as the item was added it was live. If you had a layout connection with LT1 it would now respond to mouse clicks. • Hover your mouse over the icon and it will pop up a small window with its system information.
Active Images • Selecting the hardware Control • Now enter LT2, LT3, and LT4 in the same way that we just did for LT1. The images will not change so we just edit the system number and click 'Add....' for each one. They will all stack up at (0, 0) with the last one added on top.
Active Images • Positioning the icons Control • Now enter LT2, LT3, and LT4 in the same way that we just did for LT1. The images will not change so we just edit the system number and click 'Add....' for each one. They will all stack up at (0, 0) with the last one added on top. • Move them off the stack onto their plates. (remember LT4 moves first) If in doubt, hover your mouse to see each system ID.
Active Images • Positioning the icons Control • Now enter LT2, LT3, and LT4 in the same way that we just did for LT1. The images will not change so we just edit the system number and click 'Add....' for each one. They will all stack up at (0, 0) with the last one added on top. • Move them off the stack onto their plates. (remember LT4 moves first) If in doubt, hover your mouse to see each system ID. • Notice that the plate numbers do not need to match the system IDs. In this case the plate is #11 and the system hardware ID is LT4 to match the real hardware.
Active Images • Testing the icons Control • Click on each of the new icons to let the system update the images.
Active Images • Testing the icons Control • Click on each of the new icons to let the system update the images. • Our lever positions are now known and shown by PanelPro.
Active Images • Testing the icons Control • Click on each of the new icons to let the system update the images. • Our lever positions are now known and shown by PanelPro. • A quick look at the LocoNet Traffic monitor window shows us that commands were sent to the layout as we clicked the icons. If there is matching hardware, our turnouts will have all moved to the mainline position.
Active Images • Save your work often Control • Click on each of the new icons to let the system update the images. • Our lever positions are now known and shown by PanelPro. • A quick look at the LocoNet Traffic monitor window shows us that commands were sent to the layout as we clicked the icons. If there is matching hardware, our turnouts will have all moved to the mainline position. • Save your work often as you develop a new panel. It may prevent much weeping, wailing, and gnashing of teeth. A new name lets you go back easily.
Active Images • Track Animation Track Animation • Some folks prefer to just use a static track drawing like the prototype. We will be doing that in the next clinic section. Others prefer to take full advantage of the graphical capabilities of the computer to animate the diagram to follow the turnout positions. The choice is yours. Icons are available to do it either way. You could forgo this panel altogether and use a blank gray panel with toggle switch images if you wanted to. If the available JMRI images don't suit your fancy, then simply create your own.
Active Images • Track Animation Track Animation • Drill down through 'resources' -- 'icons' – 'USS' – 'track'.
Active Images • Track Animation Track Animation • Drill down through 'resources' -- 'icons' – 'USS' – 'track'. • -- 'turnout' – 'left' -- 'east'. Here we find all of our images for animating an eastbound left hand turnout.
Active Images • Track Animation Track Animation • Drill down through 'resources' -- 'icons' – 'USS' – 'track'. • -- 'turnout' – 'left' -- 'east'. Here we find all of our images for animating an eastbound left hand turnout. • Highlight the 'os-l-e-closed' image.
Active Images • Track Animation Track Animation • Drill down through 'resources' -- 'icons' – 'USS' – 'track'. • -- 'turnout' – 'left' -- 'east'. Here we find all of our images for animating an eastbound left hand turnout. • Highlight the 'os-l-e-closed' image. • Note the 'File Prieview:' will show the selected image. The white image is a bit difficult to see against the pale gray window background.
Active Images • Track Animation Track Animation • Click on the desired icon to change the default.
Active Images • Track Animation Track Animation • Click on the desired icon to change the default. • In like manner change all the other icons.
Active Images • Track Animation Track Animation • Click on the desired icon to change the default. • In like manner change all the other icons. • Now enter our system ID. (LT1) This is one area where the Panel Editor is easier to use than the Layout Editor. We can have as many duplicate system IDs on one panel as we require. Because the Layout Editor is building tables from its entries it does not allow you to add multiple items with the same ID.
Active Images • Track Animation Track Animation • Click on 'Add ... turnout' to place the icon onto our track diagram.
Active Images • Track Animation Track Animation • Click on 'Add ... turnout' to place the icon onto our track diagram. • LT3 is also a left hand east turnout, so add it at this time as well.
Active Images • Track Animation Track Animation • Click on 'Add ... turnout' to place the icon onto our track diagram. • LT3 is also a left hand east turnout, so add it at this time as well. • Now bring up the icon selection window and change the selections to the right hand west facing images.