Download
1 / 15
150 likes | 170 Vues
https://www.coolmuster.com/android/transfer-photos-from-android-to-usb-flash-drive.html<br>If you have trouble transferring photos from Android to USB flash drive, follow this step-by-step guide which shows you how to transfer photos from Android phone to USB flash drive with 3 ways.

E N D
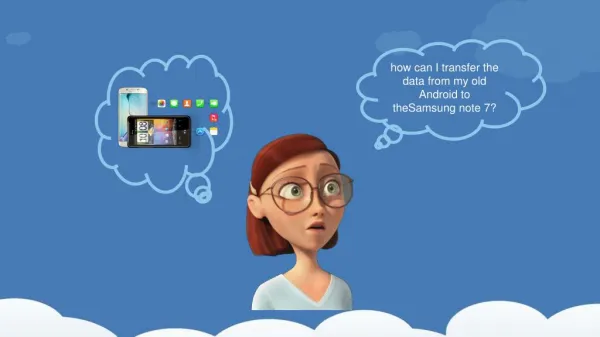
How to Transfer Photos from Android Phone to USB Flash Drive [3 Ways] https://www.coolmuster.com/android/transfer-photos-from-android-to-usb-flash-drive.html
Summary: If you have the question of "How do I transfer photos from phone to flash drive?", this tutorial is what you need. Here you will learn how to transfer photos from Android phone to USB flash drive in three ways. The first way is to use a useful phone managing software, which allows you to access and transfer photos in an easy manner. The second is by using an OTG cable that lets you connect your phone to USB drive directly. And the last method is to drag and drop photos from Android to USB using a computer. Read along and try the method you prefer.
Part 1: How to Transfer Photos from Android Phone to USB Flash Drive with Coolmuster Android Assistant To solve the problem of how to transfer photos from Android to flash drive, you can move your photos from Android phone to PC first, and then everything else comes easy. For this, Coolmuster Android Assistant can help you out. It is a desktop software designed for phone management, which makes the data transfer between Android and PC a breeze. Using this tool, you can not only transfer photos on the camera roll but also all the other albums on your Android. Why choose Coolmuster Android Assistant? > It is an all-round phone managing software that helps you manage your Android files on PC easily. > It categorizes the files on Android according to data type for easy navigation and management. > Not only transfer photos but also videos, music, SMS, call logs, contacts, apps from Android to PC.
> It has the ability to back up and restore Android phone with 1 click. > You can use it to send, reply text messages directly on your computer. > It enables you to manage your call logs, contacts in an easy manner. Coolmuster Android Assistant supports Android devices running Android 4.0 and above, it works well on all Android brands and models such as Samsung Galaxy S20/S20+/S20 Ultra/S10/S10+/S10e/S9+, HTC U12+/U12 life/U11+/U11/10, Sony Xperia 1 II /10 II/L4/5/1/10 Plus, LG, Motorola, Xiaomi, etc.
How to transfer photos from Android phone to USB flash drive with Coolmuster Android Assistant: Step 1: Launch Coolmuster Android Assistant Download and launch Coolmuster Android Assistant on your PC, click the Android Assistant section.
Step 2: Connect Android phone to PC Connect your Android phone to the PC with a USB cable, enable the USB debugging and give permissions according to the prompts. Once your Android is detected by the program, the main interface will display the info of your Android just like below.
Step 3: Transfer photos from Android to PC Click the Photos tab from the left sidebar, and you can preview all the photos on your Android. Select the photos you want and click Export to save them to PC. You can customize the location to store the photos.
Step 4: Transfer photos to USB flash drive Insert your USB flash drive to PC and then open it. Open the folder that store photos transferred from Android phone, then copy and paste photos to the USB flash drive. Part 2: How to Transfer Pictures from Phone to Flash Drive via OTG Cable An OTG (On The Go) cable has a larger USB port at one end and a micro USB connector at the other end. It enables you to directly connect a USB flash device or an SD card reader to your phone. However, not all Android devices support OTG, you can check if OTG can work on your device by downloading this app from Google Play.
Check the following steps to see how to transfer photos from phone to flash drive with an OTG cable: Step 1: Connect your USB flash drive to the larger USB port of the OTG cable. Step 2: Connect the other end of OTG cable to your Android.
Step 3: A notification will appear that says USB storage device connected. If it's not connected, you can tap USB drive for more options and select Transfer files. Step 4: Open the File Manager on your Android phone and then tap Internal storage. Step 5: Find the DCIM folder. Step 6: Locate the photo you want to transfer and long-press it to select.
Step 7: Tap the three dots icon on the top-right and select Copy. Step 8: Copy the photos to your USB drive and then tap Done. Learn more:How to Transfer Files between Android and Flash Drive via OTG?
Part 3: How to Transfer Photos from Android to USB via Drag and Drop You can also use the old-fashioned way - transfer photos from Android to PC via a USB cable, and then move the photos to the USB. This method is pretty straightforward and easy to operate. However, it doesn't allow you to view photos according to albums so it is a bit difficult to locate the required photos. How to transfer photos from Android to USB via Drag and drop: Step 1: Connect your Android to the computer with a USB cable.
Step 2: On your Android phone, tap the USB Charging notification, and select Transfer files or Transfer photos. Step 3: On your computer, click This PC and open your Android phone under the Devices and Drivers section.
Step 4: Navigate to the internal storage of your phone and find the DCIM folder and open it. Step 5: Plug the USB flash drive to the computer and then open it, drag the photos from your Android's DCIM folder and drop them to your USB drive. Eject your USB and your Android phone when it's done.
Which way do you choose? That's all for the three ways of how to put pictures on a flash drive from a phone. When it comes to the ease of use, using the OTG cable is better for it allows you to connect your USB to Android phone directly and then transfer pictures from Android to USB without a computer. If you have a computer around, I suggest you give Coolmuster Android Assistant a try. With it, you can view your photos on your computer by albums and it also lets you transfer other types of data, such as SMS, call logs, apps, videos, etc. Related Articles: How to Export Files from Android Phones to External Hard Drive Top 8 Ways on How to Transfer Photos from Android to PC How to Transfer Pictures from Android to Android? [4 Ways] How to Transfer Photos from Android to iPhone? [4 Methods] How to Transfer Photos from Android to Laptop? [Full Solutions] 9 Proven Ways on How to Transfer Photos from Android to Mac [Hot]