Image Formation
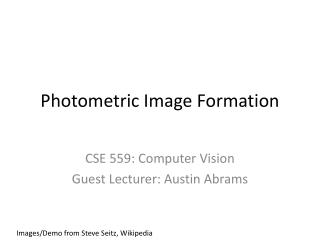
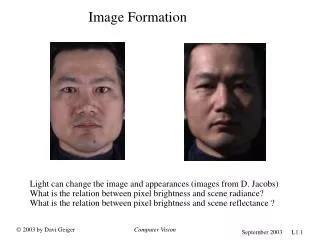
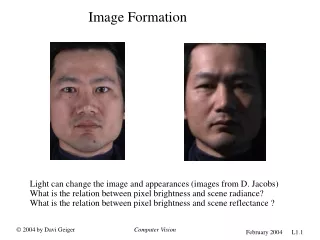
Image Formation . Light can change the image and appearances (images from D. Jacobs) What is the relation between pixel brightness and scene radiance? What is the relation between pixel brightness and scene reflectance ?. Cameras. Jetty at Margate England, 1898.
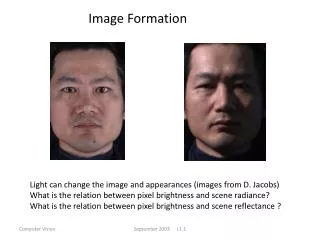

Image Formation
E N D
Presentation Transcript
Image Formation Light can change the image and appearances (images from D. Jacobs) What is the relation between pixel brightness and scene radiance? What is the relation between pixel brightness and scene reflectance ? Computer Vision
Cameras Jetty at Margate England, 1898. http://brightbytes.com/cosite/collection2.html (Jack and Beverly Wilgus) • First photograph due to Niepce • First on record shown in the book - 1822 Computer Vision
Pinhole cameras • Abstract camera model - box with a small hole in it • Pinhole cameras work in practice Computer Vision
Only a few light rays from each point on the subject can get through the tiny opening and reach the film in small clusters that cause minimal blurring. rays
A larger hole permits a greater number of rays from each point on the subject to enter the camera. These rays are recorded as large circles which tend to overlap each other, creating an unclear image. They are called circles of confusion.
Pinhole Camera Small pinhole allows only small amount of light in, blocking overlapping diffuse rays and forming image inside the camera.
The Eye • The human eye is a camera! • Iris - colored annulus with radial muscles • Pupil - the hole (aperture) whose size is controlled by the iris • What’s the “film”? • photoreceptor cells (rods and cones) in the retina
Human Eye vs. the Camera • We make cameras that act “similar” to the human eye
Image Formation Digital Camera Film The Eye
Digital camera • A digital camera replaces retina with a sensor array • Each cell in the array is light-sensitive diode that converts photons to electrons • Two common types • Charge Coupled Device (CCD) • CMOS • http://electronics.howstuffworks.com/digital-camera.htm
CCD Cameras http://huizen.ddsw.nl/bewoners/maan/imaging/camera/ccd1.gif Slide credit: David Jacobs
Sensor Array CMOS sensor
Remember the camera obscura? Most modern cameras use a lens to concentrate the light to make taking pictures possible in a wider variety of circumstances.
Books often compare the function of a camera to the human eye.
Lens settings have a big impact on the lines of your pictures
Cameras See Differently • Looking at an image on a screen, or on paper is not the same as looking at something in normal experience. • We forgive ourselves if the picture is crappy if the subject is familiar to us— we look through the picture to see the person or place we want to see.
Learning Photography is like learning to read • We see words as the containers of meaning. • Photographic seeing simply means seeing the world as it will appear in a photograph. • This takes practice.
what is your picture for? • Art pictures are supposed to make you think and/or feel. • Advertising pictures are supposed to sell you on something. • News pictures communicate information. • Snapshots preserve memories. • Personal pictures sometimes just say “I was here.”
Seeing as . . . • Means taking enough pictures to understand why some of your pictures turn out the way you expect and others don’t. Then you can see things as photographs • Means understanding how pictures in certain genres work. If you see what persuades, communicates, or moves you then you can see photographs as useful. • Means accepting the challenge of finding significance in the commonplace, the challenge of seeing day-to-day life as something important.
Seeing as . . . • Means that you must take control of the aspects of camera, photographic, and digital technologies that are important to achieving your motives. • Means that you cannot simply look at your pictures, or through them, if you expect other people to see them as you do. • Means that you have decided to make pictures instead of just taking them.
Pervasive Myths About Digital Photography • You can always “fix it up” in PhotoShop • The settings on the camera aren’t important, just as long as you can see your picture on the preview screen • Digital is better than ordinary photography.
Camera Controls You Need to Know • Focus • Exposure • White Balance • Flash settings • Image resolution and file type
Time to get out the manual • Focus settings are important • When your camera refuses to take a picture, it is usually because it can’t focus. • Not all cameras can be manually focused, but it is relatively easy to fool them into doing what you want.
Getting Focused • All cameras have a focus lock. Usually, pressing the shutter-button halfway down does the trick. Practice this carefully to make sure that you can lock the focus without taking a picture. • If your camera won’t take a picture, try pointing it at a subject of higher contrast somewhere near the same distance. Lock the focus and then reframe it to get the picture you really want.
shooting through • Many cameras have difficulty focusing through glass. Depending on the camera type, sometimes pressing it straight against the window will help. • However, if your camera has an infinity focus setting, this is better. It sets the camera so that everything over 30 feet or so will be in good focus.
Shooting Close • Most cameras have a macro focus setting. • Use this to take close-ups, if you are so inclined. At higher magnifications, it is best to use a tripod even in bright light or your pictures may be blurry. • Lighting is a major problem in close-ups. It is normally best to turn-off the camera’s flash and use the available light.
Exercise Some Control • Some cameras have manual focuscapability. It isn’t really essential if you know how to use the other settings to your advantage. • In most situations, exercising digital (finger) control on the shutter will do the trick by activating focus lock.
Expose Yourself • Remember that the two primary qualities of photography are control of space and time. • The opening of the iris diaphragm provides a space for the light to get through. • The shutter is only open for a limited time to let the light in. • These are called exposure controls.
Exposure Modes • Program Automatic • Shutter Priority • Aperture Priority • Manual Exposure • Custom Programs
Choices, Choices • Programmed Automatic Exposure (P) works well for most pictures. • However, the other modes offer more creative control. • Custom programs aren’t especially important and vary widely between cameras. • If you understand Shutter Priority (S) and Aperture Priority (A) you have all the control you need.
Save it For Later • Like zoom settings, exposure controls can drive you to fiddle incessantly experimenting with the results. • Keep it simple for now and resist them. • We’ll talk more about how to use them to best advantage and creative effect later. The range of control is limited on digital cameras compared with conventional cameras.
But... • Exposure compensation is important. • Some cameras also offer custom ISO (sensitivity)settings that can help you improve your image quality. • Digital cameras are pretty good at setting exposure, but theydon’t know what is important to you.
Exposure is the single most important factor in image quality • Exposure compensation is a setting usually marked by +/- signs. • Adjusting it to the plus side makes the image lighter. • Adjusting it to the minus side makes the image darker. • Lower ISO settings give a higher quality image but require longer exposure times; adjust at your own risk.
Learn your Camera And Your Computer’s Brightness Range • Try adjusting your exposure settings, and then look both at the preview screen of the camera and your home computer. • Better still, compare it on several computers. • The detail available to you in your images is directly related to how they are exposed. Get it right and remember how it looks!
white balance • Your camera is not as smart as your eye about color. • Sometimes, you need to tell it what color the light you are taking pictures with is. • Ever get orange photos?
The Core Settings • Daylight is actually blue-- the camera normally deals with that fairly well. • Fluorescent light is green-- this makes for really ugly pictures. • Incandescent light is orange. • Read your manual to determine what symbol matches what lighting condition. • Automatic doesn’t always give you what you want.
Using the correct white balance not only makes the color better, it improves the resolution of the picuture.
Some cameras have a black and white setting which can also improve picture detail.
Mixed lighting sources can cause problems • Some cameras have a way to set the balance to intermediate values. • This usually requires pointing the camera at a clean white surface and holding the setting. • You need to be aware that color does not always render the way you see it with your eyes. • You can use this to your advantage for creative effect, as long as you know what is going to happen when you take the photo.
To Flash, or not to Flash. • Flash solves many color balance problems when used indoors, but it does so at the expense of “naturalness.” • Learn how to turn your flash off to take photographs that look natural in indoor settings. • But remember if you don’t use flash, you’ll usually need to adjust the white balance.
Flash Settings • Automatic works okay most of the time. • Turning the flash off is good for natural indoor photographs. • Forcing the flash to turn on at all times can help fill in shadows in outdoor settings. • Red-eye reduction flash usually creates two flashes to close your subject’s pupils. It can be distracting if you don’t need it. • Slow-sync flash allows the shutter to remain open to register more of the natural light. It can produce interesting effects.
Last, but not least • The first thing you should set on your camera are the image file settings. • There are two parts to this— the size of the image your camera will record and the type of file it will save.
Image resolution settings • Use your camera at the highest resolution you can conveniently tolerate. • Higher resolution means fewer pictures can be saved to a given memory chip. • Higher resolution means pictures take longer to save— but this is a good thing. It gives you longer to think about your next picture!
Image Sharpness Settings • Avoid using “sharpness” settings. • These settings adjust the way that edges render in the saved image. • You can always adjust the sharpness using programs like PhotoShop which do a far better job and offer more options.
image file formats • There are several options available on most cameras to select the type of file the image is saved in. • Use TIFF or RAW for the best quality images. You can save fewer images per memory space, but the results always look better. • Only use JPG settings when you need to take a lot of photographs without returning to your computer.
Pinhole camera model • Pinhole model: • Captures pencil of rays – all rays through a single point • The point is called Center of Projection (COP) • The image is formed on the Image Plane • Effective focal length f is distance from COP to Image Plane Slide by Steve Seitz