Download
1 / 27
270 likes | 475 Vues
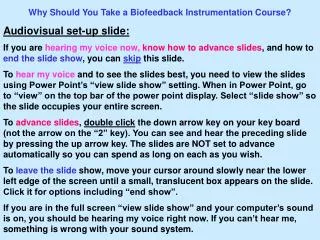
Why Should You Take a Biofeedback Instrumentation Course? Audiovisual set-up slide: If you are hearing my voice now, know how to advance slides , and how to end the slide show , you can skip this slide.

E N D
Why Should You Take a Biofeedback Instrumentation Course? Audiovisual set-up slide: If you are hearing my voice now,know how to advance slides, and how to end the slide show, you can skip this slide. To hear my voice and to see the slides best, you need to view the slides using Power Point’s “view slide show” setting. When in Power Point, go to “view” on the top bar of the power point display. Select “slide show” so the slide occupies your entire screen. To advance slides, double click the down arrow key on your key board (not the arrow on the “2” key). You can see and hear the preceding slide by pressing the up arrow key. The slides are NOT set to advance automatically so you can spend as long on each as you wish. To leave the slide show, move your cursor around slowly near the lower left edge of the screen until a small, translucent box appears on the slide. Click it for options including “end show”. If you are in the full screen “view slide show” and your computer’s sound is on, you should be hearing my voice right now. If you can’t hear me, something is wrong with your sound system.
Why Should You Take a Biofeedback Course Heavy on Instrumentation? Hi: I’m Rich Sherman. I have been president of AAPB and have been involved in biofeedback for over 30 years so am familiar with many of the problems which happen when people try to perform biofeedback without an adequate background. I’m going to be telling you why knowing how biofeedback devices work can help you be a better practitioner. Richard A. Sherman, Ph.D. Dean, College of Psychophysiology, University of Natural Medicine. rsherman@nwinet.com
(This slide appears in all 4 basic skills talks so skip it if you already read it.) • You are attending one of four brief talks in the series on • “what you need to know to perform biofeedback effectively”. • The series contains talks on why: • You need to know how biofeedback devices actually record physiology and how to set the devices to produce useful recordings (Biofeedback Instrumentation). • 2. You need to know how the body works in order to use biofeedback effectively to change physical and mental functioning. Otherwise, you may try to do training which can’t work well or can’t be done at all (A&P / Human Biology). • 3. You need to be able to tell if there is enough solid evidence supporting the use of a technique for you to even try it, let alone charge for it, and to tell whether the results you see or hear about are due to placebo or treatment effects (Basics of clinical research). • 4. Everybody needs a basic biofeedback course before doing biofeedback. You need to know when an introductory level general biofeedback or neurofeedback course doesn’t provide the depth you need to effectively incorporate biofeedback into interventions for the kinds of disorders you treat (e.g. chronic pain, incontinence, muscle rehabilitation, etc.).
(This slide appears in all 4 basic skills talks so skip it if you already read it.) Before we get started, let’s be sure you and I have the same general concept of what biofeedback is. Biofeedback includes (a) performing accurate psychophysiological recordings using standard techniques to evaluate known problems with levels and patterns of function of one or more known physiological systems and then (b) immediately showing these levels and patterns to a client as they are recorded so he or she can learn to recognize and control them. Numerous placebo controlled studies with long term follow-ups have proven that biofeedback is effective for many disorders. The crucial points here are (1) that biofeedback includes actual learning by the client and (2) that widely recognized problems in function are corrected. Biofeedback devices are NOT magic machines recording unverified physical problems using methods not explainable through normal scientific means. They do not magically cause the body to change its functioning through unproven methods to fix problems which can not be demonstrated through standard tests. No scientifically acceptable studies have shown devices making such claims to be effective. If you are not familiar with psychophysiological recording and biofeedback, please see the introductory lecture in the “Want to know what biofeedback and psychophysiology are?” section on this site.
You absolutely must have at least a basic course in biofeedback or neurofeedback to competently perform psychophysiological recordings and provide useable feedback signals. People who don’t take a basic biofeedback course think they don’t need to either because (1) they think the machines are so sophisticated the devices can work themselves (an incredibly common belief) or (2) because their licensing board includes biofeedback as a technique they can use and don’t realize that the tiny exposure to biofeedback they received in school or from a manufacturer doesn’t cover many crucial concepts. Courses provided by instrument manufacturers frequently teach you to use their device but do not contain enough of the basic background information you need to perform effective recordings and provide useable feedback. Continued on next slide
Every biofeedback course approved by BCIA should have all of the information you need to use biofeedback instruments properly AFTER you learn the specific hardware and software for the device you are actually using. There is no way for you to know whether a course not approved by BCIA includes all the information you need because you don’t know what is supposed to be there. If the course was approved by BCIA, professionals have reviewed it to insure that it at least touches on all the vital points shown to be necessary for understanding biofeedback. Unfortunately, some biofeedback courses are very weak on instrumentation basics. So, if you have had a course which didn’t include the list on the following slides in sufficient depth for you to actually understand each item and to know how to apply each when doing biofeedback, you need to take at least take a review in biofeedback instrumentation to be sure you didn’t miss lots of other items.
Biofeedback Instrumentation Topics Frequently not Taught in Adequate Depth • Ohm’s law (the relationship between resistance to the flow of current, amount of current, and voltage / signal magnitude) – how it effects SEMG, EEG, and especially, SCL / GSR signals. • How to use the (a) offset, (b) averaging / integration, (c) gain / amplification, and (d) sweep speed (time it takes the signal to cross the screen) to produce an optimal feedback signal patients can actually learn from. Are you aware that having your device set these automatically may make learning difficult or impossible? I’ll talk a bit about this later in the talk. • The overwhelming effect of bandwidth / filters on whether you actually record the signal you are trying to record relative to its power spectrum (e.g. using a narrow bandwidth of 100 – 200 Hz means you can not tell how tense most muscles are at most levels of contraction and may think a muscle is relaxed when it is tense). I’ll explain this problem in more depth near the end of the talk. • continued
Crucial instrumentation topics – continued 2 of 3 • How to properly attach the sensors for each physiological parameter you record so you minimize movement artifactsandactually record the signal rather than noise. This includes how and when to use reference sensors – not to mention where to put them. • How to easily test each signal before you begin a session to insure that it is recording properly (garbage in = garbage out) and that the signal changes with changes in the subject’s physiology. • How to recognize noise and interference from other signals during a recording (more garbage in = garbage out). Did you know that typical EEG signals can look just like recordings from Jell-O and some types of EMG? • How to reset the equipment as a session progresses so you can use shaping techniques to teach patients physiological control by properly setting the feedback display. • How to protect your patient from electrical shock when using typical biofeedback devices. • continued
Crucial instrumentation topics – continued 3 of 3 9. Do you actually understand what you are looking at on the display when you record: a. Muscle Tension b. Heart Rate / heart rate variability c. Sweating in response to stress / GSR / SCL d. Respiration e. Temperature (for blood flow) f. Electroencephalogram (EEG)? 10. Do you know how these signals are actually generated so you avoid the very common mistakes which result in recording garbage – e.g. recording across rather than along a muscle? 11. Do you understand the relationships between changes in sweating and changes in GSR signals such as conductance and resistance or the relationships between conductance and resistance? 12. Do you know the effect of different devices on the magnitudes of the signals you see?
These are all crucial points of knowledge which can’t be done without if you are going to do a good job at biofeedback. The next few slides contain examples of the kind of depth at which material needs to be presented in order for you to do a good job providing biofeedback. They also provide information you may be able to use now to improve your treatments!
Bandwidth The amplifiers on most biofeedback and psychophysiological recording devices can be set to receive a variety of frequencies. The basic idea is to set the amplifier to receive the relevant frequencies produced by the physiological signal you are trying to record (such as sEMG from a muscle) while filtering out frequencies produced by sources you are not interested in such as the room’s lights, other physiological signals, etc. The window of frequencies an amplifier is set to record is referred to as its bandwidth. An example of a bandwidth would be 90 - 500 Hz. No significant amount of the signals picked up by the sensors which are produced by frequencies above or below the bandwidth are amplified so they don’t appear in the recording. Thus, any power from 0 - 89 Hz and above 500 Hz is never seen.
Power Spectrum When you look at a raw sEMG signal, many different frequencies are represented. The total amount of the muscle’s electricity produced at any particular level of tension is unevenly divided between the various frequencies. A muscle’s “power spectrum” refers to the amount of electrical potential in each of the frequencies of waves occurring at a particular level of tension. When a muscle is relaxed, most of the power may be in lower frequency waves. This may change as the muscle tenses more so that more of the power is in higher frequency waves. A muscle’s power tends to decrease in frequency with fatigue so the power spectrum changes during recordings in which the subject is trying to control the muscle’s activity.
All of the principles of the power spectrum apply to the EEG as well. Thus, when you look at a raw EEG signal, many different frequencies are represented. The total amount of the electricity recorded by surface EEG sensors is unevenly divided between the various frequencies. In the case of the EEG, “power spectrum” refers to the amount of electrical potential in each of the frequencies of waves recorded from a particular part of the brain at any moment in time.
Crucial effect of missetting amplifiers If the recorder’s bandwidth is not set to include the frequencies containing most of the muscle’s power at various levels of tension, you may think a muscle is less tense then it is because you don’t record some of its power. This is illustrated on the next several slides.
The power spectrum is different: 1. For different muscles at the same level of tension and 2. The same muscle at different levels of tension. Power tends to decrease with fatigue so incorrectly set filters are likely to give less and less accurate readings as fatigue sets in.
The narrow bandwidth is 100 - 200 Hz while the wide bandwidth is 8 - 500 Hz. (Hz = Hertz = CPS = cycles per second) 8 100 200 500
Power Spectra for two muscles These three dimensional graphs show power (amount of electricity) on the vertical axis, time going front to back, and frequency from l. to r. Muscle 1 Muscle 2 Time Power 0 60 500 0 60 500 Frequencies recorded for each muscle (Hz)
You can’t learn to control a signal if you can’t see it properly. Thus, the display must be set so that the signal is (a) the right size to provide enough information to learn from, (b) entirely in view on the monitor, and (c) present for sufficient time before the screen refreshes itself so you can see what happens.
A signal’s GAIN is the amount of amplification (volume) The gain is initially set so low that important changes in the signal can’t be detected.
Situation in which the gain needs to be lowered to use the signal appropriately (The screen’s viewable area is shown as a red box.) High Gain Lower Gain Initially, an important part of the signal is off the viewable area of the monitor so the size of the signal needs to be reduced.
Correct use of offset controls The “offset” controls the vertical position of the signal on the screen. It does not change the gain (size / magnitude) of the signal. (The screen’s viewable area is shown as a red box.) Incorrect Correct Initially, an important part of the signal is off the top of the monitor’s viewable area so the vertical position of the signal needs to be lowered so the entire signal can be seen.
Correct use of the deflection time (sweep speed) control The rate at which the signal moves across the monitor’s screen from left to right is called the “sweep speed”. This has to be controlled so you can see enough of the signal’s history to make sense of what is happening. When the signal reaches the right edge of the screen, the display resets itself so that everything which was on the screen disappears and the signal starts over at the left edge. Thus, if you set the signal so it moves across the screen too quickly, too little of the history is available on the screen to tell what happened throughout a sequence of actions. If it is too slow, you can’t see the changes because they pile up on each other. This is illustrated on the next slide.
For example, if you ask a patient to tense a muscle, hold for ten seconds and then relax, you want to see the entire sequence. setting the speed so the signal moves across the screen in 5 seconds would mean that you might see the first part of the movement but not the entire sequence. Setting it at 10 minutes would make the changes pile up so you couldn’t tell them apart. Setting it at 30 seconds is about right to see the entire sequence. 5 sec 600 sec 30 sec
So, to make a great display, you need to control the (1) gain (amplification), (2) offset, and (3) sweep speed (horizontal deflection speed).
Well, I certainly hope I’ve provided some convincing support for the idea that people need a course in biofeedback which is strong in instrumentation – or at least given you sufficient hints during this brief talk so you can do your job better right now. If you are concerned enough to want to take a short course on just biofeedback instrumentation or just want a good review of the basics, AAPB frequently offers a biofeedback instrumentation course during its annual meeting. If you aren’t attending or if it is not being offered, please feel free to contact me and I’ll set you up with a distance education course on the topic. Please note that the course will be through the non-profit Behavioral Medicine R&T Foundation rather than AAPB. I teach this course so have something of a conflict of interest in pushing it. Thanks for listening and, especially, for keeping an open mind! Rich Sherman rsherman@nwinet.com